GREAT BRITAIN • CUSTOMER SERVICE
tel 020 8247 9300 e-mail [email protected] internet www.clasohlson.co.uk postal 10 – 13 Market Place, Kingston Upon Thames, Surrey, KT1 1JZ 500 mm
17
0359-CPR-00634
DoP: 366692-1
EN14604:2005/
AC:2008
RD-36-6692-39-001 manual rev D
Issue date: 2017.07.20
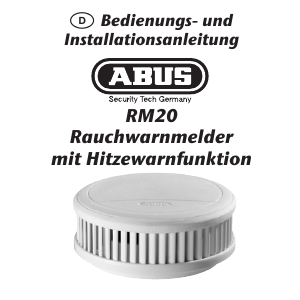
Wireless Smoke Alarm, 2-pack
Art.no 36-6692 Model GS558F
Please read the entire instruction manual before using the product and then
save it for future reference. We reserve the right for any errors in text or
images and any necessary changes made to technical data. Inthe event of
technical problems or other queries, please contact our Customer Services.
Fire safety
Preventative measures:
• Store any matches and lighters in alocked room out of children’sreach.
• Never empty theashes from ash trays, stoves and grills into waste bins
until theashes have completely cooled. Itis advisable to let them cool
overnight before disposing ofthem. Sootand ashes from stoves and
fireplaces should be collected in metal buckets fitted withlids. Always
place receptacles holding hot ashes on afireproof surface.
• Never leave naked flames such as candles unattended. Onlyuse non-
flammable candle holders and candlesticks.
• Make sure that no sparks can escape from your wood-burning stove or
fireplace and ensure that thefire has died before going tobed.
• Do not store or handle combustible liquids/substances close to sources
ofheat.
• Replace any faulty electrical plug or wiring. Makesure that thecorrect type
of fuses and circuit breakers are used in your consumerunit.
• Remember to switch off your TV, computer and other appliances using
thepower switch. Remote controls don’t switch appliances off completely.
• Do not place combustible materials and objects next to electrical heating
appliances. Avoidcontrolling electrical heaters with timers or any kind of
remote control device. Bearin mind that acombustible material might
have been placed on or next to anelectrical heating appliance while it
was switched off without your knowledge.
• It is important that chimneys and flues are cleaned regularly to prevent
chimneyfires.
• Further information about fire safety in thehome can be obtained from
theDepartment for Communities and Local Governmenthttps://www.
gov.uk/government/organisations/department-for-communities-
and-local-government if you should need tips and advice about how to
protect your home and family fromfire.
Fire safety checks:
• Check thecondition of your fire extinguishers and make sure that
everyone in your household knows how to usethem.
• Draw up asafe plan of escape from your premises in case of
emergency. Makesure that there are alternative escape routes, such as
windows. Make sure that there is aladder or rope as analternative in case
stairs are blocked.
• Practise your escape plan to make sure that itworks. Decide upon
anassembly point to gather in anemergency.
• Keep bedroom doors closed during thenight. Aclosed door can
keep thefire at bay long enough for you to make your escape through
awindow.
If afire breaksout:
• If afire alarm goes off, keep calm but act quickly.
• Wake everyone up and make sure that they leave thebuilding according
to your escapeplan. Follow your escapeplan.
• Carefully feel doors with theback of your hand before opening them – if
they are hot, don’t openthem. Tryto find analternative escaperoute. Ifyou
have to escape through smoke, crawl on your hands and knees under
thesmoke. Don’t waste time rescuing valuables.
• If possible, close doors and windows to contain theblaze.
• If thefire is small try to extinguish/contain it with awater hose, fire
extinguisher or fire blanket. Firstmake sure that you have ameans of
escape before tackling thefire. Getout as quickly as possible if you
realise that you can’t extinguish thefire.
• Call 999 as soon as you are free of thebuilding, call from aneighbour’s
house if you don’t have aphone.
• Make sure that no-one re-enters thebuilding, wait for thefire brigade.
Positioning thesmokealarm
• Smoke alarms should be positioned in themiddle of theceiling of
aroom at thehighest point, or at thehighest point of thehallway,
staircase or landing. Smokeand fumes will rise, accumulate on
theceiling and enter thesmoke alarm from thetop.
• All bedrooms, corridors/escape routes should be equipped with smoke
alarms. Other rooms should also be equipped for comprehensive
protection.
• Corridors up to 3 m wide: The first smoke alarm should be placed at a
max distance of 7.5 m from the end of the corridor. The max distance
between two smoke alarms should be 15 m.
• Corridors less than 1 m wide: The first smoke alarm should be placed at
a max distance of 7.5 m from the end of the corridor. Thesmoke alarm
should be mounted in the middle of the ceiling. In these cases, the rule of
keeping a 0.5 m distance to a wall cannot be met.
• Exterior corridors and similar: If the total length and width exceed 16m², an
extra smoke alarm should be mounted in the highest-lying area.
• Themore smoke alarms you have – thesafer you’llbe. Makesure that
you can hear thesmoke alarms from your bedroom.
• Smoke alarms should normally not be more than 10–12 mapart.
Themaximum floor space area that one smoke alarm can protect is 60 m².
• Don’t put alarms in or near kitchens or garages where smoke or exhaust
fumes can set them off by accident. Neither is it advisable to fit smoke
alarms in humid rooms or close tofans. Notin agricultural buildings either.
• Themajority of household fires start in thekitchen. Asmoke alarm
should therefore be placed in theroom next to thekitchen to provide as
early as warning as possible.
• Factors which can increase theneed for having asmoke alarmare:
Closed doors, different ceiling heights, long distances or other obstacles
that might prevent or delay smoke from reaching thesmokealarm.
• The smoke alarm must be mounted in a safe manner to ensure that it does
not fall and cause injury to someone. It may be difficult to mount the smoke
alarm to plasterboard ceilings or similar types of ceilings.
• The battery must not be subjected to fire, direct sunlight or high temperatures.
• Note: Thesmoke alarm must not be paintedover.
Things to consider:
• Other wireless equipment using the same frequency band can reduce
the transmission range.
• The range of all wireless equipment depends on the type of obstacles
located between the transmitter and the receiver (e.g. aconcrete wall will
interfere with the signal more than aplasterboard wall).
If you experience problems, try the following:
• Turn off any other existing wireless equipment to check whether this is
the cause of the problem.
• Reposition the wireless equipment, shorten the distance between the
transmitter and the receiver or reduce the number of obstacles (walls,
furniture, etc.) between them.
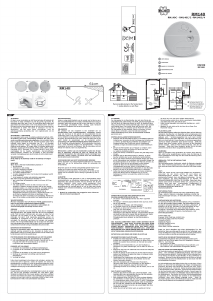
Installation
Note: It is a good idea to arrange the smoke alarms in their intended
locations and interconnect them before mounting them on the ceiling. That
way you can make sure that the construction of the building permits the
interconnection of the smoke alarms in those locations.
2. Press the test button of the master unit. After 2 seconds the LED under
the button will flash. The master unit is now in interconnecting mode and
ready to interconnect additional smoke alarms.
3. Press the test button of all the additional smoke alarms which you want
to connect (e.g. the first, second, third slave units) 5 times within 3
seconds. The LEDs will shine steadily for few seconds and then start
flashing for a few seconds. The flashing indicates that interconnection is
in progress.
When the smoke alarms are interconnected the LEDs will shine
constantly (a little less brightly than before). Press the test button of each
of the slave units once to confirm that they are interconnected.
The master unit will remain in interconnection mode for approximately
30 seconds. Step 3 can be repeated to interconnect additional slave
units. If you do not interconnect all the slave units within 30 seconds,
press the master unit again once.
Note: Those slave units that were interconnected during the first minute
will beep and flash quickly when you interconnect additional slave units
during the following minutes. The same beep and flashing will even
occur if additional smoke alarms are connected later.
The LEDs on the smoke alarms can flash every 12 seconds once they
have been interconnected. After 10 minutes the smoke alarms will enter
normal mode and the LEDs will flash every 40 seconds.
Function test
Hold down the test button of any one of the smoke alarms until the alarm
emits 3 short beeps. This means that it is okay.
Note: Depending how long the test button is held down, other
interconnected smoke alarms may also beep for about 30 seconds.
Interconnecting test
Can be applied in two ways:
1. Press the test button of the master unit once. The slave units will flash
and beep to confirm the interconnection. The master unit will be flashing
during interconnection but not beep.
2. Press quickly 3 times within 3 seconds on an optional smoke alarm.
The slave units and the master unit will flash and beep to indicate the
interconnection.
Note: The wireless communication can be affected by a number of factors.
Remember to test the smoke alarms every week to make sure that they are
connected and working as intended.
Deleting an interconnected alarm
1. Hold in the test button of the alarm that you wish to delete/disconnect
for 16 seconds (the alarm will emit 3 short quiet beeps at regular
intervals during these seconds) until the LED starts flashing quickly.
Release the test button immediately. The LED will shine steadily.
2. Press the test button twice. The alarm will beep to indicate that the
connection has been deleted.
LED indicator and alarm signals
Status LED indicator Audible signal Description
Normal
mode.
Flashes every 40
seconds.
No signal. The alarm is working
as it should.
The
batteries
need
replacing.
Flashes every 40
seconds.
Short beep every
40 sec.
Change the batteries.
Refer to the Changing
the batteries section
below.
Error. No indication. Short beep every
40 sec.
An error has occurred
with the alarm.
Pause
mode.
Flashes every
8seconds.
No signal. The alarm is in pause
mode Refer to the
Pause function sec-
tion below.
Alarm signals upon detection of rising
temperature or smoke
Detection LED indicator Audible signal
Smoke. Flashes. BI 0.5s - pause 0.5s - BI 0.5s
- pause 0.5s - BI 0.5s - pause
1.5s, repeat this alarm pattern.
Rising temperature. Flashes. BI 0.2s - pause 0.1s, repeat this
alarm pattern.
Connected units
receiving signal from
triggered unit.
Flashes. BI - BI - pause 1.2s, repeat this
alarm pattern.
False alarms
In certain circumstances your smoke alarm might be triggered by other
causes than smoke or rising temperature:
• Steam and humidity: Make sure that the smoke alarm is placed at
least 2m from areas of possible high humidity such as bathrooms and
laundry rooms.
• Dust: Vacuum clean the smoke alarm regularly, especially if it has been
installed in a dusty environment. Be careful not to damage the smoke
alarm while vacuuming it.
• Draughts and air currents: Do not install the smoke alarm where it is
exposed to draughts from windows, doors, fresh air vents, ceiling fans
or any other air currents.
• Rapid changes in temperature: Rapid changes in temperature can
cause condensation to form inside the smoke alarm. Do not install the
alarm close to doors or windows which are opened frequently. Make
sure that the alarm is located where the temperature is as constant as
possible.
False alarms can be caused by a number of reasons. If possible try to
install the smoke alarm:
• At least 5m from fuel-burning heat sources such as fireplaces and
wood-burning stoves as well as from other sources of heat.
• 2m from heat pumps and air conditioning units.
• 1m from lamps and fluorescent lights.
Pause function
The pause function enables you to temporarily switch off the sound of the
alarm in the case of a false/unwanted alarm (when cooking, smoking, etc.).
The pause function is activated by pressing in the test button of the alarm
which sounds once. The LED will flash every 8 seconds. The sound of the
alarm is then muted for 10 minutes. After 10 minutes the alarm returns to
normal mode.
Care and maintenance
• Asmoke alarm which is dirty on theinside is more sensitive and often
goes off without reason.
• Theoutside of thesmoke alarm should be wiped clean with adamp
cloth and vacuumed carefully with asoft brush nozzle.
• Clean the smoke alarm by vacuuming it at least once a year. Testthe smoke
alarm according to the instructions in the owner’s manual. Check that all
the inlets are unblocked and that the smoke alarm is not damaged in any
way. A damaged smoke alarm must be replaced.
Changing the batteries
The number of times the batteries need to be changed depends upon a
number of factors. Ideally, the batteries should be changed routinely every
year on a fixed date. Alternatively you can choose to change the batteries
when the smoke alarm indicates that they are nearly depleted (short beep
every 40 seconds).
1. Remove the smoke alarm from the baseplate by turning it anti-clockwise.
2. Remove the old batteries.
3. Insert new batteries. Follow the markings in the battery compartment to
ensure correct polarity.
4. Hold the smoke alarm against the baseplate and twist it clockwise until
it clicks into place.
5. The interconnection is retained when the batteries are replaced. In case
you should discover after replacing the batteries and an operation test
that the interconnection has been deleted, carry out the interconnection
again as instructed in section Interconnecting the alarms.
Responsible disposal
This symbol indicates that this product should not be
disposed of with general household waste. This applies
throughout the entire EU. In order to prevent any harm to
the environment or health hazards caused by incorrect
waste disposal, the product must be handed in for
recycling so that the material can be disposed of in a
responsible manner. When recycling your product, take
it to your local collection facility or contact the place of
purchase. They will ensure that the product is disposed of
in an environmentally sound manner.
Specifications
Batteries 2×AA/LR6 1.5V
Operating time Approx. 12 months
Recommended batteries GP15A, Energizer E91,
Raymax LR6
Size ø120×38mm
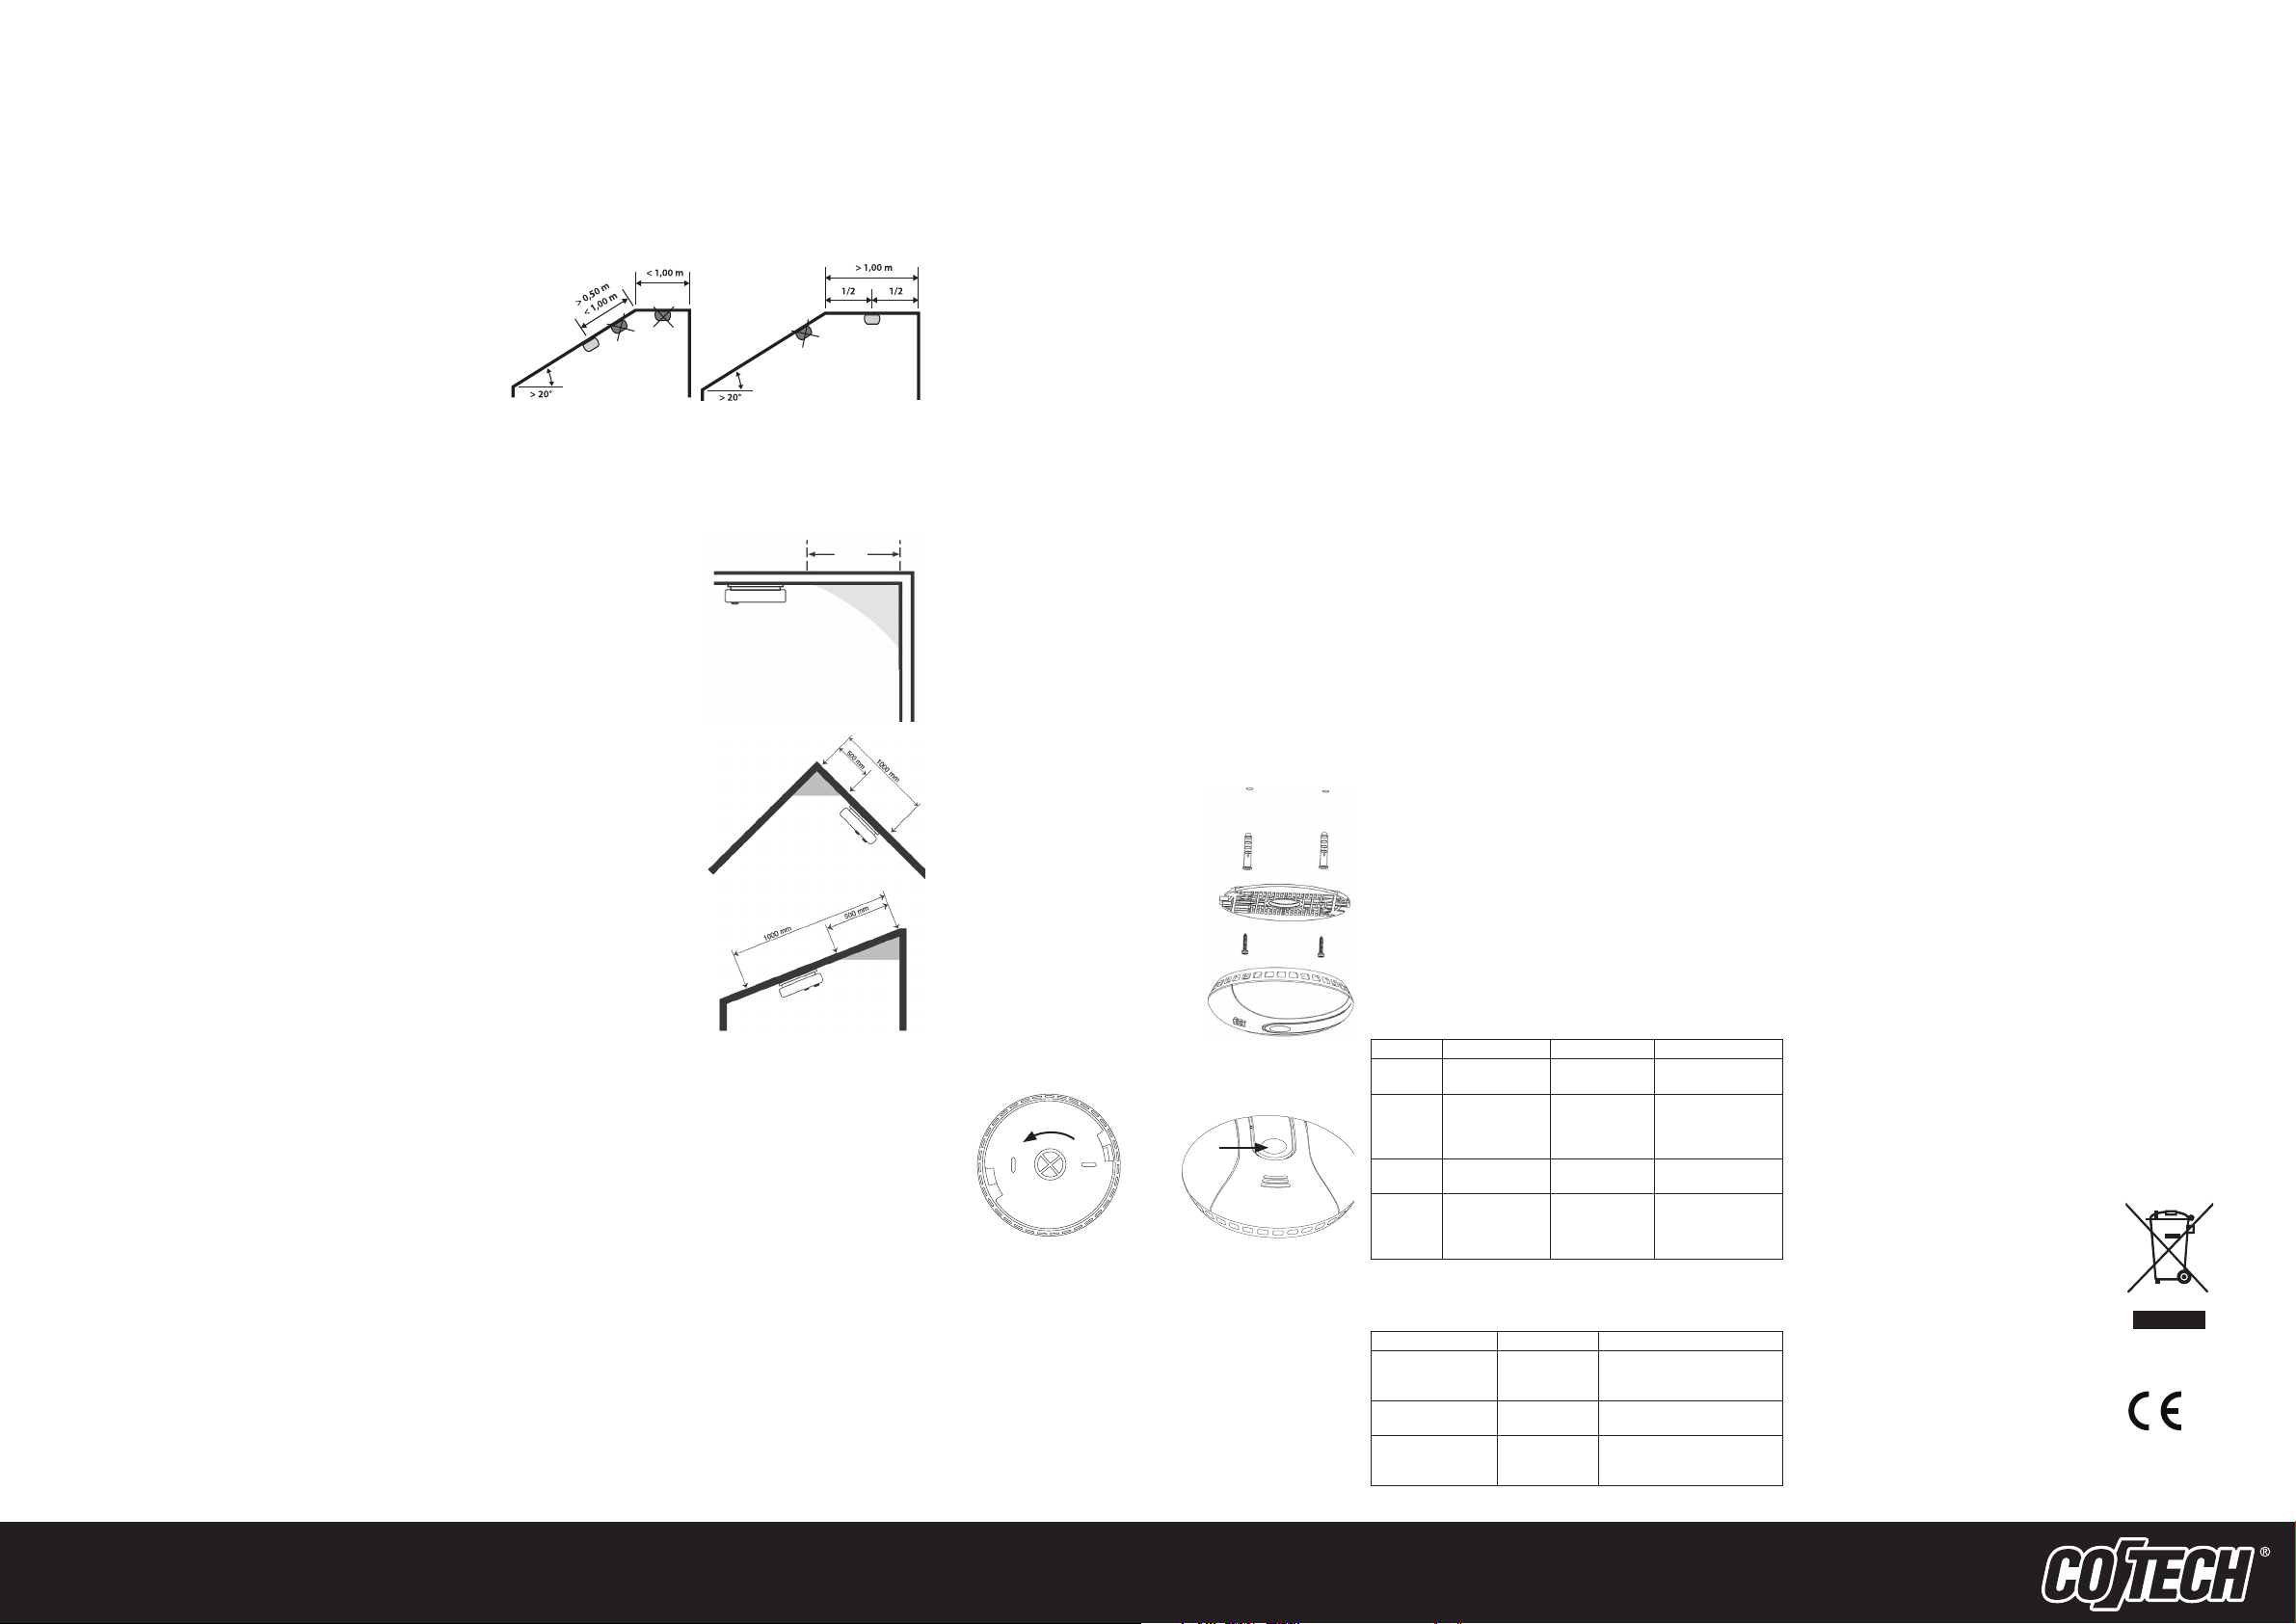
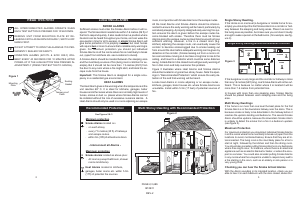
• Horizontal/slanted ceilings: Smoke alarms should be placed at least 0.5
and a maximum of 1 m away from the ceiling’s highest point on ceilings
which have a horizontal portion and a slanted portion with a slant of over
20º. The smoke alarm should be mounted on the slanted portion of the
ceiling if the horizontal portion is less than 1m wide. The smoke alarm
should be mounted in the middle of the horizontal portion if this portion
is more than 1 m wide.
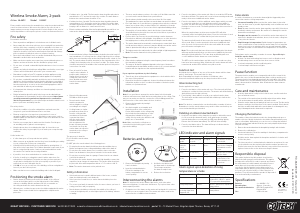
• Place at least 0.5 m from
a wall or other obstacle. If
partition walls, furniture or
similar objects reach up to
ceiling level, then each of
these divided areas must
have their own separate
smoke alarm.
• Sloped ceiling placement,
50–100cm from thepeak.
• Several smoke alarms
must be mounted at
various heights for ceilings
exceeding 6 m in height.
• If ceiling beams or similar
protrude more than 0.2m
from the ceiling and the
area between the beams
is greater than 36 m²,
then the smoke alarm
should be mounted in
this area between the
beams. If beams protrude
less than 0.2 m, then the
smoke alarm can either be
mounted on the ceiling or
the beam itself.
Thegrey zone is deadair.
Donot install thesmoke alarm
in thisarea.
Do NOT place thesmoke alarm in thefollowing places:
• Do not place thesmoke alarm in thekitchen, where theventilation ispoor.
Smokeand vapours from cooking and baking could set thealarmoff.
• Do not place thesmoke alarm close to extractor fans or airvents.
Smokecan be drawn to these places instead of to thesmokealarm.
• Do not place asmoke alarm in agarage. Fumesfrom thecar exhaust
could set thealarmoff.
• Do not place thesmoke alarm in areas with high humidity or areas that
experience large changes in temperature. Thesmoke alarm should not
be placed in areas with temperatures below +5 °C or above +40 °C.
• Note: Thesmoke alarm must not be paintedover.
Safety information
• If thebedrooms are located in different parts of thehouse, asmoke
alarm should be placed in each bedroom.
• If thehouse has several floors, asmoke alarm should be placed on
everyfloor.
• Thesooner your family is warned of afire, themore chance you have of
saving yourselves and your property.
• Smoke alarms should be positioned in themiddle of theceiling of
aroom at thehighest point, or at thehighest point of thehallway, staircase
or landing.
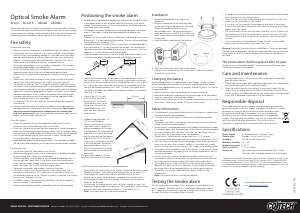
1. Remove the baseplate by turning it
anti-clockwise.
2. Use the baseplate as a template and
mark the position of the screw holes.
Fasten the baseplate to the ceiling using
the included screws and plugs or other
fixing method suitable for the type of
ceiling. If holes need to be drilled for wall
plugs, use a 5mm drill bit.
Note: Make sure that the ceiling has no
concealed electrical wiring, gas or water
pipes before drilling.
Batteries and testing
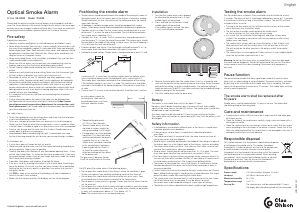
1. Remove the baseplate by turning
it anti-clockwise.
2. Insert the included batteries.
Follow the markings in the
battery compartment to ensure
correct polarity.
3. Hold in the test button until
the alarm emits 3 short beeps.
These beeps mean that
thealarm is ready for use.
4. Release the test button.
Interconnecting the alarms
Note: Do not place the smoke alarms right next to each other when
interconnecting them, it could cause interference. Try to place them afew
metres apart if possible.
1. Designate one of the alarms as the master unit and mark it in some way
so that you can recognize it later. The master unit will be used for the
interconnection of additional smoke alarms.

Delta i konversationen om denna produkt
Här kan du dela vad du tycker om Cotech GS558F Brandvarnare. Om du har en fråga, läs först noggrant igenom manualen. Att begära en manual kan göras genom att använda vårt kontaktformulär.
svara | Detta hjälpte (4) (Översatt av Google)
svara | Detta hjälpte (0) (Översatt av Google)
svara | Detta hjälpte (0)