United Kingdom •
www.clasohlson.co.uk
English
Ver. 20220929
Plug-In Digital Weekly
Timer Socket
Art.no 36-8735 Model BTS001
Please read the entire instruction manual before using
the product and then save it for future reference. We
reserve the right for any errors in text or images and
any necessary changes made to technical data. If you
experience any technical problems or have questions,
please contact our customer service team.
Safety
• Make sure that the wall socket is easily accessible
in case the product needs to be unplugged quickly
from the mains.
• Do not connect products of this type together to
each other.
• Do not cover the product.
• The product is intended for indoor use only.
• The rated voltage of the device/appliance plugged
into socket of the product must be compatible
with the voltage specifications of the product.
• The product must not be taken apart or modified.
Certain unshielded components inside the product
carry dangerous voltages. Contact with these
components could result in a fire or electric shock.
• The product should only be connected to a 230 V,
50 Hz power socket.
Buttons and functions
Instructions for use
NOTE The timer socket has a backup battery. You
can programme the on/off switching times even when
the timer socket is not plugged into a wall socket.
Programmed times will be saved in the event of a
power cut.
Make sure that a power-on time and a power-off time
is set for each programme commenced. If this is not
done, the connected device/appliance might remain
switched on or off.
Setting the ON, OFF or AUTO mode
1. Short-press [ SET ] once or multiple times. The
display will show, in order:
- OFF – The timer socket is powered off
continuously, regardless of any programmed
power-on/off times.
- ON – The timer socket is powered all the time
regardless of any programmed power-on/off times.
- AUTO – The timer socket is controlled by the
programmed power-on/power-off settings.
Random on and off mode
1. Plug the device/appliance into the timer socket
and plug the timer socket into a wall socket.
2. Set the timer socket to ”AUTO” mode as
instructed in the previous section, ”Setting the ON,
OFF or AUTO mode”.
3. Long-press [SET] and [UP/CLEAR] simultaneously
to activate the Random operation mode.
In Random mode the programmed operation times
are disabled. The timer socket will power-on and
power-off at random times between 18.00 in the
evening and 06.00 in the morning. The timer socket
will be powered off during the other hours of the day.
Timer mode
The timer function can work in one of two ways
depending on which operating mode the timer socket
is in. Short-press [ SET ] to switch between:
OFF – the timer socket changes the operating
mode to ON when the set Timer time has elapsed.
ON – the timer socket changes the operating
mode to OFF when the set Timer time has elapsed.
1. Short-press [ PROG ] and [ UP/CLEAR ]-
simultaneously.
2. Short-press [ SET ] and set the number of hours/
minutes for the Timer to countdown using [ UP ].
3. Short-press [ CLOCK/OK ] to start the Timer.
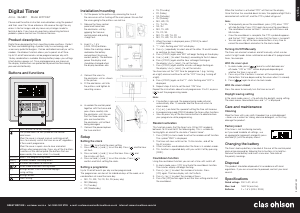
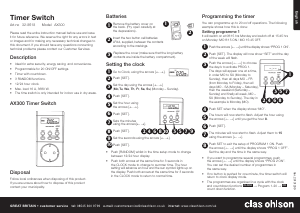
1 2 3 4 5
1. [ SET ] Toggles between OFF, ON, AUTO and
selects timer settings.
2. [ OK ] Confirms selection
[ CLOCK ] Clock set button
3. [ RESET ] Resets to factory settings
4. [ PROG ] Programming mode
5. [ CLEAR ] Deletes a programme
[ UP ] Changes a value
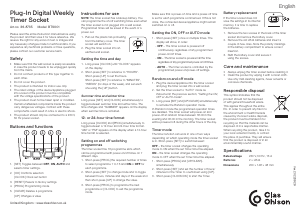
1. Pull out the plastic tab protruding
from the battery cover. The timer
socket will switch on.
2. Plug the timer socket into an
earthed wall socket.
Setting the time and day
1. Long-press [ CLOCK ] until “CLOCK” appears
on the display.
2. Short-press [ SET ] to advance to “HOURS”.
Short-press [ UP ] to set the hours.
Short-press [ SET ] to advance to “MINUTES”,
“WEEKS” (for days of the week), and set each
one using the [ UP ] button.
Summer time and winter time
Long-press [ SET ] and [ CLOCK ] simultaneously to
toggle between summer time and winter time. The
time changes and “SUMMER” appears on the display
when summer time is activated.
12- or 24-hour time format
Long-press [CLOCK] and [PROG] simultaneously to
toggle between a 12-hour and 24-hour time format.
“AM” or “PM” appears on the display when a 12-hour
time format is selected.
Setting on and off switching
programmes
The timer socket has 16 programme slots which
can be programmed with power-on/off times on 7
different days.
1. Short-press [ PROG ] the required number of times
to select programme 1 to 16 and ON or OFF for
each programme.
2. Short-press [ SET ] to change mode and to toggle
between hours, minutes and days of the week and
then short-press [ UP ] to change the value.
3. Short-press [ PROG ] to programme the next
programme or [ CLOCK ] to exit the programme
mode.
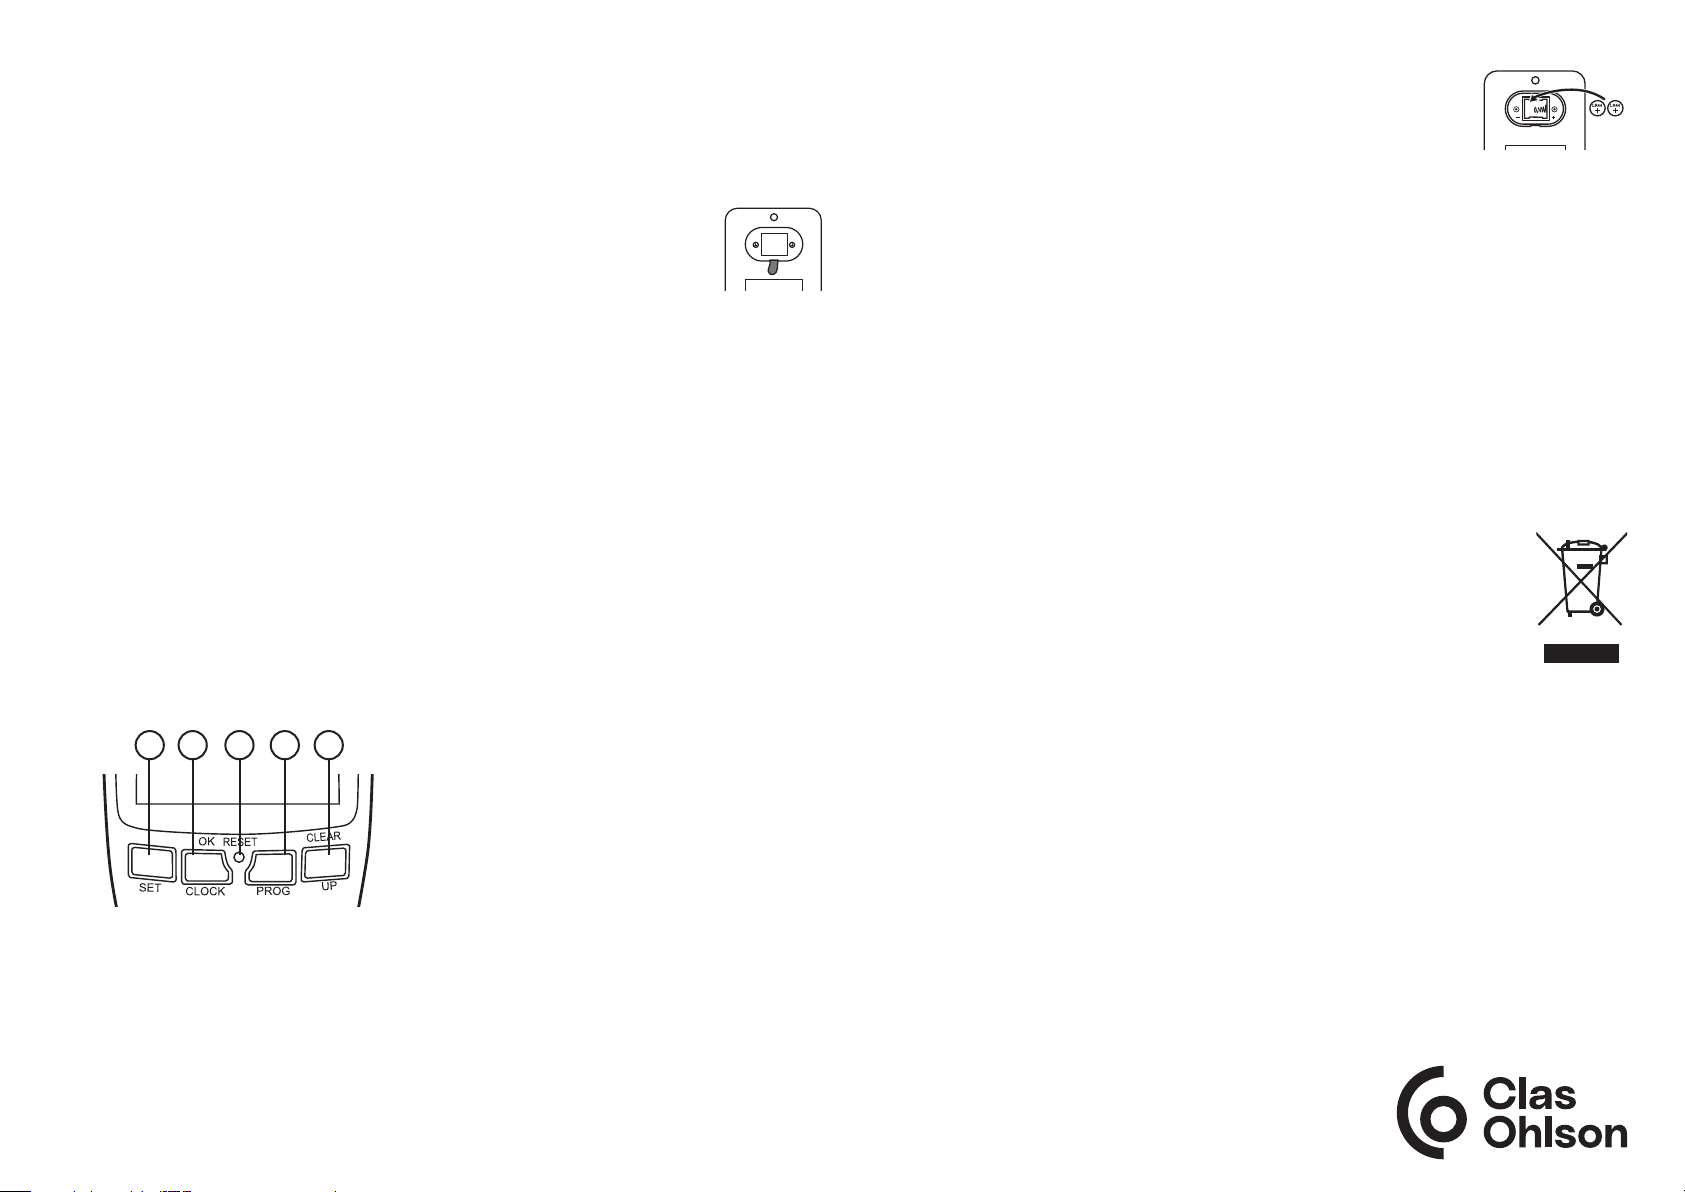
Battery replacement
If the timer socket does not
save the settings in its internal
memory, it is time to replace
the batteries.
1. Remove the two screws in the back of the timer
socket and remove the battery cover.
2. Remove the old LR44 batteries and insert a
couple of new ones. Note the polarity markings
in the battery compartment to ensure correct
insertion.
3. Refit the battery cover and secure it
using the screws.
Care and maintenance
• Always unplug the timer socket before cleaning it.
• Clean the product by wiping it with a moist cloth.
Use only mild cleaning agents, never solvents or
corrosive chemicals.
Responsible disposal
This symbol indicates that the
product should not be disposed
of with general household waste.
This applies throughout the entire
EU. In order to prevent any harm to
the environment or health hazards
caused by incorrect waste disposal,
the product must be handed in for
recycling so that the material can be
disposed of in a responsible manner.
When recycling the product, take it to
your local collection facility or contact
the place of purchase. They will ensure
that the product is disposed of in an
environmentally sound manner.
Specifications
Rated voltage 230 V, 50 Hz, 16A
Batteries 2 × LR44
Dimensions 200×148×48mm


Delta i konversationen om denna produkt
Här kan du dela vad du tycker om Clas Ohlson BTS001 Kopplingsur. Om du har en fråga, läs först noggrant igenom manualen. Att begära en manual kan göras genom att använda vårt kontaktformulär.