2 3
Setup and connections (make all connections before powering up)
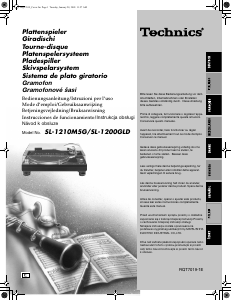
Connect the supplied mains power lead to the socket marked ‘Power
In’ on the rear of the P10 PSU.
Connect the XLR interconnect from the rear of the turntable to the
socket marked ‘output’ on the rear of the P10 PSU. To minimise the
risk of hum pick up by the cartridge, the power supply should be
situated as far from the turntable as the interconnect cable will allow.
Connecting to the amplier
The tonearm external phono leads must be connected to a suitable
phono stage. Depending on the type of cartridge you have chosen, you
will require the appropriate moving magnet (MM) or moving coil (MC)
will require an external stage (sold separately).
Connect as follows:
Red = right chanel
Black = left channel
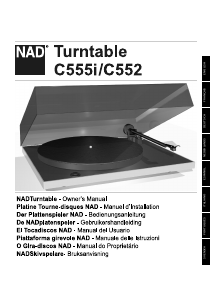
Push the power button on the front panel to turn the P10 PSU on -
When the power supply is switched on, the Rega logo will illuminate
RED.
45 rpm from the front panel.
Cartridge mounting and seing up the RB3000 tonearm
protractor (supplied) to accurately set the position of the cartridge.
Note: When using any Rega cartridge featuring a three-point
mounting system, overhang is automatically set.
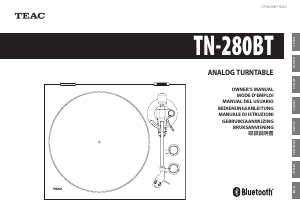
With the cartridge correctly mounted and with the stylus guard
removed, ensure that the tracking force dial (a) and bias adjustment
(b) are set to zero. Adjust the balance weight (c) until the arm is
It is normal for the arm to swing back towards the arm clip position
even with the bias set at zero. Therefore it is advisable to gently hold
the arm bearing carrier (just below the tracking dial) thus preventing
horizontal movement during the balancing procedure.
Once the arm is balanced, rotate the tracking force adjustment dial to
the required tracking force. Numbers ‘0’ to ‘3’ are marked on the dial.
If in doubt, it is advisable to use a tracking force that corresponds with
the upper limits of the cartridge manufacturer’s range.
The P10 PSU gives you total control over your turntable. It includes an
speed change at the touch of a button.
Speed adjustment (factory set - only adjust if necessary)
The speed control functions are sited on the back panel of the
P10 PSU.
Speed program switch – This enables the set speed mode.
Program mode LED – This indicates the two modes of operation:
Factory default mode and speed adjustment mode.
Speed adjustment – This encoder is used to adjust the speed. The
step size of the speed control is 0.01 rpm.
Returning the P10 PSU to factory seings
turntable or after a service, to help optimise the range of adjustment
available to you.
1.
2. Press and hold down the ‘speed program’ switch until the
pressed until a solid LED is illuminated.
3. Whilst illuminated, press the ‘speed program’ switch button once
again to fully factory reset and return to ‘run mode’.
Note:
guarantee optimum performance. Using the P10 PSU with old worn
belts may result in lower performance and minor variations in speed
stability.
Use of mobile phone apps to check and adjust the speed
Rega, along with a London mastering studio, have used the iPhone
‘RPM’ app (available on the App Store) developed by Philip Broder to
check and adjust the speed of a turntable using the Neo, with positive
Rega’s in-house speed measuring equipment, but as this is a third-
party app we cannot guarantee the readings because of uncertainties,
which could be caused by the age, condition, and operating system of
the phone the app is installed on. If you are in any doubt, you should
check the calibration of the ‘RPM’ app using a suitable reference.
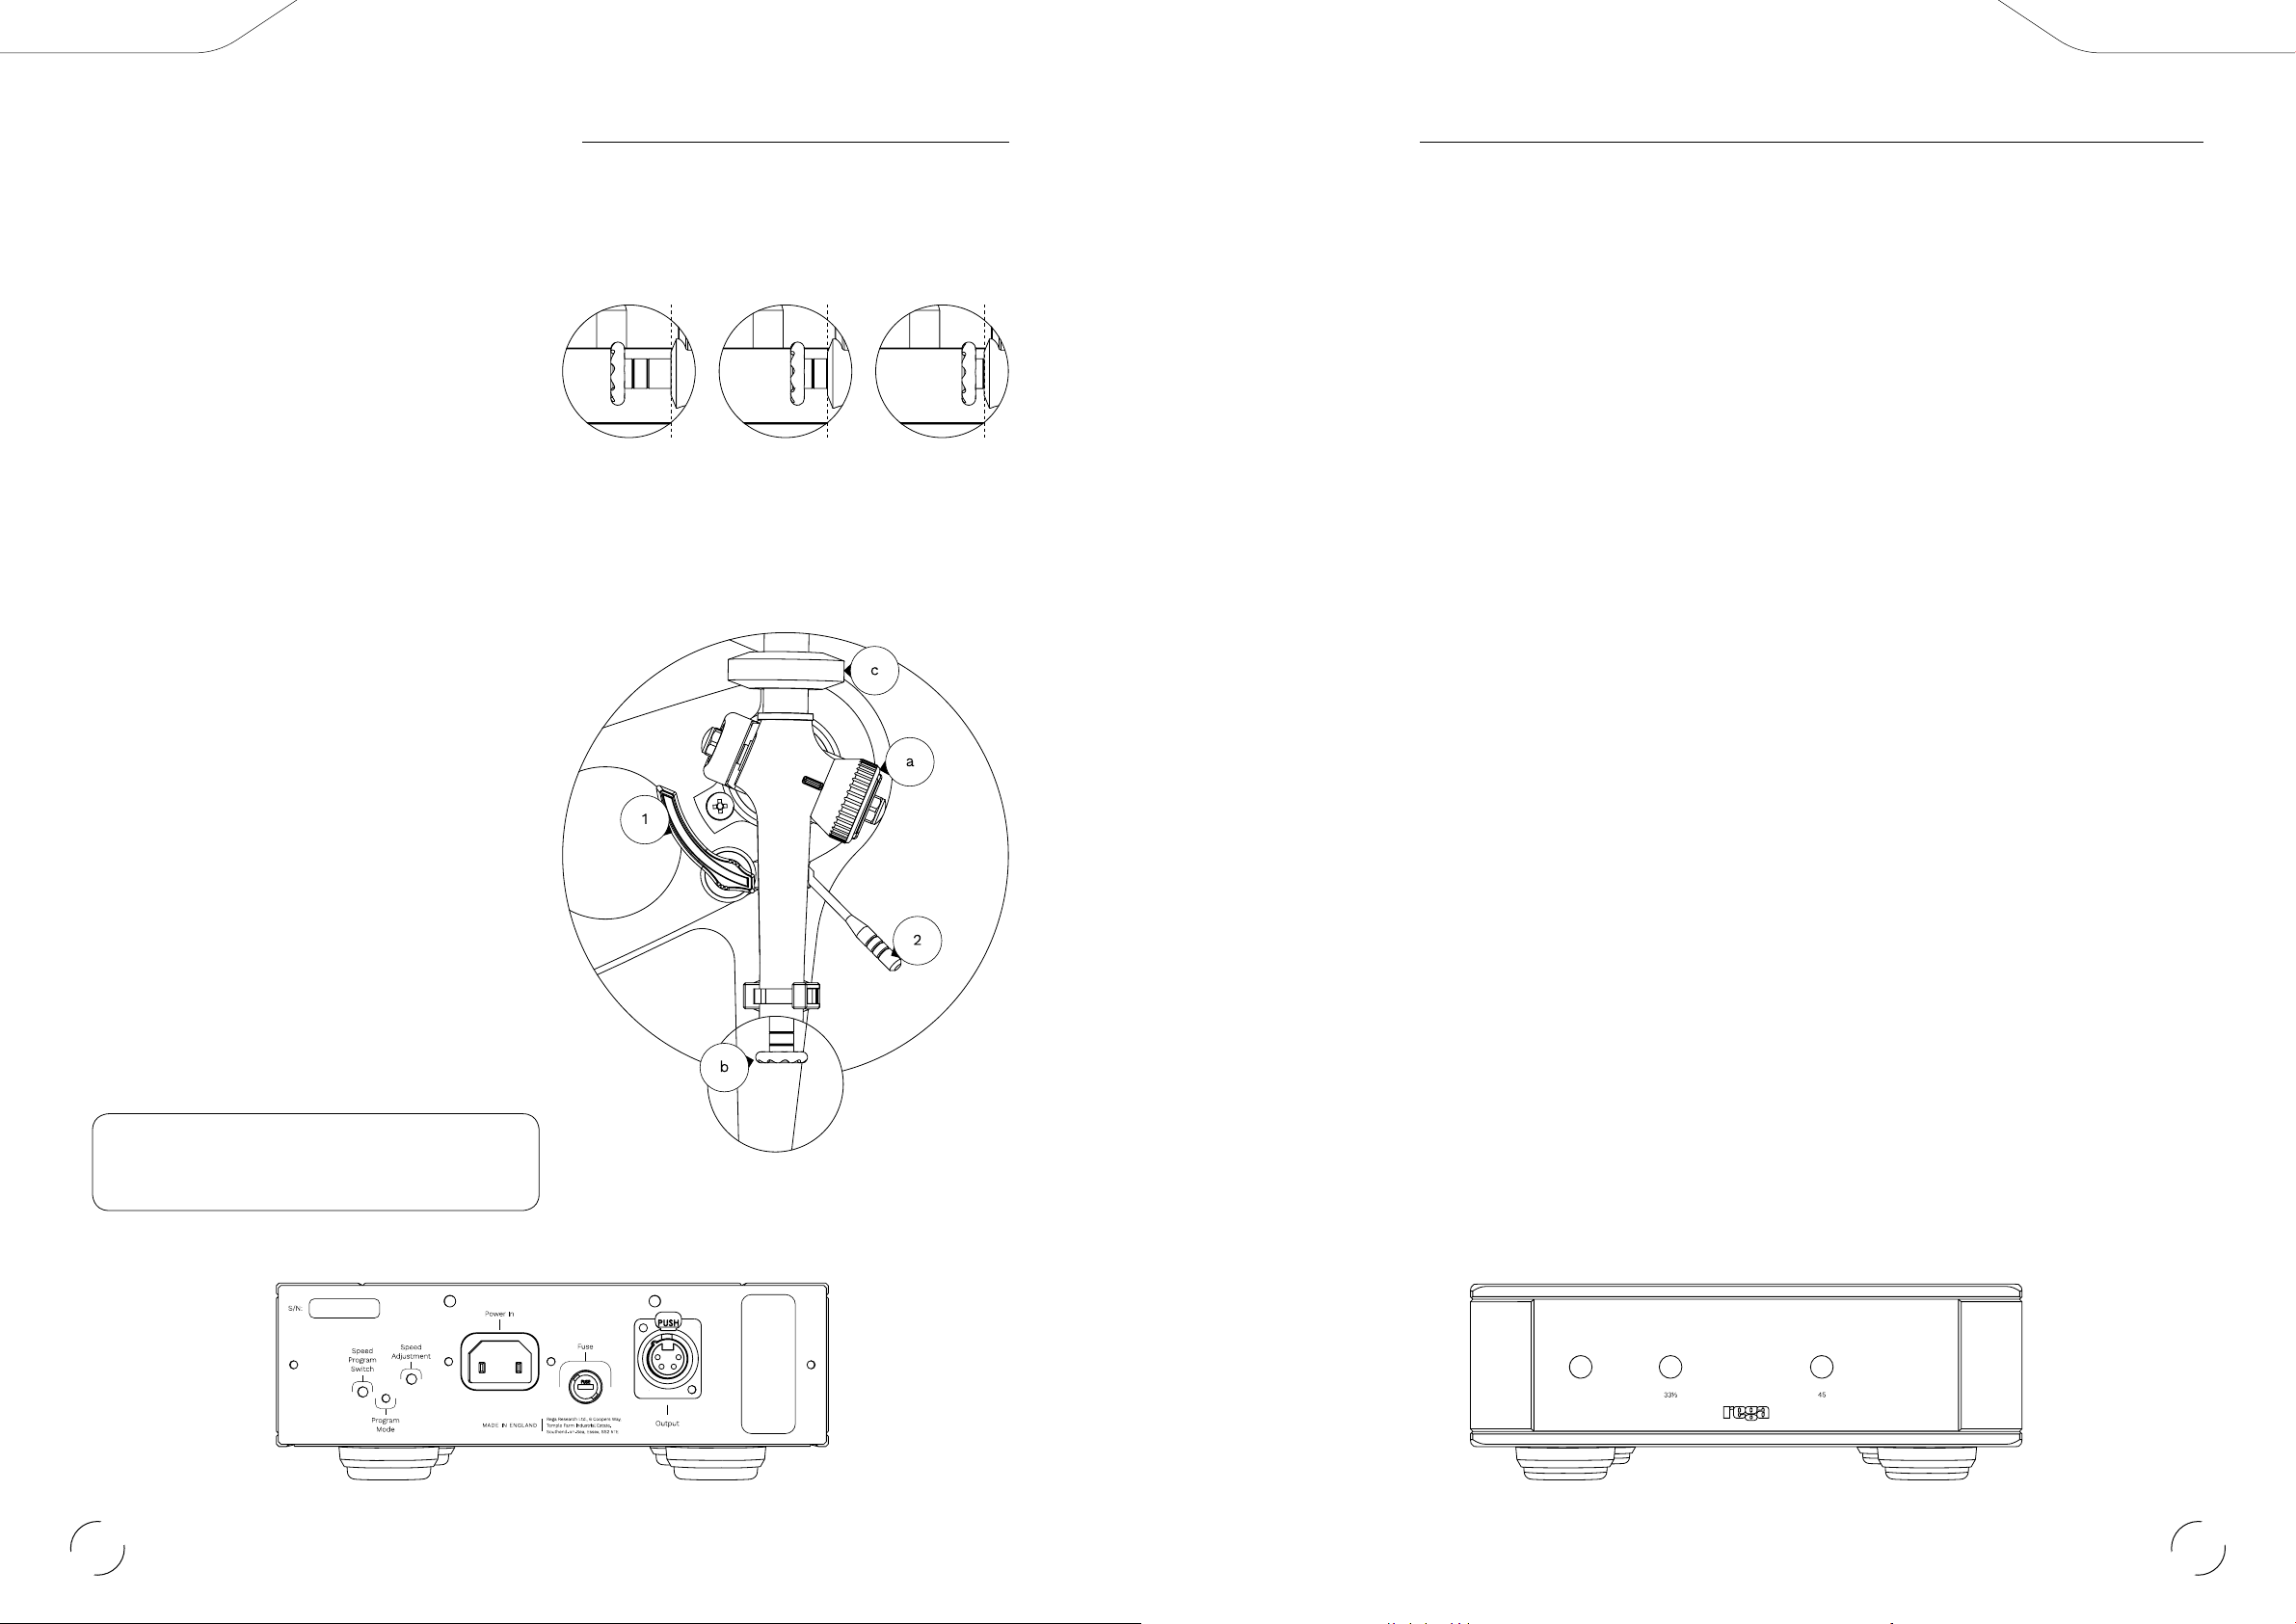
Simply push the bias adjustment slider in to the required setting, using
the dotted line as your reference (as shown above).
Your arm is now balanced, setup and ready to use. If you have any
Rega dealer who will be able to carry out the work for you. Thank you
for purchasing this Rega product and we wish you many hours of
musical enjoyment.
Rega Strobe and stroboscopic disc (sold separately)
The best way to adjust the speed of your Planar 10 is to use the
Rega Stobe kit. A stroboscopic disc is an optical instrument used to
measure the speed of the turntable by freezing the bars on the disc.
The bars are illuminated by an accurate quartz locked LED pulsing at
100 Hz.
Using the Strobe kit
Simply place the strobe disc on the turntable platter. Switch on the
100 Hz LED and hold it approximately 2 cm above the rotating strobe.
If the bars do not appear to move and are stationary, the speed is
conversely, if they move anti-clockwise, the turntable is running slow.
If over one minute the bars appear to move by one bar to the left
or one bar to the right, the speed is 0.016% fast or slow respectively.
Using the speed control on the P10 PSU, it is possible to achieve
±0.05% or ±1.3 rpm.
Note: If over one minute the bars appear to move by two bars to
the left or by two bars to the right, the speed is 0.01 rpm fast or slow
respectively. Using the speed control on the P10 PSU, it is possible to
achieve ±0.01 rpm, which is one step of the speed adjustment.
Warning: Because of the nature of the stroboscopic effect of the
disc and the LED light, we strongly recommend anyone with photo-
induced epilepsy not to use this device. Although this condition is very
rare, we must make the user aware of this condition. Ask your dealer
for assistance if required.
Warnings
Do not unplug the P10 PSU from the turntable whilst the unit is on -
turn off the power supply before unplugging.
Do not operate the power supply without the turntable connected.
Never expose the unit to rain or moisture.
Do not open the case covers. There are no user serviceable parts
inside.
P10 PSUPlanar 10 setup and connections
tracking force pressure quoted by your cartridge manufacturer. Note:
coil cartridges.
Underneath tonearm tube
0 1 2
1. Cueing platform 2. Lift lower cueing device
(Used to manually li or lower the tonearm on or off the
vinyl surface)
EN EN


Delta i konversationen om denna produkt
Här kan du dela vad du tycker om Rega P10 Skivspelare. Om du har en fråga, läs först noggrant igenom manualen. Att begära en manual kan göras genom att använda vårt kontaktformulär.