Specications
Model L28WMEF25
Supply Voltage 220 - 240V~, 50 Hz
Power Input 2000 W
Features and specications are subject to change without prior notice.
Product Fiche
Model L28WMEF25
Item Symbol Value Unit Item Unit
Heat output Type of heat output/room
temperature control (select one)
Nominal heat
output
P
nom
2.000 kW single stage heat output and
no room temperature control
no
Minimum
heat output
(indicative)
P
min
1.000 kW two or more manual stages, no
room temperature control
no
Maximum
continuous heat
output
P
max,c
2.000 kW with mechanic thermostat
room temperature control
no
Power consumption with electronic room
temperature control
no
In off mode P
o
0.00 W electronic room temperature
control plus day timer
no
In standby mode P
sm
0.43 W electronic room temperature
control plus week timer
yes
In idle mode P
idle
N/A W Other control options (multiple
selections possible)
In network mode P
nsm
N/A W room temperature control, with
presence detection
no
Standby mode with display information or
status
no room temperature control, with
open window detection
no
Seasonal space
heating energy
efficiency in
active mode
%
s,on
92.0 % distance control option no
adaptive start control yes
working time limitation no
black bulb sensor no
self-learning functionality no
control accuracy no
Contact details UK Representative and Responsible Person
Currys Group Limited (No. 504877)
1 Portal Way, London, W3 6RS, UK
https://www.currys.co.uk
EU Representative and Responsible Person
Currys Ireland Limited (No. 259460)
3rd Floor Office Suite, Omni Park SC,
Santry, Dublin 9, Republic of Ireland
https://www.currys.ie
UK & EU Contact details: business.standards@currys.co.uk
For the latest version of the Safety and Instruction Manual, please visit the o&cial website below (other
websites may not contain the full and most updated version):
https://www.currys.co.uk/services/repairs-maintenance/product-service-manuals.html
Cleaning
Your heater should be cleaned regularly to prevent dirt and dust from building up which will
aect its performance. Ensure the air inlet and the air outlet are not blocked.
This can be done with a vacuum cleaner, using the brush attachment.
• Ensure you unplug your heater from the mains socket and wait for the heater to
cool down completely before cleaning.
• Do not use any detergents or abrasives and do not allow any water to enter the
heater.
Safety Cut-O
The unit is tted with a safety cut-o which will operate if the heater overheats (e.g. Due to
blocked air vents). For safety reasons, the heater will NOT automatically reset. To reset the
appliance, disconnect the appliance from the mains supply for at least 15 minutes. Reconnect
the supply to the mains and switch on the appliance.
Hints & Tips
Problem Solution
No heat or light • Check the wall socket by plugging in a working appliance.
If socket is functional, and the cord or plug of the heater is
suspected to be faulty, have it checked by an electrician.
• Press 1000W or 2000W button to set the heating power
level.
Light but no heat • Make sure that you have pressed 1000W or 2000W button
to set the heating power level. Then press +/– on the
remote control to set temperature above the current room
temperature.
• The thermal cut-o may have engaged. See Safety Cut-O
section above.
General Operation
Powering On/O
• Connect the mains cable to the power socket. Toggle the Power ON/OFF switch to ON
position. The display will ash once and prompt a “beep“ tone. Then the display will show
indicator, and the unit is now in standby mode.
• Toggle the Power ON/OFF switch to OFF position. Disconnect the mains cable from the
power socket to switch o the unit completely.
Switch the Flame Light On/O
Press I/O Flame Eect button on the control panel of the unit, or ON/OFF button on the remote
control to switch the ame light between On/O.
The display will automatically switch o after the unit is being idle for about 20
seconds.
Adjust Heating Power Level
Press 1000W/2000W button on the control panel of the unit, or remote control to switch on/o
low ( ) /high ( ) level heating.
Date/Time Settings
1. Press DATE/TIME button on the remote control.
2. Press / button to select from SUN to SAT. Press DATE/TIME button to conrm.
3. Press +/– button to select the hour digit. Press DATE/TIME button to conrm.
4. Press +/– button to select the minute digit. Press DATE/TIME button to conrm.
Temperature Settings
Press +/– button on the remote control (from 15°C to 30°C).
Timer Setup
1. Press TIMER SET button on the remote control to start setting timer
2. Press +/– button on the remote control to select Timer from 01 to 10, and then press TIMER
SET button to conrm.
3. Press / button to select from SUN to SAT. Press + button to add your desired day(s), or –
button to delete the selected one.
4. Press TIMER SET button to set the ON time.
5. Press +/– button to select the hour digit. Press TIMER SET button to conrm.
6. Press +/– button to select the minute digit. Press TIMER SET button to set the OFF time.
7. Press +/– button to select the hour digit. Press TIMER SET button to conrm.
8. Press +/– button to select the minute digit. Press TIMER SET button to conrm.
9. Press +/– button to select Temperature. Press TIMER SET button to conrm.
View the timer setting
• Press TIMER SET button on the remote control.
• Press +/– button to check the power-on time of the set timers one by one (from 01 to 10).
• To check the power-o time, press the button on the remote control.
• Press the +/– button to check the power-o time of the set timers one by one (from 01 to
10).
• To delete selected setting, press the C button on the remote control.
Activate Timer
Press TIMER ON/OFF button to activate the timer. The display will show , and the unit will
enter standby mode. It will automatically switch on at the set time.
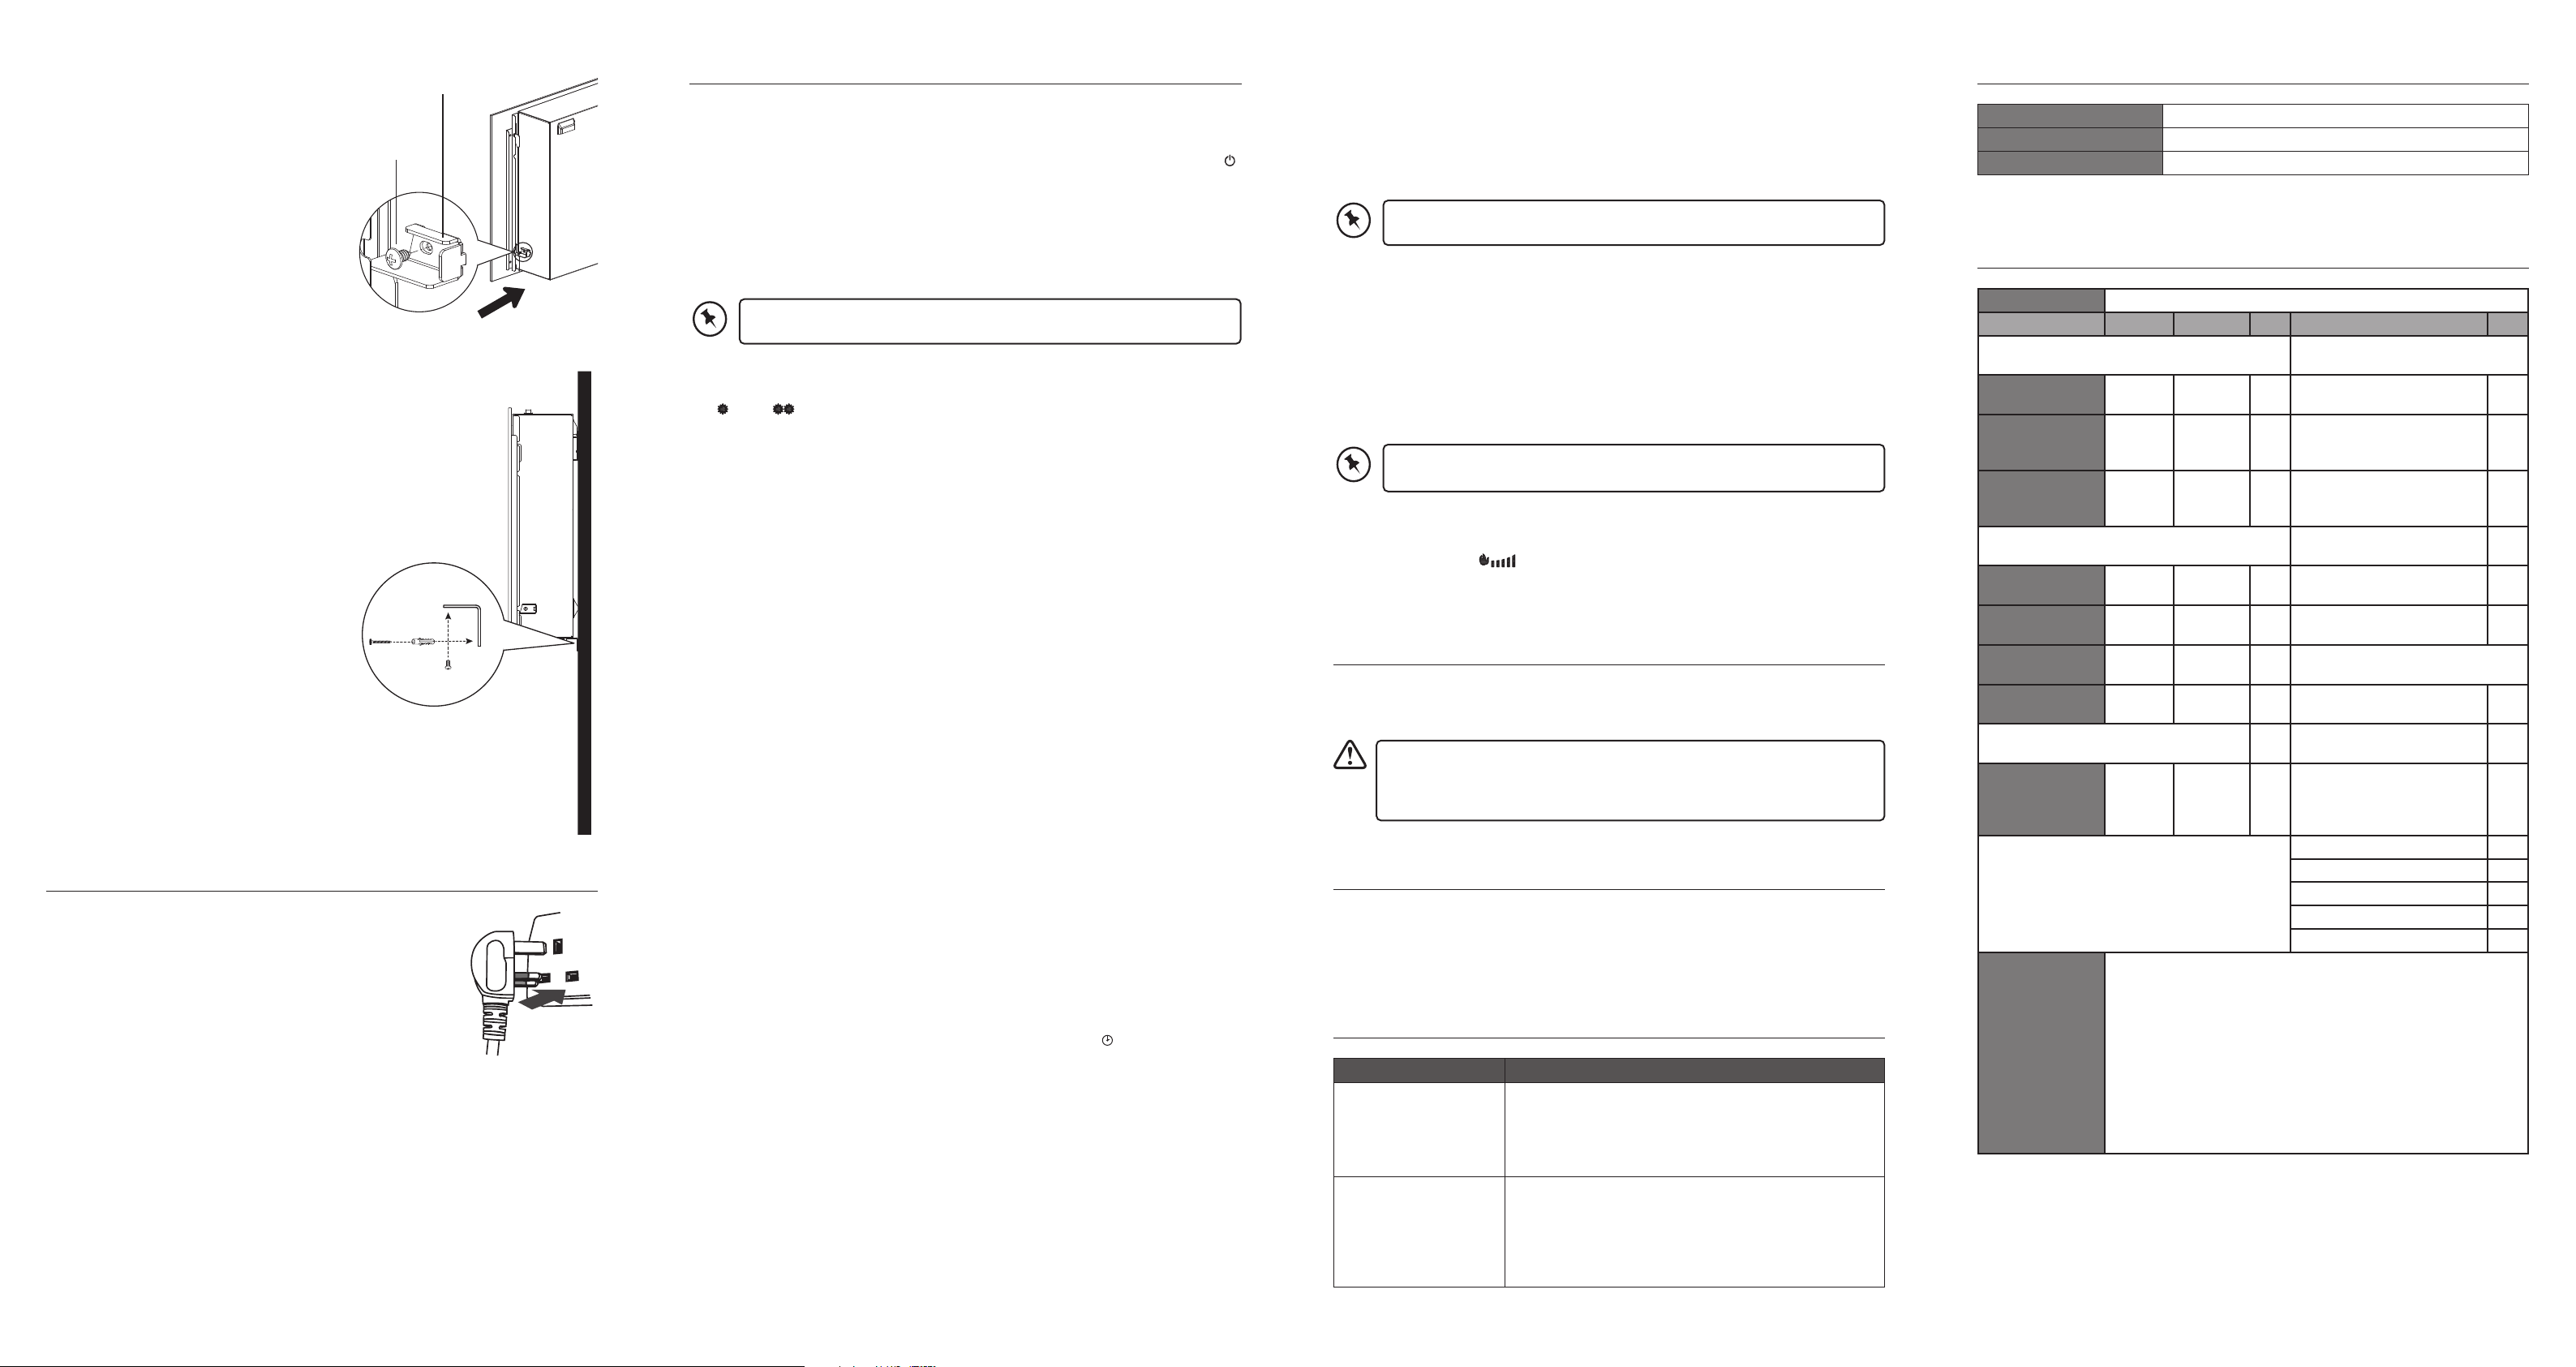
Glass Fixing Screw
Glass Fixing Bracket
Long Screw
Wall Plug
Screw
L-shape Wall
Fixing Bracket
Side View of the Unit
6. Insert the Glass Fixing Bracket with the
provided Glass Fixing Screw to secure the
front glass panel on the heater unit.
7. Install the L-shape Wall Fixing Bracket onto the
unit with the Screws, and then secure it onto the
wall with the Wall Plugs and Long Screws.
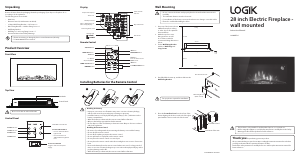
Connecting to the mains socket
Connect the mains plug with the mains socket.
Auto Mode (set temperature auto decrease)
If you switch on AUTO mode, the set temperature will automatically decrease by 4°C (Low
Power mode) when it comes to the set time. The default set time period is from 8:00 to 17:00.
Switch On/O AUTO mode
• Press IC button on the remote control to switch on AUTO mode. The display will show
AUTO.
• Press IC button again to switch o the AUTO mode.
The auto heating function only aects the set temperature during heating
operation. It does not alter any other functions.
Set timer On/O for Auto Mode
Set timer On
1. Press button. The ON indicator lights up, and the hour digit ashes.
2. Press +/– button to adjust the hour. Press button to conrm.
3. Press +/– button to adjust the minute. Press button to conrm.
Set timer O
1. Press button. The OFF indicator lights up, and the hour digit ashes.
2. Press +/– button to adjust the hour. Press button to conrm.
3. Press +/– button to adjust the minute. Press button to conrm.
• If the o time is earlier than the on time, the o time will be on the next day.
• Make sure you set the timer with a dierent ON and OFF time.
Flame Brightness
1. Press DIMMER button repeatedly on the remote control to adjust the ame brightness.
2. The Flame Indicator
will show the ame brightness level.


Delta i konversationen om denna produkt
Här kan du dela vad du tycker om Logik L28WMEF25 Elektrisk öppen spis. Om du har en fråga, läs först noggrant igenom manualen. Att begära en manual kan göras genom att använda vårt kontaktformulär.