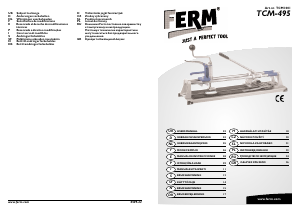
Bruksanvisning FERM TCM1001 Kakelskärare

Behöver du en bruksanvisning för din FERM TCM1001 Kakelskärare? Nedan kan du se och ladda ner PDF-bruksanvisningen gratis på svenska. Den här produkten har för närvarande 3 vanliga frågor, 0 kommentarer och har 0 röster. Om det här inte är bruksanvisningen du vill ha, vänligen kontakta oss.

Är produkten defekt och erbjuder bruksanvisningen ingen lösning? Gå till ett Repair Café för gratis reparationstjänster.

Bruksanvisning

Loading…

Caution! For your own safety, carefully read these
instructions for use before using the machine.
TECHNICAL SPECIFICATIONS
6 mm
400 mm
30 -80 mm
0-45
o
TABLE OF CONTENTS:
1. SPECIAL SAFETY INSTRUCTIONS
2. ASSEMBLY
3. HOW TO CUT AND BREAK TILES
4. MAINTENANCE
Faulty and/or discarded electrical or electronic
apparatus have to be collected at the appropriate
recycling locations.
1. SPECIAL SAFETY
INSTRUCTIONS
1. The tile cutting machine is fitted with a replaceable
circular blade. Therefore, keep children away.
2. After use the machine must be stored in a safe and
dry place, away from children.
3. This machine has been designed for cutting and
breaking glazed tiles, and must not be used for any
other purpose.
4. When using the tile cutting machine make sure to
keep extension leads and such away from the
machine.
5. Always place the tile cutting machine on a level and
firm surface.
6. CAUTION! The edges of cut tiles are sharp.
2. ASSEMBLY
Assemble the tile cutting machine as shown in the
drawing.
ASSEMBLY OF THE TILE CUTTING
MACHINE
Remove all the parts from the box and assemble the tile
cutting machine as follows:
1. Slide the black rubber feet (T) over the corners of
the tile cutter. Slide a washer onto the bolt and push
this into the rubber foot. Now slide a washer and a
nut over the bolt on the back and fasten this
properly. Repeat this for the other three corners.
2. Mount the fastening blocks (N) with the 2 tubes (M)
onto the bottom plate (V) using the 4 bolts (O) and
washers (P).
3. Screw the lever (H) onto the tube fastening (I).
4. Finally, mount the sash angle (U) onto the bottom
plate (V) using the knob (S) and washer.
ASSEMBLY OF THE HOLLOW SQUARE
CHISEL
1. Place the hollow square chisel above the hole in the
bottom plate (V).
2. Make sure that the clamping plate (E) comes under
the 2 tubes and fasten this using the socket head
wrench supplied. The socket head wrench is situated
in the black fastening plate (C).
3. It is important that the drill (G) and the knife (F) are
adjusted in such a way that they just touch the
bottom plate (V). This adjustment can be done using
the two nuts at the top of the hollow square chisel.
Then fasten these nuts against each other.
3. HOW TO CUT AND BREAK TILES
1. Use a soft-tipped (carpenter’s) pencil to mark off the
cutting line.
2. Place the tile against the stop, the glazed side facing
upward. The pencil mark must be directly below the
blade.
3. Firmly hold the tile and cut several times (at least 4)
along the mark. After each cut, press the lever more
firmly.
4. Lift the lever when it has reached the front edge of
the tile and moved it backward.
5. Subsequently the break-off unit is lifted. Repeat along
the full width of the tile until the notch is sufficiently
deep.
The cutting movement results from moving the
lever from the back edge of the tile towards its
front, while lightly pressing the lever.
WALL TILES
(single baked)
Lift the lever and position the break-off unit in the middle
of the tile. Press the lever down and the tile will break.
FLOOR TILES
(double-baked):
Sometimes these much harder tiles cannot be cut in two
by means of the break-off unit (K) on the tile cutting
machine.
In these cases after making the notch the tile must be
broken in two by tapping the underside of the tile with a
light hammer along the full length of the notch. This way
the break line will spread through the tile, and cause the
tile to break in two along the line. By means of the wing
nut (Q) the angle of the stop can be adjusted.
MAKING HOLES BY MEANS OF THE (HAND)
DRILL
1. Mount the drill attachment including the drill over
the centre of the hole in the base. It is important that
2 Ferm
Ferm 31
EXPLODED VIEW
SPARE PARTS LIST TCM-495
REF NR DESCRIPTION FERM NR
- SPARE CUTTING WHEEL TCA1001
A ELEVATING ARM 207809
E CLAMPING PLATE 207813
F CUTTER 207803
G CUTTER BRACKET 207802
I PIPE FIXTURE FOR LEVER 207807
K BREAKING HEAD 207805
Q WING NUT WITH WASHER 207819
R ANGLE INDICATOR 207820
WVU
T
S
N
P
O
L
I
H
C
B
A
D
M
E
F
K
G
Z
J
QR
Ladda ner bruksanvisning i Svenska (PDF, 0.6 MB)
(Tänk på miljön och skriv endast ut denna bruksanvisning om det verkligen är nödvändigt)

Loading…

Betyg

Berätta vad du tycker om FERM TCM1001 Kakelskärare genom att betygsätta den. Vill du dela med dig av dina åsikter om denna produkt eller ställa en fråga? Lämna en kommentar nederst på sidan.
Är du nöjd med FERM TCM1001 Kakelskärare?
Ja Nej
Bli den första personen som betygsätter denna produkt
0 röster

Delta i konversationen om denna produkt

Här kan du dela vad du tycker om FERM TCM1001 Kakelskärare. Om du har en fråga, läs först noggrant igenom manualen. Att begära en manual kan göras genom att använda vårt kontaktformulär.

Mer om denna bruksanvisning

Vi förstår att det är trevligt att ha en pappersbruksanvisning för din FERM TCM1001 Kakelskärare. Du kan alltid ladda ner bruksanvisningen från vår hemsida och skriva ut den själv. Om du vill ha en originalbruksanvisning rekommenderar vi att du kontaktar FERM. De kanske kan tillhandahålla en originalbruksanvisning. Letar du efter bruksanvisningen för din FERM TCM1001 Kakelskärare på ett annat språk? Välj ditt föredragna språk på vår hemsida och sök efter modellnumret för att se om vi har det tillgängligt.

Specifikationer

Märke FERM
Modell TCM1001
Kategori Kakelskärare
Filtyp PDF
Filstorlek 0.6 MB

Alla bruksanvisningar för FERM Kakelskärare
Fler bruksanvisningar för Kakelskärare

Vanliga frågor om FERM TCM1001 Kakelskärare

Vårt supportteam söker efter användbar produktinformation och svar på vanliga frågor. Om du hittar en felaktighet bland våra vanliga frågor uppskattar vi om du meddelar oss detta via vårt kontaktformulär.

Vad är skillnaden mellan keramiska plattor och porslinsplattor? Verifierad

Båda är gjorda av lera, men porslinsplattor har högre densitet. Detta gör porslinsplattor starkare och mer hållbara, men också svårare att skära. Du behöver specialiserade verktyg och färdigheter för att få samma resultat som med keramiska plattor.

Detta hjälpte (13) Läs mer

Spelar det någon roll vilken sida av plattan jag skär? Verifierad

Ja, oavsett vilken platta du skär, är det bäst att klippa med framsidan uppåt. Detta säkerställer den jämnaste ytan och minimerar risken för flisning.

Detta hjälpte (10) Läs mer

Hur kan jag förhindra att mina brickor flisas när jag skär dem? Verifierad

Du kan applicera maskeringstejp över plattans ovansida före kapning för att minska flisningen.

Detta hjälpte (10) Läs mer
Bruksanvisning FERM TCM1001 Kakelskärare

Relaterade produkter

Relaterade kategorier