GREAT BRITAIN - CUSTOMER SERVICE contact number: 0845 300 9799 e-mail: customerservice@clasohlson.co.uk internet: www.clasohlson.com/uk
English
6
7
8
9
1
2
3
4
5
Ver. 20140519
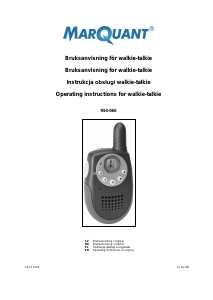
FX-250 Walkie-Talkie
Art.no 38-6327 Model FX250
Please read theentire instruction manual before using theproduct and then save
it for future reference. We reserve theright for any errors in text or images and any
necessary changes made to technicaldata. In theevent of technical problems or
other queries, please contact our Customer Services.
PMR446
PMR446 is alicence-free communication standard for use over theFM frequency
range and operates at 446 MHz.
Coverage area/range
Range capacity is highly dependant upon thesurrounding terrain. Maximum range
is achieved in open unobstructed terrain,e.g. intheabsence of hills/mountains,
buildings,etc. Toavoid interference, theradios should not be used at adistance of
less than 1.5 m from eachother.
Safety
• Never expose theradio, charger or mains adaptor to damp or moisture.
• Use only theincluded or recommended charger.
• Only use rechargeable NiMH batteries.
• When using aheadset, you should avoid having thevolume at maximum level
to protect your hearing.
• Always remove thebatteries from thedevices if they are not used for
alongtime.
• In order to avoid unnecessary radio wave exposure, always hold thehandset
at least 5 cm from your mouth while transmitting.
• Do not use handsets if any one of their aerials have been damaged.
• Always turn off theradios when requested,e.g. during explosive demolition
work or where there is risk for explosion in environments where flammable
liquids or gases are involved.
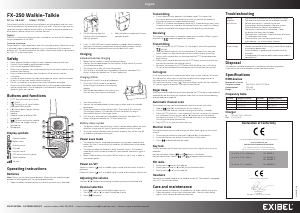
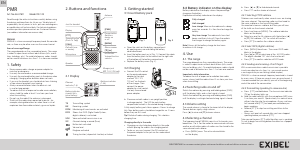
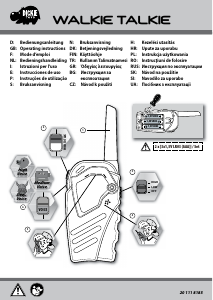
Buttons and functions
Transmitting
• 2-way radios can only operate in half-duplexmode. Thismeans that
you cannot receive atransmitted signal whilst you yourself are speaking/
transmitting (known as simplex communication).
• PMR446 is alicence-free frequency band that is shared amongst manyusers.
Ifmore than one user is found on thechannel that you are using it is customary
to identify yourself both at thebeginning and theend of any conversation.
Receiving
Thehandsets are constantly in reception mode when turnedon. Whenasignal is
received, the
symbol will appear on thedisplay.
Transmitting
1. Press and hold in the [ PTT ] button (1). Thedisplay’s transmitting indicator
willlight.
2. Hold thehandset vertically with themicrophone (9) about 5 cm from your
mouth. Speakin aclear normal tone of voice without resorting to yelling.
3. Always wait asecond after you have pressed the [ PTT ] button before you
begin talking.
4. Always wait asecond after pressing the [ PTT ] button to end atransmission
and wait for theother user to begin talking.
5. Be careful not to press the [ PTT ] button while theother user is still talking.
Trynot to transmit before theother person has finished their transmission.
Call signal
Acall signal may be sent in order to alert other users of your intention totransmit.
This requires any other users to have their handsets within range and set to
thesame channel as your transmitting handset.
Call signal transmission: Press [ ]. Yourtransmitting handset will then send out
a2-sec call signal to all devices sharing thesame channel.
Roger beep
When you have finished talking and have released thePTT button aroger beep will
automatically be sent letting any receivers know that you have finished speaking
and are ready for aresponse.
Automatic channel scan
Thehandsets can be used to automatically scan for channels with traffic.
1. Hold in [
] and [ ► ] simultaneously to start scanning.
2. Once atrafficked channel is found scanning will pause for 3 seconds.
3. Pressing [ PTT ] within this 3 sec window will transmit asignal on this channel
or if you prefer you can use the [ ◄ ] or [ ► ] buttons to manually browse
and select achannel. If [ PTT ] is not pressed within the3 sec time window
scanning will continue automatically.
4. Press [ PTT ] at any time to cancel scanning.
Monitor mode
Themonitor feature can be used to check for other weak signals on thecurrent
channel.
1. To activate themonitor function press [ ◄ ] and [ ► ] simultaneously.
2. If no other channels are found, all you will hear is whitenoise.
3. Press [
] to deactivate monitormode.
Key lock
Thekey lock does not influence call signal transmission, regular transmission or
reception.
Key lock activation: Holdin [
] until shows in thedisplay.
Key lock deactivation: Holdin [ ] until disappears from thedisplay.
FM radio
1. Shortly press [ ] to turn theradioon.
2. Shortly press or hold in [ ◄ ] or [ ► ] to find adesired station.
3. Shortly press [
] to turn theradiooff.
Headsets
Connect theincluded headset to theheadset socket (6). Theheadset is equipped
with aPTT transmission button.
Care and maintenance
• Always remove thebatteries if theproduct is not to be used for alongtime.
• Clean theproduct using alightly moistenedcloth. Useonly mild cleaning
agents, never solvents or corrosive chemicals.
Troubleshooting
Bad/no
reception/
transmission
• Thetransmitter is located outside of thereceiver’srange.
• Thereceiver or transmitter are set to different channels.
• Volume level too low – increase thevolume.
• Surroundings affecting reception. Moveto anarea
without obstacles or sources of interference.
• Thedevice is held too close to thebody – keep
thedevice abit away from thebody.
• Theother user is too close – keep adistance of at least
1.5 m between eachother.
• There are other users on thechannel causing
adisturbance – try to find another channel.
Thehandset/s
do not charge.
• Make sure that thecharge cable and its plug are
securely connected to thecharging station/device and to
afunctioning powerpoint.
• Are thebatteries in good enough condition to retain
acharge?
• Is there power at thepower point where charge cable is
connectedto?
Disposal
This product should be disposed of in accordance with local regulations.
Ifyou are unsure how to proceed, contact your local council.
Specifications
PMR devices
Number of channels 8
Frequency range 446.00625–446.09375 MHz
Outputpower 500mW
Range Upto 5 km
Frequency table
Channel Frequency (MHz) Channel Frequency (MHz)
1 446.00625 5 446.05625
2 446.01875 6 446.06875
3 446.03125 7 446.08125
4 446.04375 8 446.09375
Charger
In 100–240 V AC, 50/60 Hz
Out 5 V, 500mA
1. [ PTT ] Transmit button (push to talk)
2. [
] On/off
3. [ ] Transmits acall signal to other
receivable PMR handsets
4. [ ◄ ] Volume down, toggles settings
back/down
5. Speaker
6. Headset socket and Micro USB
charge port
7. [
] Channel and function selector
8. [ ► ] Volume up, toggles settings
forwards/up
9. Microphone
Display symbols
Channel number
Battery status
Scanning active
FM radio
Key lock active
PPT transmission or ringtone
Signal reception
Volume
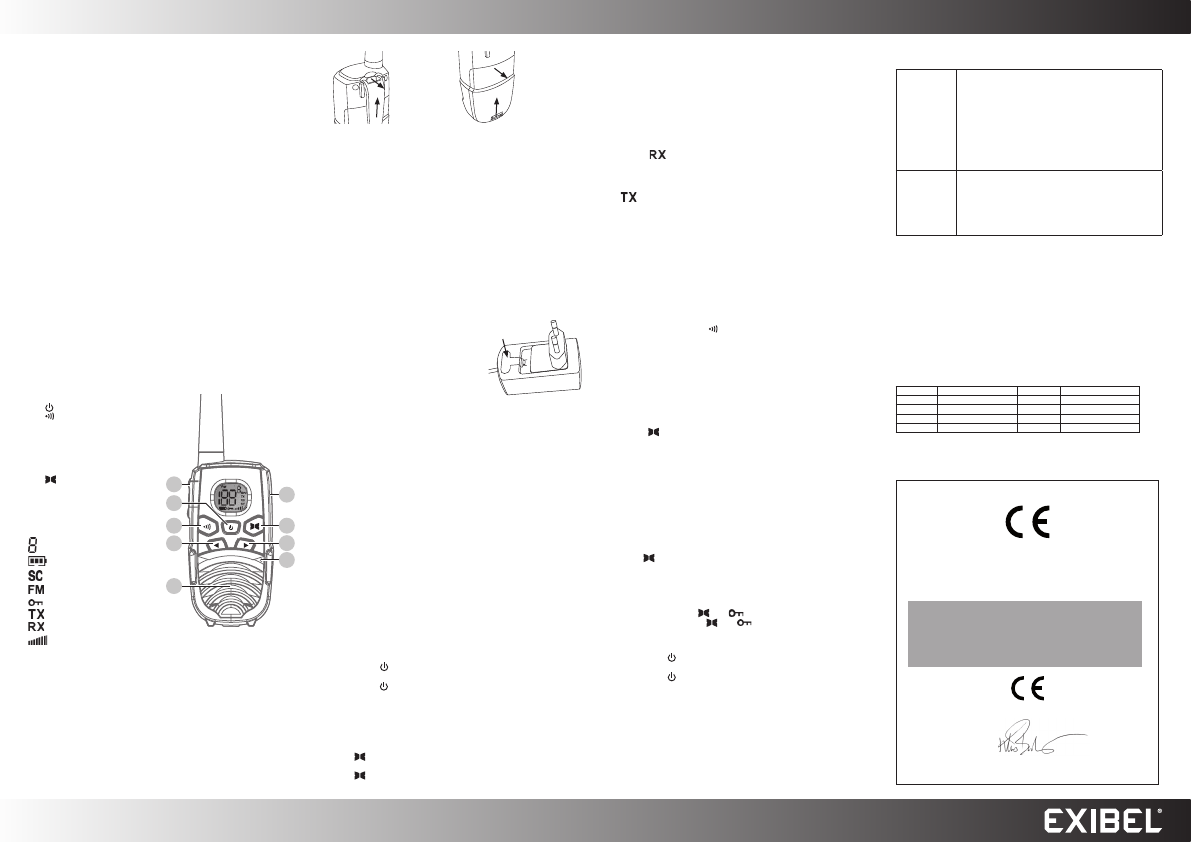
2. Pull theclip away from the
handset while simultaneously
sliding it upwards.
3. Slide thebattery compartment’s cover
upwards toopen.
4. Insert 3×AAA/HR03 per handset (batteries included). Notethepolarity
markings in thebattery compartment to ensure correct battery insertion.
5. Refit thebattery compartment cover and thebelt clip (if used).
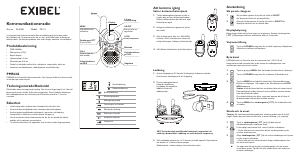
Charging
Individual handset charging
1. Make sure thehandset is turned off before charging.
2. Connect theincluded adaptor to thehandset’s charge socket (6) and to
anavailable powerpoint.
3. Thecharge status icon will show in thedisplay.
4. Afull charge is achieved from acompletely flat battery after about 10h.
Always charge new batteries for 14 hours beforeuse.
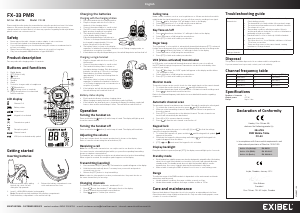
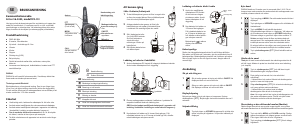
Charging station
Changing theEU and UK charge plug adaptors:
1. Press the [ PUSH ] symbol at thebottom
of thecharger and slide out theattached
adaptor.
2. Slide thedesired adaptor in by making sure
that you hear it lock securely intoplace.
Operating instructions
Batteries
Note: Always use thesame type of batteries. Nevermix new and discharged
batteries or rechargeable with non-rechargeable batteries.
1. Open thebattery compartment by first removing thebelt clip (if attached).
3. Turn thehandsetsoff.
4. Connect theincluded adaptor to thecharging station and to anavailable
powerpoint.
5. Place thehandsets into thecharge station. Theywill only fit in oneway.
Thecharging station’s LED indicator will continue to be lit as long as
thehandsets remain in thecharge station.
6. Afull charge is achieved from acompletely flat battery after about 10h.
Always charge new batteries for 14 hours beforeuse.
Battery status symbol
• Thebattery symbol (see theDisplay symbols section above) reflects thestate
of battery charge and will show full once thebatteries are fully charged.
• Once thehandset’s batteries reach thepoint of empty, they will first give off
anaudible signal before shuttingoff.
Power save mode
• Thehandsets have anintegrated auto power-saving mode in order to save
batterylife. After4 sec of disuse thehandsets will automatically enter power-
savemode.
• This does not affect thehandsets’ ability to receive signals. Thehandsets
automatically return to normal mode with normal power whenever asignal is
received.
• Make ahabit of always turning thePMR off when it is not in use, in order to
save batterypower.
Power on/off
Poweron: Holdin [ ] until anaudible signal is heard and thecurrent channel is
displayed.
Poweroff: Holdin [
] until anaudible signal is heard and thedisplay switchesoff.
Adjusting the volume
Use the [ ◄ ] [ ► ] buttons for increasing or reducing volume to thedesiredlevel.
Channel selection
1. Press [ ], until thechannel display begins toflash.
2. Then press [ ◄ ] or [ ► ] to select thedesired channel.
3. Press [ ] to confirm.
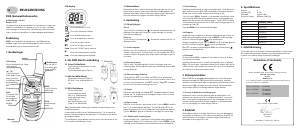
Declaration of Conformity
Hereby, Clas Ohlson AB declares that following product(s):
38-6327 EXIBEL FX-250
PMR (446 MHz) COMMUNICATION RADIO
is in compliance with the essential requirements
and other relevant provisions of Directive 1999/5/EC.
Article 3.1a (Safety): EN 60950-1
Article 3.1b (EMC): EN 301489-1
EN 301489-5
Article 3.2 (Radio): EN 300296-2
Insjön, Sweden, May 2014
Klas Balkow,
President.
Clas Ohlson, 793 85 Insjön, Sweden

Delta i konversationen om denna produkt
Här kan du dela vad du tycker om Exibel FX-250 Walkie-talkie. Om du har en fråga, läs först noggrant igenom manualen. Att begära en manual kan göras genom att använda vårt kontaktformulär.