User Manual
AIR PURIFIER
• The product warranty is printed on the back of this guide.
• This product is suitable for AC 220 - 240 V only.
T1000(AU)Model
Use & Care
Guide
The unit does not turn on at all
•
Is the plug securely attached to the outlet?
-
Make sure the outlet has power going to it, and
ensure the plug is secured.
•
Is there a power outage?
-
Check to see if other lights and electrical
equipment are working and try again.
The unit doesn’t work in Auto Mode
•
Has Auto Mode been selected?
-
Press the Fan Speed button until Auto Mode is
selected.
•
Is the sensor blocked or clogged?
-
Clean Smart Sensor with vacuum cleaner.
It vibrates and makes a lot of noise
•
Is it running on a slanted or uneven surface?
-
Move the unit to a hard, flat, even area.
The power plug and outlet feel hot
•
Is the plug securely plugged in?
-
Make sure the plug is properly plugged into the outlet.
There is a strange smell
•
Is it being used in a place with a lot of smoke, dust,
or odors?
-
Clean the air intakes on either side and clean the
Pre-Filter.
-
Replace the Active Carbon Filter and the True HEPA
filter.
The fan strength is weak. The unit is not purifying the air
•
Is the Check Filter Indicator light on?
-
Change the filters as required.
The display panel is dim
•
Is the Light Sensor blocked by debris?
-
When Auto Mode is on, Sleep Mode is
automatically activated when the Light Sensor
detects that the room is dark.
FREQUENTLY ASKED QUESTIONS
INITIAL OPERATION
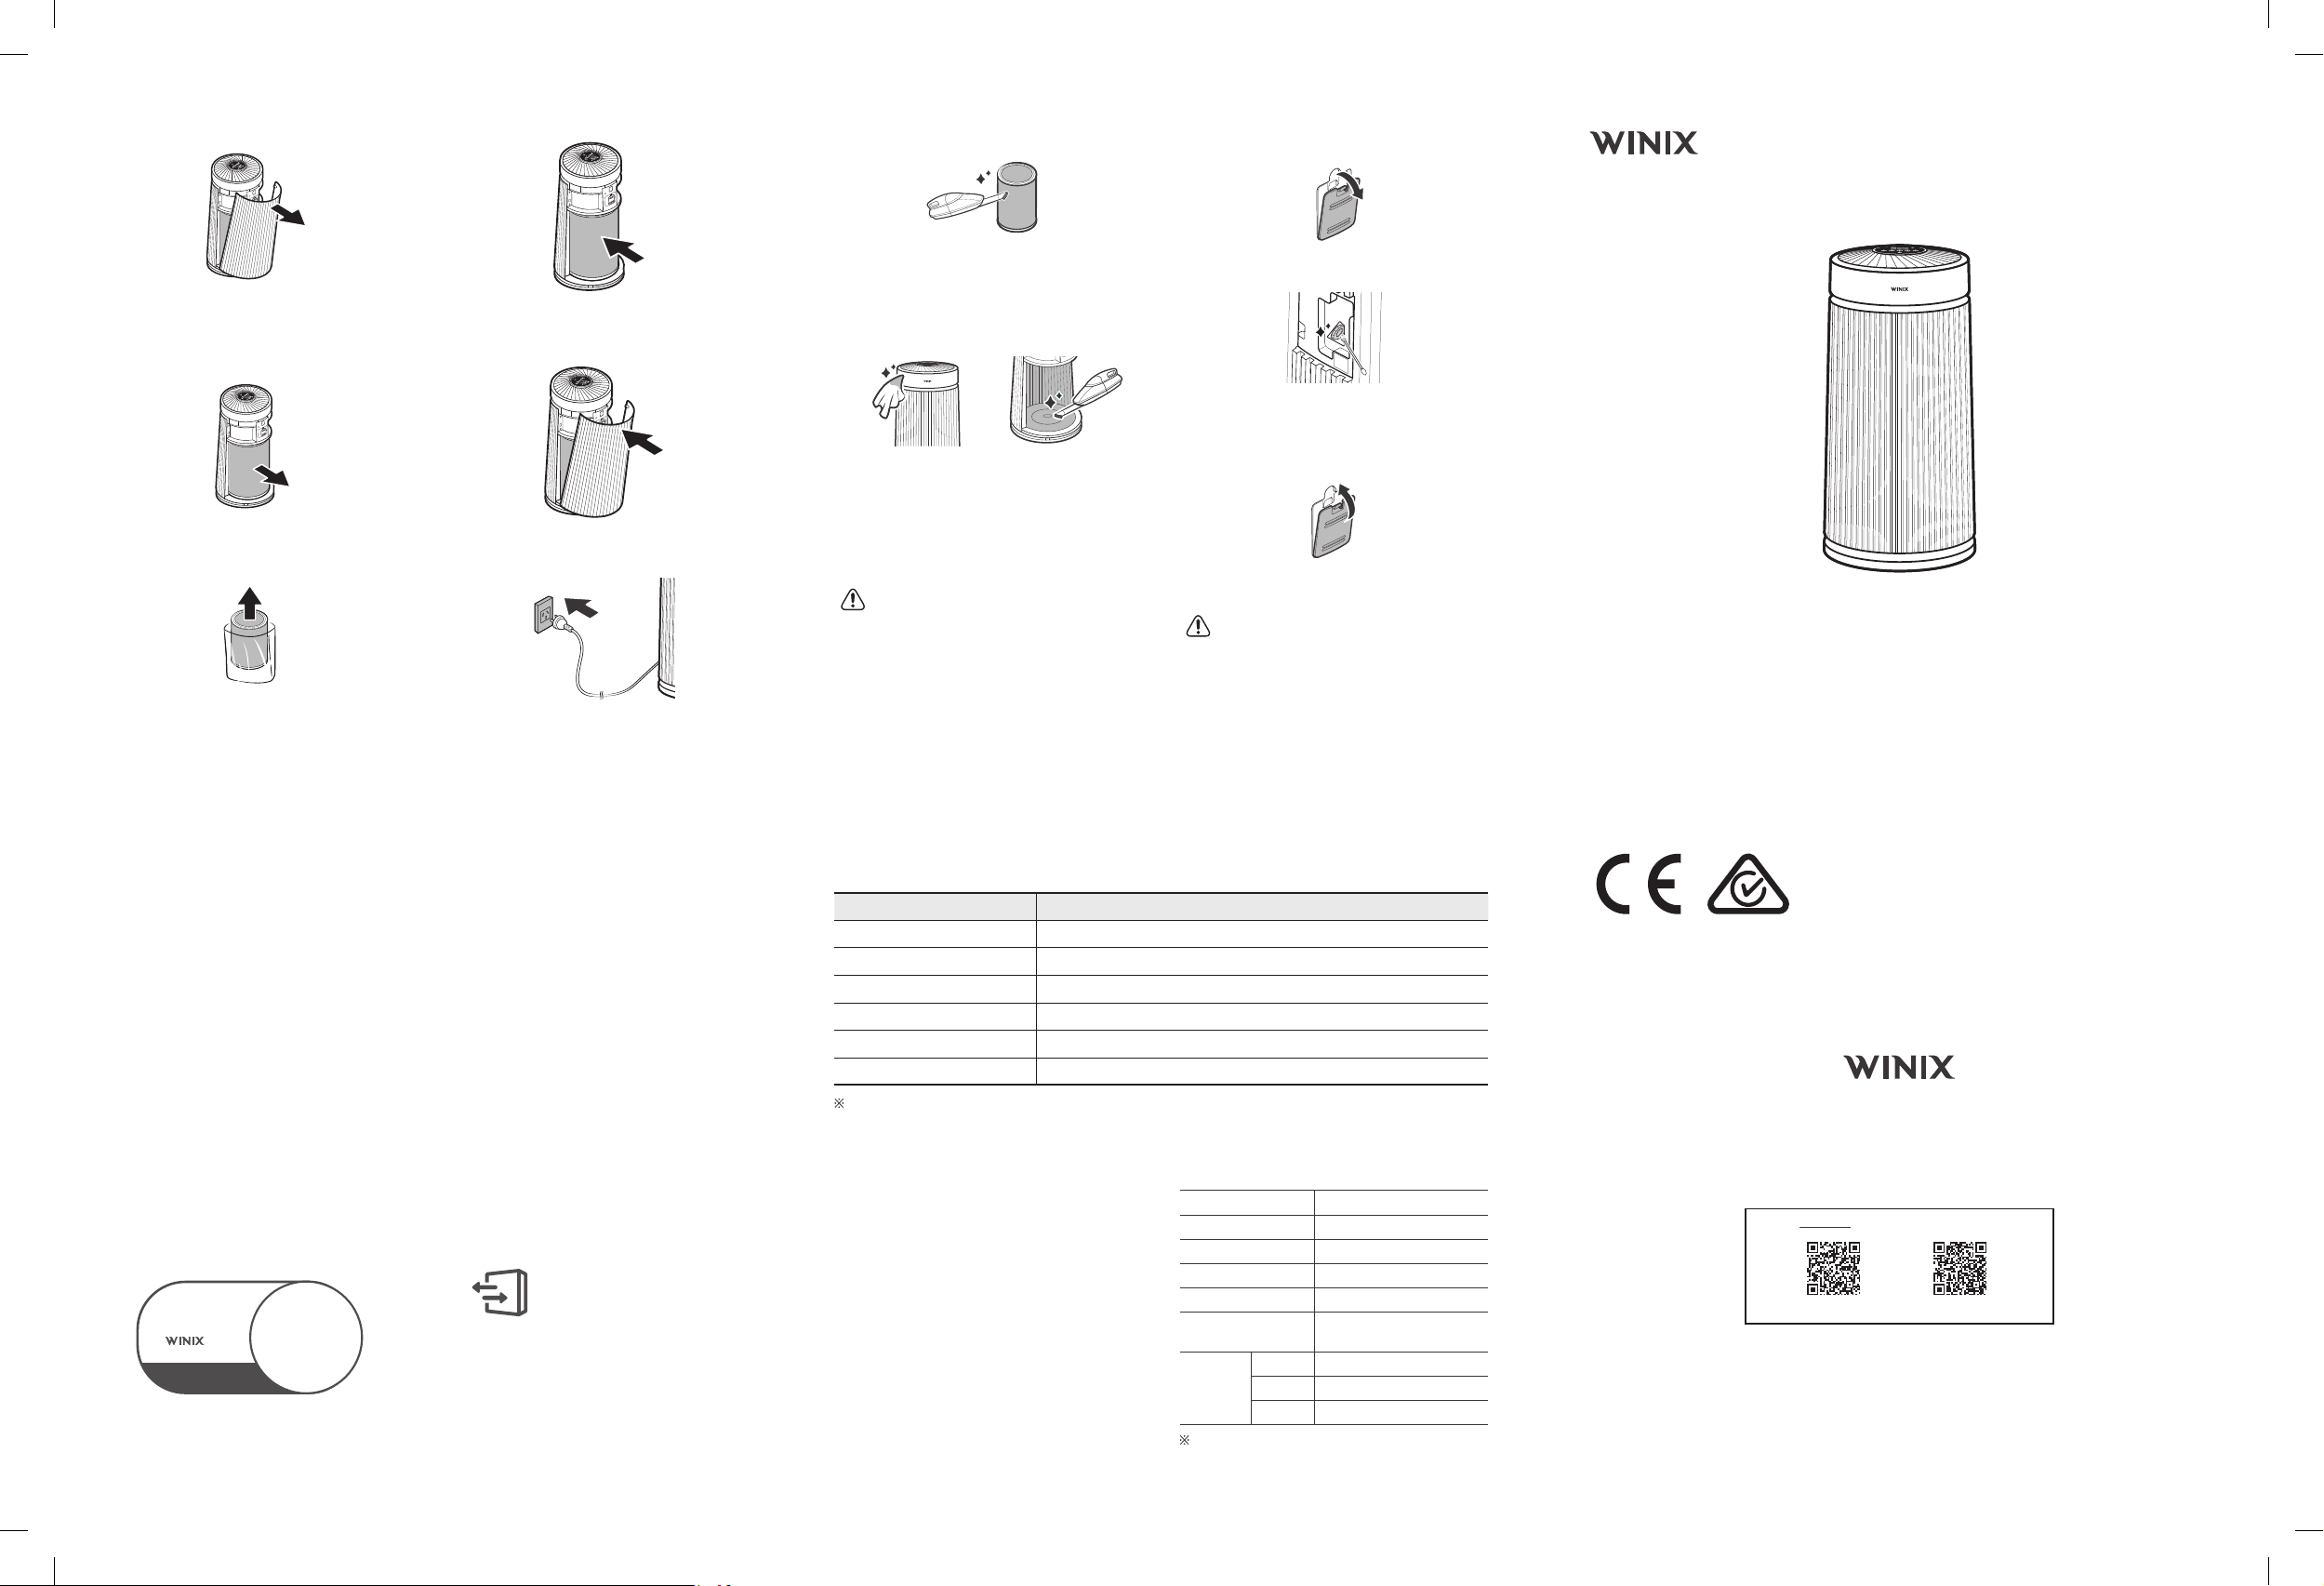
1.
When removing the rear cover, grasp the handle at
the top center and pull forward to remove.
2.
Hold the filter handle and pull out the filter.
3.
Remove the protective vinyl from the filter
installed inside the product.
4.
nsert the filter with the top side facing upward, and
push it in until it is fully seated.
If the filter is not inserted properly, performance may
be reduced.
5.
After installing the filter, first insert the bottom
center hook, then fit the side hooks into their slots
and close the rear cover.
6.
Return the product to an upright position and
resume normal operation.
CLEANING CARE
Cleaning the Filters:
Clean with a vacuum or a soft brush.
•
Only clean the Pre-Filter.
•
This filter CAN NOT be washed.
•
Intervals between filter cleaning may vary
depending on the air quality.
Cleaning the Exterior & Interior:
Wipe with a soft damp cloth using room temperature
water. Afterwards, wipe it down with a clean dry
cloth.
After opening the rear cover, remove the 360º All-
in-One True HEPA Filter and clean the interior with a
vacuum cleaner.
•
For optimal performance, clean every 14days.
NOTICE
•
When cleaning the unit, always unplug the power cord
first and then wait until the unit has cooled down.
•
Never disassemble, repair, or modify this unit yourself.
•
Do not use flammable sprays or liquid detergents.
•
Do not allow children to clean or maintain the unit.
•
Before cleaning or maintaining, ensure unit is
unplugged.
How to disassemble and clean the smart sensor cover
1.
Open the cover of the dust sensor.
2.
Clean the lens and suction port of the dust sensor
with a damp cotton swab, and then use a dry
cotton swab to clean the dust sensor.
(Cleaning frequency: Once every two months)
3.
Close the cover of the dust sensor until you hear a
clicking sound.
NOTICE
•
Do not use benzene, alcohol, or other volatile fluids,
which may cause damage or discoloration.
•
Do not clean the sensor with volatile substances such
as water, alcohol, or acetone.
If not cleaned regularly, the performance of the dust
sensor may deteriorate.
To expedite service, please specify the model name and number,
the nature of the problem, your contact information, and your address.
Contact for product
related inquiries and
customer service
After sales and warranty enquiries, visit website
Website : www.ausclimate.com.au / www.ausclimate.co.nz
Distributed by the
CDB Group
2610-0388-00 Rev.00
WINIX REPLACEMENT FILTER CLUB
For exclusive savings on replacement filters
AUSTRALIA NEW ZEALAND
PRODUCT WARRANTY
The terms of the warranty are as follows.
1.
This product is manufactured under stringent
quality control and inspections.
2.
The warranty will be voided if product failure is a
result of negligence or misuse by the consumer,
shipping and service fees may be incurred even
during the warranty period.
3.
A proof of purchase must be presented upon
claiming a Product Warranty.
4.
Store the proof of purchase in a safe place.
5.
This warranty is valid only in Australia or
NewZealand.
For more information, visit:
www.ausclimate.com.au
www.ausclimate.co.nz
Product Name Air Purifier
Model Name T1000(AU)
Purchase Date
Warranty Period Two (2) years
Place of Purchase
Place of
Purchase Tel.
Customer
Address
Name
Tel.
After purchase, be sure to complete all of the above
information.
UNIT SPECIFICATIONS
Model Name T1000(AU)
Power Voltage AC 220 - 240 V, 50 / 60 Hz
Power Rate 65W
Verified Room Size 299 m
2
Dimensions ø 395 mm X 804 mm (H)
Weight 11 kg
Replacement Filter FILTER XS / SKU : 1712-0128-00
The exterior, design, and product specifications may be changed without prior notice to improve product performance.
REPLACING FILTERS
item : 1712-0128-00
this unit
is compatible
with this
filter
FILTER
XS
Resetting Filter Life:
After replacing the 360° All-in-
one True HEPA Filter, While the
unit is on, hold the Filter Reset
Button for at least 5seconds
until you hear the beep. After
the beep, the Filter Replacement
Indicator will disappear.


Delta i konversationen om denna produkt
Här kan du dela vad du tycker om Winix T1000(AU) Luftrenare. Om du har en fråga, läs först noggrant igenom manualen. Att begära en manual kan göras genom att använda vårt kontaktformulär.