
CM1280
EN | Instruction manual
NL | Gebruiksaanwijzing
FR | Mode d’emploi
DE | Bedienungsanleitung
ES | Manual de usuario
PT | Manual de utilizador
IT | Manuele utente
SV | Bruksanvisning
PL | Instrukcja obsługi
CS | Návod na použití
SK | Návod na použitie
RU | Руководство по
эксплуатации
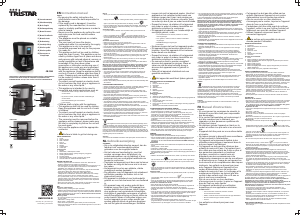
PARTS DESCRIPTION / ONDERDELENBESCHRIJVING / DESCRIPTION DES PIÈCES / TEILEBESCHREIBUNG /
DESCRIPCIÓN DE LAS PIEZAS / DESCRIÇÃO DOS COMPONENTES / DESCRIZIONE DELLE PARTI /
BESKRIVNING AV DELAR / OPIS CZĘŚCI / POPIS SOUČÁSTÍ / POPIS SÚČASTÍ / ПИСАНИЕ ЗАПЧАСТИ
CONTROL PANEL
1
5
8
2
3
4
3
4
2
1
5
6
7
6
7
WWW.TRISTAR.EU
Tristar Europe B.V. | Jules Verneweg 87
5015 BH Tilburg | The Netherlands
ENInstruction manual
SAFETY
• By ignoring the safety instructions the
manufacturer cannot be held responsible for
the damage.
• If the supply cord is damaged, it must be
replaced by the manufacturer, its service
agent or similarly qualified persons in order to
avoid a hazard.
• Never move the appliance by pulling the cord
and make sure the cord cannot become
entangled.
• The appliance must be placed on a stable,
level surface.
• The user must not leave the device
unattended while it is connected to the supply.
• This appliance is only to be used for
household purposes and only for the purpose
it is made for.
• This appliance shall not be used by children
aged less than 8 years. This appliance can be
used by children aged from 8 years and above
and persons with reduced physical, sensory or
mental capabilities or lack of experience and
knowledge if they have been given
supervision or instruction concerning use of
the appliance in a safe way and understand
the hazards involved. Children shall not play
with the appliance. Keep the appliance and its
cord out of reach of children aged less than 8
years. Cleaning and user maintenance shall
not be made by children unless older than 8
and supervised.
• To protect yourself against an electric shock,
do not immerse the cord, plug or appliance in
the water or any other liquid.
• This appliance is intended to be used in
household and similar applications such as:
– Staff kitchen areas in shops, offices and other working
environments.
– By clients in hotels, motels and other residential type
environments.
– Bed and breakfast type environments.
– Farm houses.
• Children shall not play with the appliance.
• This appliance shall not be used by children.
Keep the appliance and its cord out of reach
of children.
• To protect yourself against an electric shock,
do not immerse the cord, plug or appliance in
the water or any other liquid.
• The connector must be removed before the
appliance will be cleaned, please make sure
the inlet is completely dry before the unit will
be used again.
• Only use the appliance with the appropriate
connector.
• Surface is liable to get hot during use.
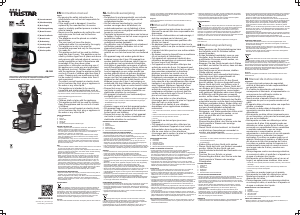
PARTS DESCRIPTION
1. Cover
2. Open lid button
3. Filter / Strainer
4. Funnel
5. Water tank
6. Display
7. Control panel
8. Coffee pot
Control panel
1. Display
2. Start button, ON/Off power switch
3. Minute settings button, quickly change by long press
4. Grinding beans button
5. Program button
6. Hour settings button, quickly change by long press
7. Ground button for automatic brewed coffee
BEFORE THE FIRST USE
• Take the appliance andaccessoriesoutthebox.Removethe
stickers,protective foilorplasticfrom thedevice.
• Place the device on a flat stable surface and ensure a minimum of 10
cm. free space around the device. This device is not suitable for
installation in a cabinet or for outside use.
• Before using your appliance for the first time, wipe off all removable
parts with a damp cloth. Never use abrasive products.
• Plug the power cable into a socket.(Note: Make surethe
voltagewhich is indicated on the devicematchesthe localvoltage
beforeconnecting the device.Voltage220V-240V 50Hz).
• For a perfect taste, carry out 2 or 3 boil processes with fresh water
(without coffee). Once all the water has passed through, switch the
appliance off and let it cool down during 5 minutes. Then repeat the
process with fresh water.
• Never pour hot water, milk, coffee powder or tea into the water tank.
• Do not fill the water tank beyond the 6 cup indication.
USE
Using the coffee brewer
• Open the lid by pressing the open lid button.
• Slide the filter basket into the holder until it snaps into place. Place the
strainer properly. Put the beans or ground coffee (maximum allowed to
add 6-7 tablespoons) into the strainer. Beans should not exceed the
MAX mark on the strainer
Brewing coffee
• The amount of water you pour into the water tank defines the strength
of your coffee.
• Little water = strong coffee
• Much water = weak coffee
• Close the lid and place the glass coffee pot onto the hot plate.
• Plug in the power cord. When the red indicator light turns on, the lid is
not properly closed.
Beans
• When you have filled the strainer with beans, press the Bean button. The
display will show for coarse grinded coffee, press the Bean button
again if you want fine grinded coffee, the display will show .
• Press the Start button, the green indicator light will flash. The device will
start to grind and brew coffee automatically. The hot plate will be kept
warm for 38 minutes.
Grounded coffee
• If you have fille the strainer with grounded coffee, press the Ground
button. The display will show . The green indicator will be on.
• Press the Start button, the green indicator light will flash and the coffee
will be brewed automatically. The hot plate will be kept warm for 38
minutes.
Automatic start function
• Make sure the clock is set to the current time.
• Set the automatic start time by pressing the Program button until the
digits in the display begin to flash.
• Use the Hour and Minute button to set the desired start time.
• Press Bean or Ground button to set the brew method. Wait 5 seconds,
the program sign on the display will change to ‘auto’. The program is set.
• When the set time is reached, the green indicator light will start to flash
and the device will brew coffee automatically. The hot plate will be kept
warm for 38 minutes.
• To modify the set program, long press the Program button for 2 seconds.
Within 5 seconds, you can adjust the time by pressing the Hour and
Minute button.
• The Program button also has a memory function if it is not unplugged
from the power socket. It will start at the last set time.
You can manually stop the brewing process by pressing the Start button.
The device will stop brewing immediately.
Warning: Do not open the lid of the device when it is brewing. If you
open the lid, the device will turn off automatically. Do not touch the
heated parts inside the machine. When it is necessary to restart,
unplug the device and check if the funnel and filter are in place
before closing the top cover.
• The glass jug can remain on the hotplate, which starts to heat up as
soon as the coffee maker is switched on. The hotplate will keep the
coffee hot.
• Do not leave an empty pot on the hot plate, or it may break.
• Do not use the brewer without water, it will reduce the service life.
• After brewing, it should be cooled for at least 5 minutes before you start
a new brewing process.
• NOTE: due to safety reasons the hot plate will turn off automatically after
38 minutes.
CLEANING AND MANTENANCE
• Always unplug the device and let it cool down completely before cleaning
• Clean the outside and the base of the device with a damped cloth.
• Never immerse the appliance in water or other liquid.
• All the non-electrical parts can be washed in warm soapy water. Dry
thoroughly before reusing. These parts are not dishwasher safe. Never
use abrasive detergents.
• Dry all the parts after cleaning thoroughly.
• Make sure always remove the remaining beans. Keep the grinder and
the grinder compartment clean when the appliance is not used regularly,
to prevent clogging of the grinder compartment.
Cleaning mineral deposits
• The appliance has to be descaled every month, otherwise the coffee
taste will become bad and the scale deposited inside in the machine may
cause permanent and irreparable damage to the machine.
• Use detergent, which can be obtained from specialist shops, and follow
the instructions given.
• Mix adequate descaler with cold water in a measuring jug as per its
instructions. Fill the water tank up to the Max level with the prepared
descaling solution. Then put the water tank back into the machine.
• Press the ground coffee button, the indicator light will turn on, press the
Start button, the appliance will start the cleaning procedure.
• Make sure you always rinse the device with clear water after rinse it with
the water/descaler mixture.
ENVIRONMENT
This appliance should not be put into the domestic garbage at the
end of its durability, but must be offered at a central point for the recycling
of electric and electronic domestic appliances. This symbol on the
appliance, instruction manual and packaging puts your attention to this
important issue. The materials used in this appliance can be recycled. By
recycling of used domestic appliances you contribute an important push to
the protection of our environment. Ask your local authorities for information
regarding the point of recollection.
Support
You can find all available information and spare parts at www.tristar.eu!
NLGebruiksaanwijzing
VEILIGHEID
• Als u de veiligheidsinstructies negeert, kan de
fabrikant niet verantwoordelijk worden
gehouden voor de mogelijke schade.
• Als het netsnoer beschadigd is, moet het
worden vervangen door de fabrikant, de
onderhoudsmonteur van de fabrikant of door
personen met een soortgelijke kwalificatie om
gevaar te voorkomen.
• Verplaats het apparaat nooit door aan het snoer
te trekken en zorg dat het snoer niet in de war
kan raken.
• Het apparaat moet op een stabiele, vlakke
ondergrond worden geplaatst.
• De gebruiker mag het apparaat niet onbeheerd
achterlaten wanneer de stekker zich in het
stopcontact bevindt.
• Dit apparaat is uitsluitend voor huishoudelijk
gebruik en voor het doel waar het voor bestemd
is.
• Dit apparaat mag niet worden gebruikt door
kinderen jonger dan 8 jaar. Dit apparaat kan
worden gebruikt door kinderen vanaf 8 jaar en
door personen met verminderde lichamelijke,
zintuiglijke of geestelijke vermogens of gebrek
aan de benodigde ervaring en kennis indien ze
onder toezicht staan of instructies krijgen over
hoe het apparaat op een veilige manier kan
worden gebruikt alsook de gevaren begrijpen
die met het gebruik samenhangen. Kinderen
mogen niet met het apparaat spelen. Houd het
apparaat en het netsnoer buiten bereik van
kinderen jonger dan 8 jaar. Laat reiniging en
onderhoud niet door kinderen uitvoeren, tenzij
ze ouder zijn dan 8 jaar en onder toezicht staan.
• Dompel het snoer, de stekker of het apparaat
niet onder in water of andere vloeistoffen om
elektrische schokken te voorkomen.
• Dit apparaat is bedoeld voor huishoudelijk en
soortgelijk gebruik, zoals:
– Personeelskeukens in winkels, kantoren en andere
werkomgevingen.
– Door gasten in hotels, motels en andere residentiële
omgevingen.
– Bed&Breakfast-type omgevingen.
– Boerderijen.
• Kinderen mogen niet met het apparaat spelen.
• Dit apparaat mag niet worden gebruikt door
kinderen. Houd het apparaat en het netsnoer
buiten bereik van kinderen.
• Dompel het snoer, de stekker of het apparaat
niet onder in water of andere vloeistoffen om
elektrische schokken te voorkomen.
• De connector dient te worden verwijderd
alvorens het apparaat te reinigen. Wees er
zeker van dat de inlaat volledig droog is
alvorens het apparaat weer in gebruik te
nemen.
• Gebruik het apparaat uitsluitend met een
geschikte connector.
• Het oppervlak wordt heet tijdens gebruik.
BESCHRIJVING VAN DE ONDERDELEN
1. Deksel
2. Knop om deksel te openen
3. Filter/zeef
4. Trechter
5. Waterreservoir
6. Display
7. Bedieningspaneel
8. Koffiepot
Bedieningspaneel
1. Display
2. Startknop, aan/uit-schakelaar
3. Knop om de minuten in te stellen; snel wijzigen door lang ingedrukt te
houden
4. Knop voor het malen van bonen
5. Programmaknop
6. Knop voor om de uren in te stellen; snel wijzigen door lang ingedrukt
te houden
7. Maalknop om automatisch koffie te zetten
VOORAFGAAND AAN HET EERSTE GEBRUIK
• Haal het apparaat en de accessoires uit de doos.Verwijder de stickers,
de beschermfolie of het plastic van het apparaat.
• Plaats het apparaat op een vlakke, stabiele ondergrond. Zorg voor
minimaal 10 cm vrije ruimte rondom het apparaat. Dit apparaat is niet
geschikt voor inbouw of gebruik buitenshuis.
• Veeg voor het eerste gebruik van het apparaat alle afneembare
onderdelen af met een vochtige doek. Gebruik nooit schurende
producten.
• Steek de stekker in het stopcontact.(Opmerking: controleer of het
voltage op het apparaat overeenkomt met de plaatselijke netspanning
voordat u het apparaat aansluit.Voltage 220 - 240 V, 50 Hz.)
• Laat het apparaat eerst 2 of 3 maal met zuiver water doorlopen (zonder
koffie). Is het water doorgelopen, schakel dan het apparaat uit en laat het
5 minuten afkoelen. Herhaal vervolgens de procedure met zuiver water.
• Giet nooit heet water, melk, koffiepoeder of thee in het waterreservoir.
• Vul het waterreservoir niet verder dan de aanduiding voor 6kopjes.
GEBRUIK
Het koffiezetapparaat gebruiken
• Open het deksel door op de betreffende knop te drukken.
• Schuif het filtermandje in de houder totdat het vastklikt. Plaats de zeef
correct. Doe de bonen of gemalen koffie (maximaal toegestaan: 6-7
eetlepels) in de zeef. Vul de zeef niet verder dan de MAX-markering
met bonen
Koffiezetten
• De hoeveelheid water in het waterreservoir bepaalt hoe sterk de koffie
wordt.
• Weinig water = sterke koffie
• Veel water = slappe koffie
• Sluit het deksel en plaats de glazen koffiepot op de warmhoudplaat.
• Steek de stekker in het stopcontact. Als het rode lampje gaat branden, is
het deksel niet goed gesloten.
Bonen
• Nadat u de zeef hebt gevuld met bonen, drukt u op de knop voor bonen.
Op het scherm ziet u voor grof gemalen koffie. Druk nogmaals op
de knop voor bonen als u fijn gemalen koffie wilt. Op het scherm ziet u
.
• Druk op de startknop; het groene lampje gaat knipperen. Het apparaat
begint automatisch te malen en koffie te zetten. De warmhoudplaat blijft
38minuten warm.
Gemalen koffie
• Wanneer u de zeef hebt gevuld met gemalen koffie, drukt u op de knop
voor gemalen koffie. Op het scherm ziet u . Het groene lampje
gaat branden.
• Druk op de startknop; het groene lampje gaat knipperen en de koffie
wordt automatisch gezet. De warmhoudplaat blijft 38minuten warm.
Functie voor automatisch starten
• Zorg dat de klok op de juiste tijd is ingesteld.
• Stel de automatische begintijd in door de programmaknop ingedrukt te
houden tot de cijfers op het display beginnen te knipperen.
• Gebruik de knoppen voor uren en minuten om de gewenste begintijd in
te stellen.
• Druk op de knop voor bonen of gemalen koffie om de gewenste methode
in te stellen. Wacht 5seconden. De programma-indicator op het display
verandert in 'auto'. U hebt het programma ingesteld.
• Op het ingestelde tijdstip gaat het groene lampje knipperen en begint het
apparaat automatisch koffie te zetten. De warmhoudplaat blijft
38minuten warm.
• Als u het ingestelde programma wilt wijzigen, houdt u de
programmaknop 2seconden ingedrukt. U kunt binnen 5seconden de tijd
aanpassen door op de knoppen voor uren en minuten te drukken.
• De programmaknop heeft ook een geheugenfunctie, zolang u de stekker
van het apparaat niet uit het stopcontact haalt. Met deze functie wordt de
laatst ingestelde tijd opnieuw gebruikt.
U kunt het koffiezetten handmatig stoppen door op de startknop te
drukken. Het apparaat stopt dan direct met koffiezetten.
Waarschuwing: Open het deksel niet terwijl het koffiezetten bezig is.
Als u dat wel doet, wordt het apparaat automatisch uitgeschakeld.
Raak de warme onderdelen in het apparaat niet aan. Wanneer u het
apparaat opnieuw moet starten, haalt u de stekker uit het stopcontact
en controleert u of de trechter en het filter goed zijn geplaatst
voordat u het deksel sluit.
• U kunt de glazen pot op de warmhoudplaat laten staan. De plaat wordt
opgewarmd zodra u het koffiezetapparaat inschakelt. De warmhoudplaat
houdt de koffie op temperatuur.
• Laat geen lege pot op de warmhoudplaat staan; de pot kan dan barsten.
• Gebruik het koffiezetapparaat niet zonder water; hierdoor gaat het
apparaat minder lang mee.
• Laat het apparaat na gebruik minstens 5minuten afkoelen voordat u
opnieuw koffie zet.
• OPMERKING: de warmhoudplaat wordt voor de veiligheid na 38minuten
automatisch uitgeschakeld.
REINIGING EN ONDERHOUD
• Verwijder voor reiniging altijd de stekker uit het stopcontact en laat het
apparaat volledig afkoelen.
• Reinig de buitenzijde en de voet van het apparaat met een vochtige
doek.
• Dompel het apparaat nooit onder in water of een andere vloeistof.
• U kunt alle niet-elektrische onderdelen in een warm sopje afwassen.
Droog ze zorgvuldig voordat u de machine weer gaat gebruiken. Deze
onderdelen zijn niet geschikt voor de vaatwasser. Gebruik nooit
schurende reinigingsmiddelen.
• Droog na het reinigen alle onderdelen zorgvuldig.
• Zorg dat u achtergebleven bonen altijd verwijdert. Houd de molen en het
maalcompartiment schoon wanneer u het apparaat niet regelmatig
gebruikt. Zo voorkomt u dat het maalcompartiment verstopt raakt.
Verwijderen van kalkafzetting
• Ontkalk het apparaat maandelijks, anders krijgt de koffie een nare smaak
en kan kalkaanslag de machine blijvend en onherstelbaar beschadigen.
• Gebruik een bij een gespecialiseerde winkel verkrijgbaar
reinigingsmiddel en volg de gegeven instructies op.
• Meng voldoende ontkalkingsmiddel volgens de instructies met koud
water in een maatbeker. Vul het waterreservoir tot het maximumniveau
met de bereide ontkalkingsoplossing. Plaats vervolgens het
waterreservoir terug in de machine.
• Druk op de knop voor gemalen koffie. Het lampje gaat branden. Druk
vervolgens op de startknop om zo de reinigingsprocedure van het
apparaat te starten.
• Spoel het apparaat na het ontkalken altijd na met schoon water.
MILIEU
Dit apparaat mag aan het einde van de levensduur niet bij het
normale huisafval worden gedeponeerd, maar moet bij een speciaal
inzamelpunt voor hergebruik van elektrische en elektronische apparaten
worden aangeboden. Het symbool op het apparaat, in de
gebruiksaanwijzing en op de verpakking attendeert u hierop. De in het
apparaat gebruikte materialen kunnen worden gerecycled. Met het
recyclen van gebruikte huishoudelijke apparaten levert u een belangrijke
bijdrage aan de bescherming van ons milieu. Informeer bij uw lokale
overheid naar het inzamelpunt.
Support
U kunt alle beschikbare informatie en reserveonderdelen vinden op
www.tristar.eu!
FRManuel d'instructions
SÉCURITÉ
• Si vous ignorez les consignes de sécurité, le
fabricant ne peut être tenu pour responsable
des dommages.
• Si le cordon d'alimentation est endommagé, il
doit être remplacé par le fabricant, son
réparateur ou des personnes qualifiées afin
d'éviter tout risque.
• Ne déplacez jamais l'appareil en tirant sur le
cordon et veillez à ce que celui-ci ne s'enroule
pas.
• L'appareil doit être posé sur une surface stable
et nivelée.
• Ne laissez jamais le dispositif sans surveillance
s'il est connecté à l'alimentation.
• Cet appareil est uniquement destiné à des
utilisations domestiques et seulement dans le
but pour lequel il est fabriqué.
• Cet appareil ne doit pas être utilisé par des
enfants de moins de 8 ans. Cet appareil peut
être utilisé par des enfants de 8 ans ou plus et
des personnes présentant un handicap
physique, sensoriel ou mental voire ne
disposant pas des connaissances et de
l'expérience nécessaires en cas de surveillance
ou d'instructions sur l'usage de cet appareil en
toute sécurité et de compréhension des risques
impliqués. Les enfants ne doivent pas jouer
avec l'appareil. Maintenez l'appareil et son
cordon d'alimentation hors de portée des
enfants de moins de 8 ans. Le nettoyage et la
maintenance utilisateur ne doivent pas être
confiés à des enfants sauf s'ils ont 8 ans ou
plus et sont sous surveillance.
• Afin de vous éviter un choc électrique,
n'immergez pas le cordon, la prise ou l'appareil
dans de l'eau ou autre liquide.
• Cet appareil est destiné à une utilisation
domestique et aux applications similaires,
notamment:
– Coin cuisine des commerces, bureaux et autres
environnements de travail.
– Hôtels, motels et autres environnements de type résidentiel.
– Environnements de type chambre d’hôtes.
– Fermes.
• Les enfants ne doivent pas jouer avec
l'appareil.
• Cet appareil ne doit pas être utilisé par les
enfants. Maintenez l'appareil et son cordon
d'alimentation hors de portée des enfants.
• Afin de vous éviter un choc électrique,
n'immergez pas le cordon, la prise ou l'appareil
dans de l'eau ou autre liquide .
• L’adaptateur doit être retiré avant de nettoyer
l’appareil, veillez à ce que l'orifice d'entrée soit
totalement sec avant de réutiliser l'appareil.
• Utilisez l’appareil uniquement avec le
connecteur approprié.
• La surface est susceptible de devenir
chaude pendant l'utilisation.
DESCRIPTION DES PIÈCES
1. Couvercle
2. Bouton d'ouverture du couvercle
3. Filtre/Tamis
4. Entonnoir
5. Réservoir d'eau
6. Écran
7. Panneau de commande
8. Verseuse
Panneau de commande
1. Écran
2. Bouton Démarrer, interrupteur Marche/Arrêt
3. Bouton de réglage des minutes, appuyer longuement pour les faire
défiler rapidement
4. Bouton Café en grain
5. Bouton de programme
6. Bouton de réglage des heures, appuyer longuement pour les faire
défiler rapidement
7. Bouton Café moulu pour préparation automatique
AVANT LA PREMIÈRE UTILISATION
• Sortez l'appareil et les accessoires hors de la boîte.Retirez les
autocollants, le film protecteur ou le plastique de l'appareil.
• Mettez l'appareil sur une surface stable plate et assurez un dégagement
tout autour de l'appareil d'au moins 10 cm. Cet appareil ne convient pas
à une installation dans une armoire ou à un usage à l'extérieur.
• Avant la première utilisation de votre appareil, essuyez toutes les pièces
amovibles avec un chiffon humide. N’utilisez jamais de produits abrasifs.
• Mettez le câble d'alimentation dans la prise.(Remarque: Assurez-vous
que la tension indiquée sur l'appareil correspond à la tension locale
avant de brancher l'appareil.Tension 220V-240V 50 Hz).
• Pour éliminer tout mauvais goût, effectuer 2 ou 3 cycles de chauffe
complets avec de l’eau fraîche (sans café). Une fois que toute l’eau est
passée, éteindre l’appareil et le laisser refroidir pendant 5 minutes. Puis
réitérer le processus avec de l’eau fraîche.
• Ne versez jamais d'eau chaude, lait, poudre de café ou thé dans le
réservoir d'eau.
• Ne remplissez pas le réservoir d'eau au-delà de la limite de 6tasses.
UTILISATION
Utilisation de la cafetière
• Ouvrez le couvercle en appuyant sur le bouton d'ouverture du couvercle.
• Faites glisser le porte-filtre dans le support jusqu'à ce qu'il s'enclenche.
Placez correctement le tamis. Mettez les grains ou le café moulu
(6-7cuillères à soupe maximum) dans le tamis. La hauteur des grains
ne doit jamais dépasser la marque MAX sur le tamis.
Préparation du café
• La force du café dépend de la quantité d'eau que vous versez dans le
réservoir.
• Peu d'eau = Café fort
• Beaucoup d'eau = Café léger
• Fermez le couvercle et placez la verseuse en verre sur la plaque
chauffante.
• Branchez la cafetière sur une prise secteur. Si le voyant rouge s'allume,
le couvercle n'est pas correctement fermé.
Café en grain
• Une fois que vous avez rempli le tamis de grains de café, appuyez sur le
bouton Bean (Café en grain). L'écran affiche pour un café moulu
grossièrement. Appuyez à nouveau sur le bouton si vous voulez un café
moulu fin, l'écran affiche .
• Appuyez sur le bouton Démarrer. Le voyant vert se met à clignoter. La
cafetière commence à moudre et à préparer le café automatiquement.
La plaque chauffante reste chaude pendant 38minutes.
Café moulu
• Si vous avez rempli le tamis de café moulu, appuyez sur le bouton
Ground (Café moulu). L'écran affiche . Le voyant vert s'allume.
• Appuyez sur le bouton Démarrer. Le voyant vert se met à clignoter et le
café est automatiquement préparé. La plaque chauffante reste chaude
pendant 38minutes.
Fonction de démarrage automatique
• Assurez-vous que la minuterie est bien réglée sur la bonne heure.
• Réglez l'heure de démarrage automatique en appuyant sur le bouton
Programme jusqu'à ce que les chiffres se mettent à clignoter sur l'écran.
• Utilisez les boutons de réglage de l'heure et des minutes pour régler
l'heure de démarrage souhaitée.
• Appuyez sur le bouton Bean (Café en grain) ou Ground (Café moulu)
pour régler la méthode de préparation. Attendez 5secondes, puis
l'indication du programme à l'écran passe à «auto». Le programme est
réglé.
• Lorsque l'heure de démarrage arrive, le voyant vert se met à clignoter et
la cafetière commence à préparer automatiquement le café. La plaque
chauffante reste chaude pendant 38minutes.
• Pour modifier le programme, appuyez 2secondes sur le bouton
Programme. Après 5secondes, vous pourrez modifier l'heure de
démarrage en appuyant sur le bouton de réglage de l'heure et des
minutes.
• Le bouton Programme dispose également d'une fonction mémoire qui
reste active tant que la cafetière n'est pas débranchée. La cafetière
démarrera à la dernière heure de démarrage réglée.
Vous pouvez arrêter manuellement la préparation du café en appuyant sur
le bouton Démarrer. La cafetière arrêtera aussitôt la préparation.
Avertissement: N'ouvrez pas le couvercle de l'appareil pendant la
préparation. Si vous ouvrez le couvercle, l'appareil s'éteint
automatiquement. Ne touchez pas les parties chaudes à l'intérieur de
l'appareil. Lorsqu'il est nécessaire de redémarrer l'appareil,
débranchez-le et vérifiez que l'entonnoir et le filtre sont bien de place
avant de fermer le couvercle.
• La verseuse en verre peut rester sur la plaque chauffante, qui
commence à chauffer dès que la cafetière est allumée. La plaque
chauffante tient le café au chaud.
• Ne laissez aucun récipient vide sur la plaque chauffante, car il pourrait
se briser.
• N'utilisez pas la cafetière sans eau, car cela réduira sa durée de vie.
• Une fois le café préparé, laissez la cafetière reposer pendant au moins
5minutes avant de préparer un nouveau café.
• NOTE: pour des raisons de sécurité, la plaque chauffante s'arrête
automatiquement au bout de 38minutes.
NETTOYAGE ET ENTRETIEN
• Débranchez toujours l’appareil et laissez-le refroidir complètement avant
de le nettoyer.



Delta i konversationen om denna produkt
Här kan du dela vad du tycker om Tristar CM-1280 Kaffebryggare. Om du har en fråga, läs först noggrant igenom manualen. Att begära en manual kan göras genom att använda vårt kontaktformulär.