
5
ENGLISH
FRANÇAISDEUTSCHNEDERLANDSESPAÑOL
ITALIANO
PORTUGUÊS
SVENSKA
NOTES ON INSTALLATION
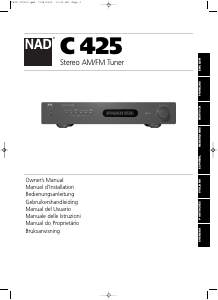
Your NAD C 425 should be placed on a firm, level surface. Avoid placing
the unit in direct sunlight, near sources of heat and damp or in poorly
ventilated positions. It comes with RCA leads for connection to your
amplifier. Ensure that leads and connectors are not damaged in any way
and all connectors are firmly pushed home.
If the unit is not going to be used for some time, disconnect the plug
from the AC socket. Should water get into your NAD C 425, shut off the
power to the unit and remove the plug from the AC socket. Have the
unit inspected by a qualified service technician before attempting to use
it again.
DO NOT REMOVE THE COVER; THERE ARE NO USER-
SERVICEABLE PARTS INSIDE.
Use a dry soft cloth to clean the unit. If necessary, lightly dampen the
cloth with soapy water. Do not use solutions containing benzyl or other
volatile agents.
QUICK START
Use the RCA-to-RCA lead to connect the NAD C 425 left & right outputs
to the Tuner Input of your amplifier.
1 Connect C 425’s output to amplifier.
2 Connect AM and FM antenna (see figure 3).
3 Plug in the AC power cord.
4 Press the POWER button (No. 1) to turn on the NAD C 425.
5 Press the AM/FM button (No. 6) to select AM or FM reception.
6 Press Preset/Tune button so that "PRESET" isn’t lit in display; the
tuner is now in Tune mode.
7 Rotate the PRESET/TUNE Control or to select a station.
REAR PANEL CONNECTIONS FIGURE 1
1 FM Antenna - A ribbon wire FM antenna is included and should
be connected to the FM connector at the rear of the unit using the
supplied "balun" adaptor (see figure 3). The ribbon aerial should be
mounted on a vertical surface and placed so that it forms a "T".
Experiment with placement of the antenna to find the position that
gives the best signal strength and lowest background noise. An
inadequate FM signal normally results in high levels of hiss, especially
in stereo, and interference from external electrical sources. In areas of
poor FM reception, the tuner section’s performance can be improved
by using an externally mounted FM antenna. A qualified aerial
installer will be able to advise and fit a recommended aerial for your
reception conditions.
2 AM Antenna - An AM loop antenna is supplied with the NAD
C425 and is required for AM reception. To connect the AM antenna,
first press the keys on the Antenna terminals downwards. Insert the
bare antenna wires into the two terminal holes and push the
connector keys upwards again to secure the connection (see figure
3). Test various positions for the antenna but always ensure the loop
is placed vertically for best reception. Placing the antenna close to
large metal items such as metal shelves or radiators may interfere
with reception.
3 Output - Using twin RCA-to-RCA leads, connect to the left (white)
and right (red) audio outputs to the "Tuner" input or other line-level
input such as "Aux" input of your amplifier. Do not connect this
cable to the amplifier’s "Phono" input.
4 IR in - The IR IN connector is used to pass commands from other
units fitted with IR OUT connectors. This allows centralized control of
a complete system, and also allows some of the basic functions of
other NAD components (such as a CD player or cassette-deck) also
equipped with IR IN to be controlled with an NAD system remote
control. To function with such other units, connect the C 425’s IR IN
to the IR OUT on the other unit. IR IN connectors can be daisy-
chained, IN to OUT, so that a whole system can be controlled from
the remote control facilities of one unit.
NOTE
The NAD C 425 has a built-in receiver for commands from a remote
control and doesn’t need to rely on IR IN to be remotely operated. It
is advisable not to connect IR IN if the other units that have their own
built-in remote control command receiver and are positioned
together, in direct view from the remote control handset. If you are
unsure, try operating the products without IR IN first; if the unit
responds to the remote control command, it will not be necessary to
connect IR IN.
5 +12V Trigger in - This input allows the C 425 to be switched
remotely to Stand-by and On by ancillary equipment such as an
amplifier or preamp, AV processor, etc. which are also equipped with
a 12V trigger output. For switching Stand-by/Power On of the C 425
by an external component, connect the12V-trigger input of the C
425 to the remote component’s DC output jack. The plug required is
a standard 3.5mm Mini-Jack plug ("mono"): The tip is the live or +
connection, the shaft of the input jack is the 12V-trigger – or ground
connection.
NOTE
The C 425’s 12V Trigger will work within a range of 6 to 15 V DC
level and typically draws less than 10mA of current. Check the
specifications of the Trigger output terminal on the remote
component to ensure it is compatible with the C 425’s 12V trigger
input. NAD components equipped with 12V output triggers are fully
compatible with the C 425’s 12V input trigger. Before making any
connections to any 12V trigger input or output, make sure all
components are disconnected from the AC mains. Failure to observe
the above may result in damage to the C 425 or any ancillary
components attached to it. If in doubt over the connections,
installation and operation of the 12V trigger output consult your
NAD dealer.
6 AC Line cord - Plug the AC power cord into a live AC wall socket
or to an AC convenience outlet at the rear of your amplifier.
7 RS-232 - Connect to the RS-232 serial port of a home-automation
system or personal computer (see “System Integration,” below).
Introduction
C425 072006.qxd 7/28/2006 11:31 AM Page 5




Delta i konversationen om denna produkt
Här kan du dela vad du tycker om NAD C 425 Tuner. Om du har en fråga, läs först noggrant igenom manualen. Att begära en manual kan göras genom att använda vårt kontaktformulär.