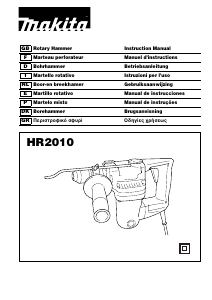
Bruksanvisning Makita HR2010 Borrhammare

Behöver du en bruksanvisning för din Makita HR2010 Borrhammare? Nedan kan du se och ladda ner PDF-bruksanvisningen gratis på svenska. Den här produkten har för närvarande 4 vanliga frågor, 0 kommentarer och har 0 röster. Om det här inte är bruksanvisningen du vill ha, vänligen kontakta oss.

Är produkten defekt och erbjuder bruksanvisningen ingen lösning? Gå till ett Repair Café för gratis reparationstjänster.

Bruksanvisning

Loading…
5
FUNCTIONAL DESCRIPTION
CAUTION:
Always be sure that the tool is switched off and
unplugged before adjusting or checking function on the
tool.
Switch action (Fig.1)
CAUTION:
• Before plugging in the tool, always check to see that
the switch trigger actuates properly and returns to the
“OFF” position when released.
Do not tape, tie or otherwise secure the trigger in the
“ON” position.
To start the tool, simply pull the switch trigger. Tool speed
is increased by increasing pressure on the switch trigger.
Release the trigger to stop.
Torque limiter
The torque limiter will actuate when a certain torque level
is reached. The motor will disengage from the output
shaft. When this happens, the bit will stop turning.
CAUTION:
• As soon as the torque limiter actuates, switch off the
tool immediately. This will help prevent premature wear
of the tool.
Hole saws, core bits, diamond core bits, etc. cannot be
used with this tool. They tend to pinch or catch easily in
the hole. This will cause the torque limiter to actuate
too frequently.
ASSEMBLY
CAUTION:
Always be sure that the tool is switched off and
unplugged before carrying out any work on the tool.
Side grip (auxiliary handle) (Fig. 2)
The side grip swings around to either side, allowing easy
handling of the tool in any position. Loosen the side grip
by turning it counterclockwise, swing it to the desired
position and then tighten it by turning clockwise.
Bit grease
Coat the bit shank head beforehand with a small amount
of bit grease (about 0.5 – 1 g).
This chuck lubrication assures smooth action and longer
service life.
Installing or removing the bit (Fig. 3 & 4)
Clean the bit shank and apply bit grease before installing
the bit.
Insert the bit into the tool. Turn the bit and push it in until
it engages.
If the bit cannot be pushed in, remove the bit. Pull the
chuck cover down a couple of times. Then insert the bit
again. Turn the bit and push it in until it engages.
After installing, always make sure that the bit is securely
held in place by trying to pull it out.
To remove the bit, pull the chuck cover down all the way
and pull the bit out.
Depth gauge (Fig. 5)
The depth gauge is convenient for drilling holes of uni-
form depth. Insert the depth gauge into the hole in the
grip base. Adjust the depth gauge to the desired depth
and then tighten the clamp screw to secure the depth
gauge.
NOTE:
The depth gauge cannot be used at the position where
the depth gauge strikes against the gear housing.
OPERATION
Hammer drilling operation
Position the bit at the desired location for the hole, then
pull the switch trigger. Do not force the tool. Light pres-
sure gives best results. Keep the tool in position and pre-
vent it from slipping away from the hole.
Do not apply more pressure when the hole becomes
clogged with chips or particles. Instead, run the tool at an
idle, then remove the bit partially from the hole. By
repeating this several times, the hole will be cleaned out
and normal drilling may be resumed.
CAUTION:
There is a tremendous and sudden twisting force
exerted on the tool/bit at the time of hole break-
through, when the hole becomes clogged with chips
and particles, or when striking reinforcing rods embed-
ded in the concrete. Always use the side grip (auxiliary
handle) and firmly hold the tool by both side grip and
switch handle during operations. Failure to do so may
result in the loss of control of the tool and potentially
severe injury.
Drilling in wood or metal (Fig. 6)
Use the optional drill chuck assembly (consisting of drill
chuck and chuck adapter assembly). When installing it,
refer to “Installing or removing drill bit” described on the
previous page.
You can drill up to 13 mm diameter in metal and up to
24 mm diameter in wood.
MAINTENANCE
CAUTION:
Always be sure that the tool is switched off and
unplugged before attempting to perform inspection or
maintenance.
Never use gasoline, benzine, thinner, alcohol or the
like. Discoloration, deformation or cracks may result.
Replacing carbon brushes (Fig. 7 & 8)
When the resin insulating tip inside the carbon brush is
exposed to contact the commutator, it will automatically
shut off the motor. When this occurs, both carbon
brushes should be replaced. Keep the carbon brushes
clean and free to slip in the holders. Both carbon brushes
should be replaced at the same time. Use only identical
carbon brushes.
Use a screwdriver to remove the brush holder caps. Take
out the worn carbon brushes, insert the new ones and
secure the brush holder caps.
Lubrication (Fig. 9 & 10)
This tool requires no hourly or daily lubrication because it
has a grease-packed lubrication system. Lubricate the
tool every time the carbon brushes are replaced.
Run the tool for several minutes to warm it up. Switch off
and unplug the tool.
Remove the crank cap using a Makita lock nut wrench
(optional accessory). Rest the tool on the table with the
bit end pointing upwards. This will allow the old grease to
collect inside the crank housing.
Ladda ner bruksanvisning i Engelska (PDF, 0.94 MB)
(Tänk på miljön och skriv endast ut denna bruksanvisning om det verkligen är nödvändigt)

Loading…

Betyg

Berätta vad du tycker om Makita HR2010 Borrhammare genom att betygsätta den. Vill du dela med dig av dina åsikter om denna produkt eller ställa en fråga? Lämna en kommentar nederst på sidan.
Är du nöjd med Makita HR2010 Borrhammare?
Ja Nej
Bli den första personen som betygsätter denna produkt
0 röster

Delta i konversationen om denna produkt

Här kan du dela vad du tycker om Makita HR2010 Borrhammare. Om du har en fråga, läs först noggrant igenom manualen. Att begära en manual kan göras genom att använda vårt kontaktformulär.

Mer om denna bruksanvisning

Vi förstår att det är trevligt att ha en pappersbruksanvisning för din Makita HR2010 Borrhammare. Du kan alltid ladda ner bruksanvisningen från vår hemsida och skriva ut den själv. Om du vill ha en originalbruksanvisning rekommenderar vi att du kontaktar Makita. De kanske kan tillhandahålla en originalbruksanvisning. Letar du efter bruksanvisningen för din Makita HR2010 Borrhammare på ett annat språk? Välj ditt föredragna språk på vår hemsida och sök efter modellnumret för att se om vi har det tillgängligt.

Specifikationer

Märke Makita
Modell HR2010
Kategori Borrhammare
Filtyp PDF
Filstorlek 0.94 MB

Alla bruksanvisningar för Makita Borrhammare
Fler bruksanvisningar för Borrhammare

Vanliga frågor om Makita HR2010 Borrhammare

Vårt supportteam söker efter användbar produktinformation och svar på vanliga frågor. Om du hittar en felaktighet bland våra vanliga frågor uppskattar vi om du meddelar oss detta via vårt kontaktformulär.

Vad är skillnaden mellan en slagborrmaskin och en borrhammare? Verifierad

Slagborrmaskiner kan användas för att borra hål i tegelväggar. För att borra hål i betongväggar krävs en borrhammare.

Detta hjälpte (260) Läs mer

Vad betyder Joule (J) när vi pratar om borrhammare? Verifierad

Vid jämförelse av effektiviteten hos olika maskiner är den viktigaste parametern hammarverkets anslagsenergi som mäts i Joule (J). För att borra hål i betong räcker det med en borrhammare på 2,2 J.

Detta hjälpte (219) Läs mer

Behöver jag bära hörselskydd när jag använder en borr? Verifierad

Ja det borde du. Även om mängden buller som en borr producerar kan variera mellan märken och modeller, kan långvarig exponering för högt ljud orsaka permanent hörselskada. Det är därför det är en bra idé att använda hörselskydd.

Detta hjälpte (138) Läs mer

Kan jag förvara elverktyg i ett skjul eller garage? Verifierad

Generellt sett kan du förvara elverktyg i ett skjul eller garage, även om det ibland fryser där. Det är dock bättre för elverktygets livslängd att förvara det på en torr plats utan större temperaturfluktuationer. I ett skjul eller garage kan temperaturskillnader orsaka kondens som kan orsaka rost. Dessutom håller verktyg som går på batteri kortare och laddas inte lika bra vid mycket låga temperaturer. För att vara säker på hur ditt elverktyg behöver förvaras, läs alltid bruksanvisningen noggrant.

Detta hjälpte (70) Läs mer
Bruksanvisning Makita HR2010 Borrhammare

Relaterade produkter

Relaterade kategorier

×
Download