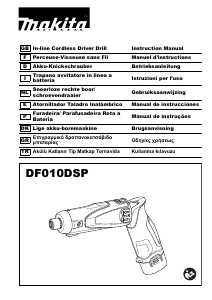
Bruksanvisning Makita DP4011 Borrskruvdragare

Behöver du en bruksanvisning för din Makita DP4011 Borrskruvdragare? Nedan kan du se och ladda ner PDF-bruksanvisningen gratis på svenska. Den här produkten har för närvarande 3 vanliga frågor, 0 kommentarer och har 0 röster. Om det här inte är bruksanvisningen du vill ha, vänligen kontakta oss.

Är produkten defekt och erbjuder bruksanvisningen ingen lösning? Gå till ett Repair Café för gratis reparationstjänster.

Bruksanvisning

Loading…

4
Reversing switch action (Fig. 2)
This tool has a reversing switch to change the direction of
rotation. Move the reversing switch lever to the
D posi-
tion (A side) for clockwise rotation or the
E position (B
side) for counterclockwise rotation.
CAUTION:
Always check the direction of rotation before operation.
Use the reversing switch only after the tool comes to a
complete stop. Changing the direction of rotation
before the tool stops may damage the tool.
Speed change (Fig. 3)
Two speed ranges can be preselected with the speed
change knob.
To change the speed, turn the speed change knob so
that the arrow on the tool body points toward the “I” posi-
tion on the knob for low speed or “II” position for high
speed.
If it is hard to turn the knob, first turn the chuck slightly in
either direction and then turn the knob again.
CAUTION:
Use the speed change knob only after the tool comes
to a complete stop. Changing the tool speed before the
tool stops may damage the tool.
Always set the speed change knob to the correct posi-
tion. If you operate the tool with the speed change knob
positioned halfway between the “I” and “II” position, the
tool may be damaged.
ASSEMBLY
CAUTION:
Always be sure that the tool is switched off and
unplugged before carrying out any work on the tool.
Installing side grip (auxiliary handle) (Fig. 4)
Always use the side grip to ensure operating safety.
Install the side grip so that the teeth on the grip fit in
between the protrusions on the tool barrel.
Then tighten the grip by turning clockwise at the desired
position.
NOTE:
The depth gauge cannot be used at the position where
the depth gauge strikes against the gear housing.
Installing or removing drill bit
For Model DP4010 (Fig. 5)
To install the bit, place it in the chuck as far as it will go.
Tighten the chuck by hand. Place the chuck key in each
of the three holes and tighten clockwise. Be sure to
tighten all three chuck holes evenly.
To remove the bit, turn the chuck key counterclockwise in
just one hole, then loosen the chuck by hand.
After using the chuck key, be sure to return to the original
position.
For Model DP4011 (Fig. 6)
Hold the ring and turn the sleeve counterclockwise to
open the chuck jaws. Place the bit in the chuck as far as it
will go. Hold the ring firmly and turn the sleeve clockwise
to tighten the chuck.
To remove the bit, hold the ring and turn the sleeve coun-
terclockwise.
Depth gauge (Fig. 7)
The depth gauge is convenient for drilling holes of uni-
form depth. Loosen the side grip and insert the depth
gauge into the hole in the grip base. Adjust the depth
gauge to the desired depth and tighten the side grip.
NOTE:
The depth gauge cannot be used at the position where
the depth gauge strikes against the tool body.
OPERATION
Holding the tool
Always use side grip (auxiliary handle) and firmly hold
the tool by side grip and switch handle during operations.
Drilling operation
CAUTION:
Pressing excessively on the tool will not speed up the
drilling. In fact, this excessive pressure will only serve
to damage the tip of your bit, decrease the tool perfor-
mance and shorten the service life of the tool.
There is a tremendous force exerted on the tool/bit at
the time of hole break through. Hold the tool firmly and
exert care when the bit begins to break through the
workpiece.
A stuck bit can be removed simply by setting the
reversing switch to reverse rotation in order to back out.
However, the tool may back out abruptly if you do not
hold it firmly.
• Always secure small workpieces in a vise or similar
hold-down device.
Avoid drilling in material that you suspect contains hid-
den nails or other things that may cause the bit to bind
or break.
Drilling in wood
When drilling in wood, the best results are obtained with
wood drills equipped with a guide screw. The guide
screw makes drilling easier by pulling the bit into the
workpiece.
Drilling in metal
To prevent the bit from slipping when starting a hole,
make an indentation with a center-punch and hammer at
the point to be drilled. Place the point of the bit in the
indentation and start drilling.
Use a cutting lubricant when drilling metals. The excep-
tions are iron and brass which should be drilled dry.
MAINTENANCE
CAUTION:
Always be sure that the tool is switched off and
unplugged before attempting to perform inspection or
maintenance.
Cleaning vent holes (Fig. 8)
The tool and its air vents have to be kept clean. Regularly
clean the tools air vents or whenever the vents start to
become obstructed.
To maintain product SAFETY and RELIABILITY, repairs,
carbon brush inspection and replacement, any other
maintenance or adjustment should be performed by Mak-
ita Authorized Service Centers, always using Makita
replacement parts.
Ladda ner bruksanvisning i Engelska (PDF, 0.36 MB)
(Tänk på miljön och skriv endast ut denna bruksanvisning om det verkligen är nödvändigt)

Loading…

Betyg

Berätta vad du tycker om Makita DP4011 Borrskruvdragare genom att betygsätta den. Vill du dela med dig av dina åsikter om denna produkt eller ställa en fråga? Lämna en kommentar nederst på sidan.
Är du nöjd med Makita DP4011 Borrskruvdragare?
Ja Nej
Bli den första personen som betygsätter denna produkt
0 röster

Delta i konversationen om denna produkt

Här kan du dela vad du tycker om Makita DP4011 Borrskruvdragare. Om du har en fråga, läs först noggrant igenom manualen. Att begära en manual kan göras genom att använda vårt kontaktformulär.

Mer om denna bruksanvisning

Vi förstår att det är trevligt att ha en pappersbruksanvisning för din Makita DP4011 Borrskruvdragare. Du kan alltid ladda ner bruksanvisningen från vår hemsida och skriva ut den själv. Om du vill ha en originalbruksanvisning rekommenderar vi att du kontaktar Makita. De kanske kan tillhandahålla en originalbruksanvisning. Letar du efter bruksanvisningen för din Makita DP4011 Borrskruvdragare på ett annat språk? Välj ditt föredragna språk på vår hemsida och sök efter modellnumret för att se om vi har det tillgängligt.

Specifikationer

Märke Makita
Modell DP4011
Kategori Borrskruvdragare
Filtyp PDF
Filstorlek 0.36 MB

Alla bruksanvisningar för Makita Borrskruvdragare
Fler bruksanvisningar för Borrskruvdragare

Vanliga frågor om Makita DP4011 Borrskruvdragare

Vårt supportteam söker efter användbar produktinformation och svar på vanliga frågor. Om du hittar en felaktighet bland våra vanliga frågor uppskattar vi om du meddelar oss detta via vårt kontaktformulär.

Jag fortsätter att ta bort skruvhuvudet när jag använder borrskruvdragaren. Varför är det så? Verifierad

De flesta borrskruvar kan ställas in för att skruva hårdare eller mjukare. Om huvudet fortsätter att avlägsnas borde troligen borrföraren sättas i en annan inställning. När det är en trådlös enhet, se alltid till att batteriet är laddat för att få ett optimalt resultat.

Detta hjälpte (96) Läs mer

Behöver jag bära hörselskydd när jag använder en borr? Verifierad

Ja det borde du. Även om mängden buller som en borr producerar kan variera mellan märken och modeller, kan långvarig exponering för högt ljud orsaka permanent hörselskada. Det är därför det är en bra idé att använda hörselskydd.

Detta hjälpte (37) Läs mer

Kan jag förvara elverktyg i ett skjul eller garage? Verifierad

Generellt sett kan du förvara elverktyg i ett skjul eller garage, även om det ibland fryser där. Det är dock bättre för elverktygets livslängd att förvara det på en torr plats utan större temperaturfluktuationer. I ett skjul eller garage kan temperaturskillnader orsaka kondens som kan orsaka rost. Dessutom håller verktyg som går på batteri kortare och laddas inte lika bra vid mycket låga temperaturer. För att vara säker på hur ditt elverktyg behöver förvaras, läs alltid bruksanvisningen noggrant.

Detta hjälpte (29) Läs mer
Bruksanvisning Makita DP4011 Borrskruvdragare

Relaterade produkter

Relaterade kategorier

×
Download