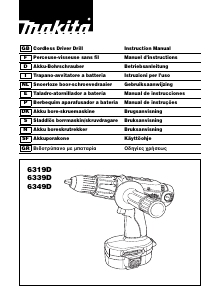
Bruksanvisning Makita 6339D Borrskruvdragare

Behöver du en bruksanvisning för din Makita 6339D Borrskruvdragare? Nedan kan du se och ladda ner PDF-bruksanvisningen gratis på svenska. Den här produkten har för närvarande 3 vanliga frågor, 0 kommentarer och har 0 röster. Om det här inte är bruksanvisningen du vill ha, vänligen kontakta oss.

Är produkten defekt och erbjuder bruksanvisningen ingen lösning? Gå till ett Repair Café för gratis reparationstjänster.

Bruksanvisning

Loading…

5
8. Do not incinerate the battery cartridge even if it
is severely damaged or is completely worn out.
The battery cartridge can explode in a fire.
9. Be careful not to drop or strike battery.
SAVE THESE INSTRUCTIONS.
Tips for maintaining maximum battery life
1. Charge the battery cartridge before completely
discharged.
Always stop tool operation and charge the bat-
tery cartridge when you notice less tool power.
2. Never recharge a fully charged battery cartridge.
Overcharging shortens the battery service life.
3. Charge the battery cartridge with room tempera-
ture at 10°C 40°C (50°F 104°F). Let a hot bat-
tery cartridge cool down before charging it.
4. Charge the Nickel Metal Hydride battery car-
tridge when you do not use it for more than six
months.
FUNCTIONAL DESCRIPTION
CAUTION:
Always be sure that the tool is switched off and the bat-
tery cartridge is removed before adjusting or checking
function on the tool.
Installing or removing battery cartridge (Fig. 1)
Always switch off the tool before insertion or removal of
the battery cartridge.
• To remove the battery cartridge, withdraw it from the
tool while pressing the buttons on both sides of the car-
tridge.
To insert the battery cartridge, align the tongue on the
battery cartridge with the groove in the housing and slip
it into place. Always insert it all the way until it locks in
place with a little click. If not, it may accidentally fall out
of the tool, causing injury to you or someone around
you.
Do not use force when inserting the battery cartridge. If
the cartridge does not slide in easily, it is not being
inserted correctly.
Switch action (Fig. 2)
CAUTION:
Before inserting the battery cartridge into the tool,
always check to see that the switch trigger actuates
properly and returns to the “OFF” position when
released.
To start the tool, simply pull the switch trigger. Tool speed
is increased by increasing pressure on the switch trigger.
Release the switch trigger to stop.
Reversing switch action (Fig. 3)
This tool has a reversing switch to change the direction of
rotation. Depress the reversing switch lever from the A
side for clockwise rotation or from the B side for counter-
clockwise rotation.
When the reversing switch lever is in the neutral position,
the switch trigger cannot be pulled.
CAUTION:
Always check the direction of rotation before operation.
Use the reversing switch only after the tool comes to a
complete stop. Changing the direction of rotation
before the tool stops may damage the tool.
When not operating the tool, always set the reversing
switch lever to the neutral position.
Speed change (Fig. 4)
This tool has a three-gear speed change lever. To
change the speed, first switch off the tool and then slide
the speed change lever to the “1” position for low speed,
“2” position for medium speed or “3” position for high
speed. Be sure that the speed change lever is set to the
correct position before operation. Use the right speed for
your job.
NOTE:
When changing the position from “1” to “3” or from “3” to
“1”, it may be a little difficult to slide the speed change
lever. At this time, switch on and run the tool for a second
at the “2” position, then stop the tool and slide to your
desired position.
CAUTION:
Always set the speed change lever fully to the correct
position. If you operate the tool with the speed change
lever positioned halfway between the “1” position, “2”
position and “3” position, the tool may be damaged.
Do not use the speed change lever while the tool is run-
ning. The tool may be damaged.
Selecting the action mode (Fig. 5)
This tool has an action mode change lever. For drilling,
slide the action mode change lever to the left (m symbol).
For screwing, slide the action mode change lever to the
right ( symbol).
NOTE:
When changing the position from to m, it may be a lit-
tle difficult to slide the mode change lever. At this time,
switch on and run the tool for a second at the position,
then stop the tool and slide to your desired position.
CAUTION:
Always slide the action mode change lever all the way
to your desired mode position. If you operate the tool
with the lever positioned halfway between the mode
symbols, the tool may be damaged.
Do not use the action mode change lever while the tool
is running. The tool may be damaged.
Adjusting the fastening torque (Fig. 6)
The fastening torque can be adjusted in 16 steps by turn-
ing the adjusting ring so that its graduations are aligned
with the arrow on the tool body.
First, slide the action mode change lever to the position
of symbol.
The fastening torque is minimum when the number 1 is
aligned with the arrow, and maximum when the number
16 is aligned with the arrow. The clutch will slip at various
torque levels when set at the number 1 to 16. Before
actual operation, drive a trial screw into your material or a
piece of duplicate material to determine which torque
level is required for a particular application.
NOTE:
The adjusting ring does not lock when the arrow is
positioned only halfway between the graduations.
ASSEMBLY
CAUTION:
Always be sure that the tool is switched off and the bat-
tery cartridge is removed before carrying out any work
on the tool.
Ladda ner bruksanvisning i Svenska (PDF, 0.64 MB)
(Tänk på miljön och skriv endast ut denna bruksanvisning om det verkligen är nödvändigt)

Loading…

Betyg

Berätta vad du tycker om Makita 6339D Borrskruvdragare genom att betygsätta den. Vill du dela med dig av dina åsikter om denna produkt eller ställa en fråga? Lämna en kommentar nederst på sidan.
Är du nöjd med Makita 6339D Borrskruvdragare?
Ja Nej
Bli den första personen som betygsätter denna produkt
0 röster

Delta i konversationen om denna produkt

Här kan du dela vad du tycker om Makita 6339D Borrskruvdragare. Om du har en fråga, läs först noggrant igenom manualen. Att begära en manual kan göras genom att använda vårt kontaktformulär.

Mer om denna bruksanvisning

Vi förstår att det är trevligt att ha en pappersbruksanvisning för din Makita 6339D Borrskruvdragare. Du kan alltid ladda ner bruksanvisningen från vår hemsida och skriva ut den själv. Om du vill ha en originalbruksanvisning rekommenderar vi att du kontaktar Makita. De kanske kan tillhandahålla en originalbruksanvisning. Letar du efter bruksanvisningen för din Makita 6339D Borrskruvdragare på ett annat språk? Välj ditt föredragna språk på vår hemsida och sök efter modellnumret för att se om vi har det tillgängligt.

Specifikationer

Märke Makita
Modell 6339D
Kategori Borrskruvdragare
Filtyp PDF
Filstorlek 0.64 MB

Alla bruksanvisningar för Makita Borrskruvdragare
Fler bruksanvisningar för Borrskruvdragare

Vanliga frågor om Makita 6339D Borrskruvdragare

Vårt supportteam söker efter användbar produktinformation och svar på vanliga frågor. Om du hittar en felaktighet bland våra vanliga frågor uppskattar vi om du meddelar oss detta via vårt kontaktformulär.

Jag fortsätter att ta bort skruvhuvudet när jag använder borrskruvdragaren. Varför är det så? Verifierad

De flesta borrskruvar kan ställas in för att skruva hårdare eller mjukare. Om huvudet fortsätter att avlägsnas borde troligen borrföraren sättas i en annan inställning. När det är en trådlös enhet, se alltid till att batteriet är laddat för att få ett optimalt resultat.

Detta hjälpte (73) Läs mer

Behöver jag bära hörselskydd när jag använder en borr? Verifierad

Ja det borde du. Även om mängden buller som en borr producerar kan variera mellan märken och modeller, kan långvarig exponering för högt ljud orsaka permanent hörselskada. Det är därför det är en bra idé att använda hörselskydd.

Detta hjälpte (23) Läs mer

Kan jag förvara elverktyg i ett skjul eller garage? Verifierad

Generellt sett kan du förvara elverktyg i ett skjul eller garage, även om det ibland fryser där. Det är dock bättre för elverktygets livslängd att förvara det på en torr plats utan större temperaturfluktuationer. I ett skjul eller garage kan temperaturskillnader orsaka kondens som kan orsaka rost. Dessutom håller verktyg som går på batteri kortare och laddas inte lika bra vid mycket låga temperaturer. För att vara säker på hur ditt elverktyg behöver förvaras, läs alltid bruksanvisningen noggrant.

Detta hjälpte (9) Läs mer
Bruksanvisning Makita 6339D Borrskruvdragare

Relaterade produkter

Relaterade kategorier