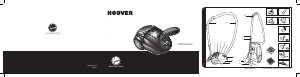
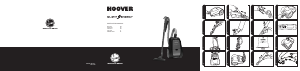
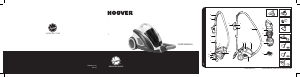
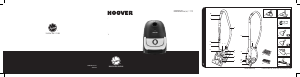
Bruksanvisning Hoover ST71_ST02 001 Dammsugare
Behöver du en bruksanvisning för din Hoover ST71_ST02 001 Dammsugare? Nedan kan du se och ladda ner PDF-bruksanvisningen gratis på svenska. Den här produkten har för närvarande 9 vanliga frågor, 0 kommentarer och har 0 röster. Om det här inte är bruksanvisningen du vill ha, vänligen kontakta oss.
Är produkten defekt och erbjuder bruksanvisningen ingen lösning? Gå till ett Repair Café för gratis reparationstjänster.
Bruksanvisning
Loading…


Loading…
Betyg
Berätta vad du tycker om Hoover ST71_ST02 001 Dammsugare genom att betygsätta den. Vill du dela med dig av dina åsikter om denna produkt eller ställa en fråga? Lämna en kommentar nederst på sidan.Mer om denna bruksanvisning
Vi förstår att det är trevligt att ha en pappersbruksanvisning för din Hoover ST71_ST02 001 Dammsugare. Du kan alltid ladda ner bruksanvisningen från vår hemsida och skriva ut den själv. Om du vill ha en originalbruksanvisning rekommenderar vi att du kontaktar Hoover. De kanske kan tillhandahålla en originalbruksanvisning. Letar du efter bruksanvisningen för din Hoover ST71_ST02 001 Dammsugare på ett annat språk? Välj ditt föredragna språk på vår hemsida och sök efter modellnumret för att se om vi har det tillgängligt.
Specifikationer
| Märke | Hoover |
| Modell | ST71_ST02 001 |
| Kategori | Dammsugare |
| Filtyp | |
| Filstorlek | 1.28 MB |
Alla bruksanvisningar för Hoover Dammsugare
Fler bruksanvisningar för Dammsugare
Vanliga frågor om Hoover ST71_ST02 001 Dammsugare
Vårt supportteam söker efter användbar produktinformation och svar på vanliga frågor. Om du hittar en felaktighet bland våra vanliga frågor uppskattar vi om du meddelar oss detta via vårt kontaktformulär.
Min dammsugarslang är igensatt, vad kan jag göra? Verifierad
Lossa slangen och titta igenom den för att avgöra om den faktiskt är igensatt. Om så är fallet kan du ta ett långt föremål som en kvast och försiktigt trycka genom slangen. Detta kommer normalt att ta bort alla föremål som täpper till slangen. Kontakta tillverkaren om detta inte hjälper dig.
Detta hjälpte (1672) Läs merVilka storlekar dammpåse finns det? Verifierad
Det finns två storlekar som måste övervägas. Först är plattans storlek med påseingången. Detta avgör om dammpåsen passar en viss dammsugare. Då är väskans storlek. Detta anges oftast i liter och avgör hur mycket damm påsen rymmer.
Detta hjälpte (1216) Läs merStrömkabeln till min dammsugare spolar inte tillbaka in i enheten. Vad kan jag göra? Verifierad
Det är möjligt att det finns en vridning eller vikning i sladden. Rulla ut sladden helt några gånger och spola tillbaka den i enheten under ledning av dina händer. Om detta inte löser problemet är det möjligt att mekanismen för att spola tillbaka sladden är trasig. Kontakta i så fall tillverkaren eller en reparatör.
Detta hjälpte (865) Läs merHur tar jag bort damm och hår från dammsugarens borsthuvud? Verifierad
Att ta bort damm och hår från dammsugarens borsthuvud har gjorts manuellt. Om detta inte går som önskat är det möjligt att använda en fin kam för att ta bort kvarvarande smuts.
Detta hjälpte (764) Läs merMin dammsugare avger ett visslande ljud, vad kan jag göra? Verifierad
Detta problem orsakas ofta av en full dammpåse eller ett filter eller när det finns en öppning som släpper in luft i slangen. Kontrollera dammpåsen och filtret och byt ut dem vid behov. Kontrollera om det finns hål eller dåliga anslutningar i slangen. Om detta inte löser problemet, kontakta tillverkaren.
Detta hjälpte (732) Läs merVilken inställning på dammsugarens borsthuvud ska jag använda? Verifierad
Nästan alla dammsugare har ett huvud med en justerbar borste. Använd borsten för hårda ytor för att förhindra repor och skador. Stäng av borsten för mattor och mattor.
Detta hjälpte (574) Läs merKan jag använda en pappersdammpåse mer än en gång? Verifierad
Detta är inte tillrådligt. Porerna i påsen blir mättade och orsakar förlust av sug och kan skada motorn.
Detta hjälpte (376) Läs merVad är HEPA? Verifierad
HEPA står för högeffektiv partikulär luft. Många dammsugare har ett HEPA-filter. Ett HEPA-filter stoppar minst 85% och högst 99,999995% av alla partiklar på 0,3 mikrometer (µm) och uppåt.
Detta hjälpte (367) Läs merKan jag använda en vanlig dammsugare för att suga upp aska? Verifierad
Nej, detta är absolut inte möjligt. Ask som verkar sval kan fortfarande vara varm eller till och med varm inuti. En vanlig dammsugare är inte avsedd för detta och det kan orsaka brand. Dessutom är filtren för vanliga dammsugare inte alltid lämpliga för att hålla kvar extremt små partiklar som ask. Den kan då nå dammsugarens motor och orsaka skador.
Detta hjälpte (367) Läs mer

Delta i konversationen om denna produkt
Här kan du dela vad du tycker om Hoover ST71_ST02 001 Dammsugare. Om du har en fråga, läs först noggrant igenom manualen. Att begära en manual kan göras genom att använda vårt kontaktformulär.