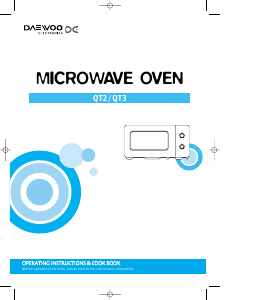
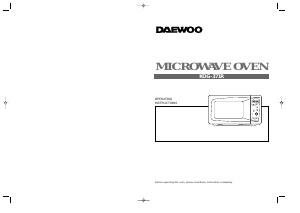
Bruksanvisning Daewoo KQG-8A6K5S40 Mikrovågsugn
Behöver du en bruksanvisning för din Daewoo KQG-8A6K5S40 Mikrovågsugn? Nedan kan du se och ladda ner PDF-bruksanvisningen gratis på svenska. Den här produkten har för närvarande 7 vanliga frågor, 0 kommentarer och har 0 röster. Om det här inte är bruksanvisningen du vill ha, vänligen kontakta oss.
Är produkten defekt och erbjuder bruksanvisningen ingen lösning? Gå till ett Repair Café för gratis reparationstjänster.
Bruksanvisning
Loading…

Loading…
Betyg
Berätta vad du tycker om Daewoo KQG-8A6K5S40 Mikrovågsugn genom att betygsätta den. Vill du dela med dig av dina åsikter om denna produkt eller ställa en fråga? Lämna en kommentar nederst på sidan.Mer om denna bruksanvisning
Vi förstår att det är trevligt att ha en pappersbruksanvisning för din Daewoo KQG-8A6K5S40 Mikrovågsugn. Du kan alltid ladda ner bruksanvisningen från vår hemsida och skriva ut den själv. Om du vill ha en originalbruksanvisning rekommenderar vi att du kontaktar Daewoo. De kanske kan tillhandahålla en originalbruksanvisning. Letar du efter bruksanvisningen för din Daewoo KQG-8A6K5S40 Mikrovågsugn på ett annat språk? Välj ditt föredragna språk på vår hemsida och sök efter modellnumret för att se om vi har det tillgängligt.
Specifikationer
| Märke | Daewoo |
| Modell | KQG-8A6K5S40 |
| Kategori | Mikrovågsugnar |
| Filtyp | |
| Filstorlek | 0.59 MB |
Alla bruksanvisningar för Daewoo Mikrovågsugnar
Fler bruksanvisningar för Mikrovågsugnar
Vanliga frågor om Daewoo KQG-8A6K5S40 Mikrovågsugn
Vårt supportteam söker efter användbar produktinformation och svar på vanliga frågor. Om du hittar en felaktighet bland våra vanliga frågor uppskattar vi om du meddelar oss detta via vårt kontaktformulär.
Min mikrovågsugn startar inte när jag trycker på startknappen. Vad ska jag göra? Verifierad
Ofta beror det på att luckan på mikrovågsugnen inte har stängts ordentligt. Öppna och stäng luckan och försök igen.
Detta hjälpte (3585) Läs merKan jag använda min mikrovågsugn när den snurrande plattan inte fungerar? Verifierad
Den snurrande plattan gör att värmen fördelas jämnt. När det inte fungerar kan mikrovågsugnen inte användas korrekt. Låt reparera den.
Detta hjälpte (2129) Läs merMikrovågsugnen är på men fungerar inte. Varför är det så? Verifierad
Det är möjligt att dörren inte stängs ordentligt. För att garantera säkerheten kommer en mikrovågsugn inte att fungera förrän dörren är helt stängd. Ibland kan detta åtgärdas genom att justera dörrgångjärnet.
Detta hjälpte (1586) Läs merGlimmer-/kartongplattan på insidan av mikrovågsugnen har lossnat. Kan jag fortfarande använda mikrovågsugnen? Verifierad
Nej, absolut inte. Glimmer-/kartongplattan är vågledaren som distribuerar mikrovågorna. Sätt tillbaka den eller skaffa en ny.
Detta hjälpte (1394) Läs merMin mikrovågsugn gör ljud ifrån sig när den är klar. Är det normalt? Verifierad
Ja, det är normalt. En fläkt kyler mikrovågsugnen efter användningen. Hur länge fläkten är på, beror på hur länge mikrovågsugnen har använts.
Detta hjälpte (1173) Läs merKan jag koka vatten i mikrovågsugnen? Verifierad
Nej, absolut inte. Vatten kan bli överhettat. Detta innebär att vattnet kan nå en temperatur över 100 ℃ utan att koka. När detta vatten sedan rör vid något föremål kan det omedelbart koka och stänkas upp och orsaka brännskador.
Detta hjälpte (901) Läs merVarför kan jag inte lägga in metall i en mikrovågsugn? Verifierad
Metall släpper inte igenom mikrovågor utan får dem att studsa tillbaka. När mikrovågorna studsar tillbaka till samma plats kan gnistor uppstå.
Detta hjälpte (898) Läs mer
Delta i konversationen om denna produkt
Här kan du dela vad du tycker om Daewoo KQG-8A6K5S40 Mikrovågsugn. Om du har en fråga, läs först noggrant igenom manualen. Att begära en manual kan göras genom att använda vårt kontaktformulär.