GB-1 GB-2
GB-3
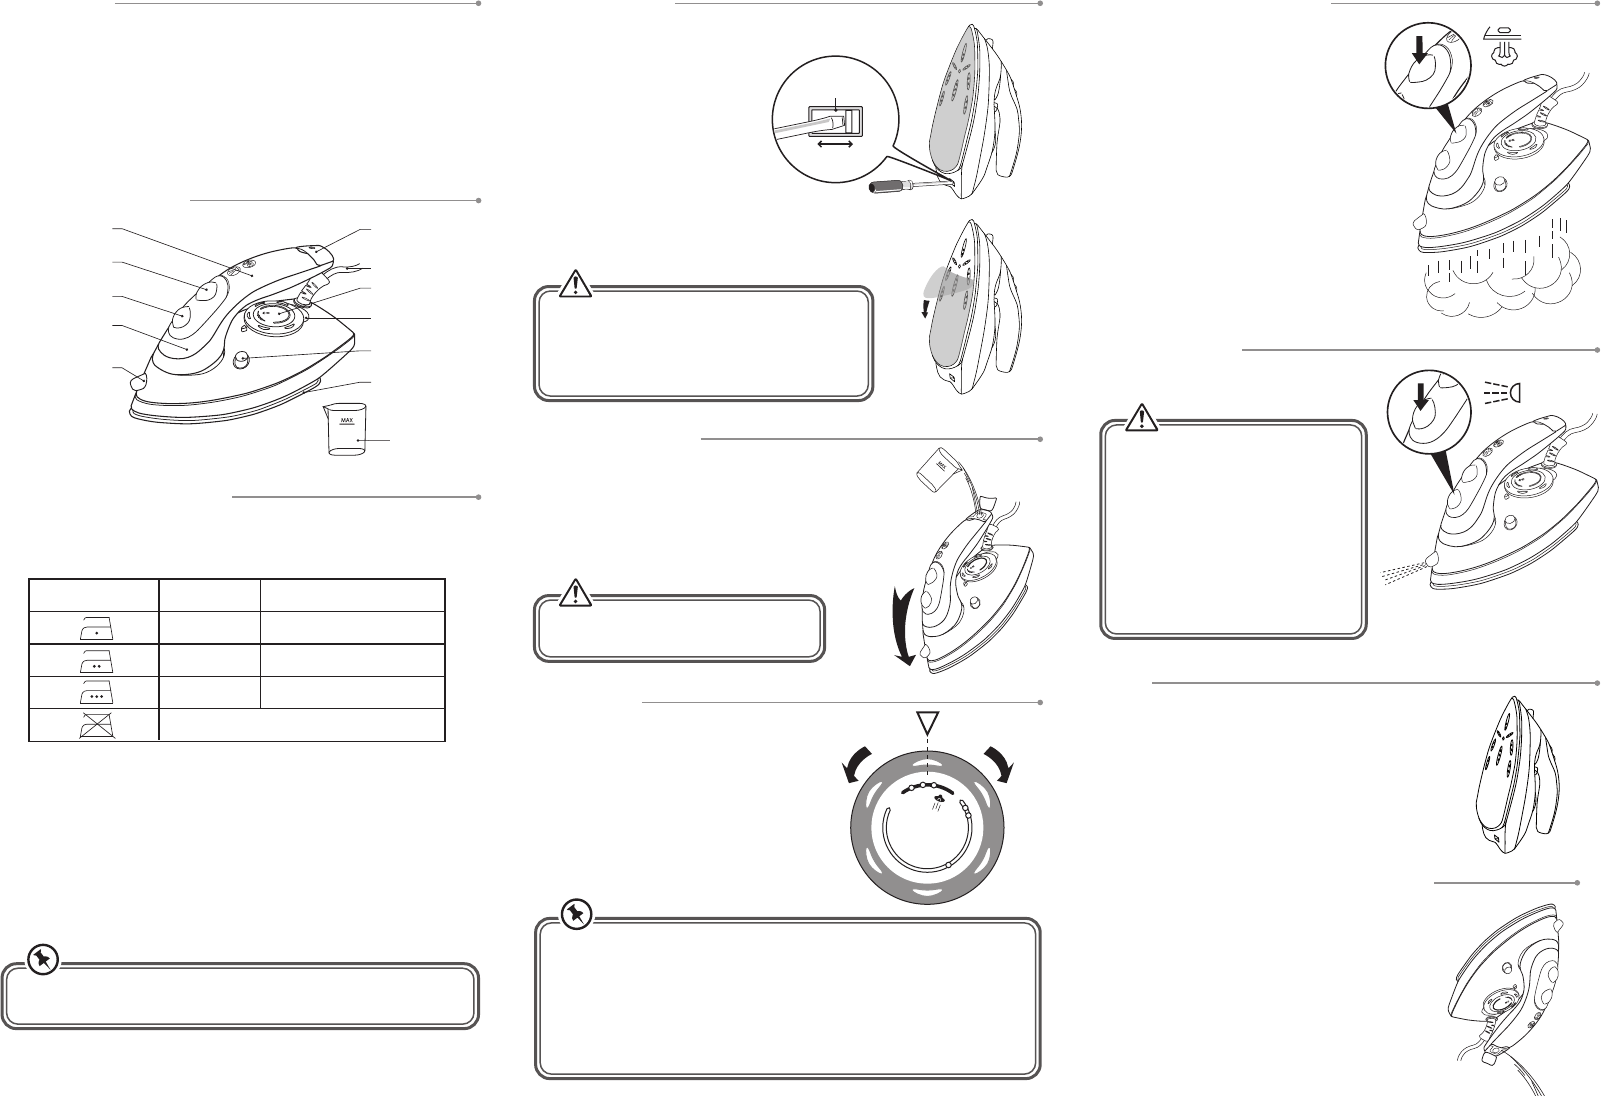
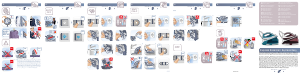
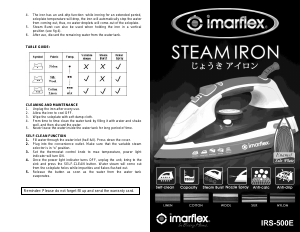
P R O D U C T O V E R V I E W
F I R S T T I M E U S E
1. Inspect the iron carefully. Select the
voltage. Check local supply voltage.
2. Use a screw driver to select the
correct voltage (120V or 230V) on
the voltage selector that
corresponds to your voltage supply.
3. Raise the iron handle until you hear
a click sound.
4. Remove any protective lm from the
soleplate. Polish the soleplate lightly
with a clean soft cloth to remove any
residues.
5. Place the iron on the ironing board or a at rigid surface.
F I L L I N G T H E I R O N
Make sure the iron is unplugged from the mains socket.
Open the Water Filler & Cap, tip the iron down slightly and
fill it carefully with fresh water using the supplied filler cup.
If you live in a hard water area, it is advisable to use distilled
or de-mineralised water. Avoid using water containing
softeners, perfumes or additives.
I R O N I N G T E M P E R AT U R E S
Check the ironing instructions attached to the article (they are on a label showing
a symbol of an iron). Always follow these ironing instructions. The indications on
the iron’s temperature dial and the table below will help you.
If there are no ironing instructions but you know the fabric, then use the table
above. The table is valid only for the actual material and does not take account of
any finish applied to the fabric. Fabrics to which a finish has been applied (wrinkle
relief, printed T shirts etc.) should be ironed at a lower temperature.
If the fabric contains mixed fibres, select the lowest ironing temperature of the
composition, e.g. iron a 60% polyester / 40% cotton mix at the temperature
indicated for polyester.
The iron heats up quicker than it cools down. Sort fabrics to be ironed into groups
according to temperature: wool with wool, cotton with cotton, etc. Start by
ironing articles requiring low temperature settings and progress to higher ones.
Pure (100%) wool fabrics may be pressed with the iron set to a steam position and
the garment protected by a dry cloth.
Garment Label Fabric Type Thermostat Regulation
Synthetic
•
Low temperature
Silk-wool
• •
Medium temperature
Cotton-linen
• • •
High temperature
Fabric not to be ironed
U N PA C K I N G
Remove all packaging from the unit. Retain the packaging. If you dispose of it
please do so according to any recycling regulations.
• The Main Unit
• One Filler Cup (Part number: C10TIR10-CUP)
• One Carry Bag (Part number: C10TIR10-BAG)
• The Instruction Manual (Part number: C10TIR10-002)
If items are missing or damaged, please contact Partmaster (UK only)
Tel. 0844 800 3456 for assistance.
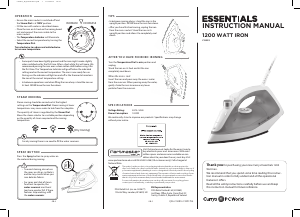
S H OT OF STEAM B U T T O N
This feature may be used during ironing but
only when the iron is at its highest settings.
Press the Shot of Steam button to release a
powerful surge of steam. You may need to
press the button a few times to prime the surge
of steam.
Wait a few seconds for the steam to penetrate
the fabric before pressing the button again.
Excessive use of this feature will cause the iron
to cool, and the Temperature Indicator will
illuminate. Water will drip from the soleplate.
If this happens, wait for the Temperature
Indicator to go off before using this feature
again.
P
U
S
H
min
Water Filler
& Cap
Spray Button
Spray Nozzle
Mains Cable
Temperature
Dial
Temperature
Indicator
Handle Release
Button
Water
Reservoir
Handle
Shot of Steam
Button
Iron Soleplate
Filler Cup
(25ml)
P
U
S
H
min
P
U
S
H
min
T I P S
• In between ironing always stand the iron in the upright
position. NEVER leave the iron face down.
• After you have nished ironing, unplug the iron from
the mains socket. Stand the iron in its upright position
and allow it to completely cool down.
P
U
S
H
min
S P R AY B U T TO N
Press the Spray button to spray water on the
material during ironing.
P
U
S
H
min
O P E R AT I O N
1. Fill the iron with water as described above.
2. Place the iron on its heel on the ironing
board rest and connect the mains cable to
the mains socket.
3. The Temperature Indicator will illuminate.
4. Select the correct temperature by turning the
Temperature Dial. Turn clockwise to
increase and anticlockwise to reduce
temperature.
230V
Voltage Selector
120V
Do not iron garments that are dirty or stained. The iron’s heat may set
the stain.
Some parts have been lightly greased and the iron might smoke slightly
when switched on for the first time. After a short while, this will cease.
We recommend passing the iron over a clean cotton cloth before using it
for the first time. The Temperature Indicator will go off when the indicated
setting reaches the correct temperature. The iron is now ready for use.
During use the indicator will light on and off as the thermostat maintains
the iron at the correct temperature setting.
Do not fill the iron above the max mark
indicated on the side of the iron.
• To avoid staining, do not use the
spray on silk or synthetics, and
be very careful when you iron
delicate fabrics.
• For spray and shot of steam
functions to operate, the water
reservoir must be at least
one-quarter full. If these features
stop working, stand the iron on
its heel and fill the water
reservoir.
Maintaining the nish of the iron’s soleplate is
essential. Keep the soleplate smooth: do not
scratch it on metal objects (e.g. the edge of the
ironing board, buttons, zippers, etc.) as these
may impair performance.
max
min
INCREASEDECREASE
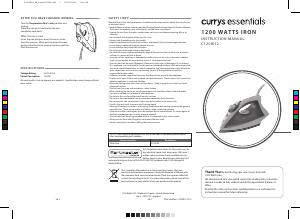
When the iron is cool:
Open the Water Filler & Cap, invert the iron and
pour away the excess water from the reservoir.
When pouring away the water, gently shake the
iron to remove any loose particles from the
reservoir.
Switch the iron off at the mains socket and unplug.
Stand the iron on its heel and let the iron
completely cool down.
A F T E R YO U H AV E F I N I S H E D I R O N I N G
C10TIR10_IB_101202.pdf 2 12/2/10 3:39 PM


Delta i konversationen om denna produkt
Här kan du dela vad du tycker om Currys Essentials C10TIR10 Strykjärn. Om du har en fråga, läs först noggrant igenom manualen. Att begära en manual kan göras genom att använda vårt kontaktformulär.