
FRANÇAIS ENGLISH
réservoir en place. Un clic indique qu’il est en position
et correctement xé.
INSTRUCTIONS D’UTILISATION
1. Remplissez le réservoir d’eau distillée.
2. Branchez l’appareil sur une prise électrique.
3. Appuyez sur le bouton
pour allumer le défroisseur.
4. Le voyant bleu READY s’allume et commence à clignoter.
Attendez 40 secondes pour que l’appareil chaue. Celui-
ci est prêt à fonctionner lorsque le voyant READY cesse
de clignoter et reste allumé.
REMARQUE : avant la première utilisation ou si l’appareil
n’a pas été utilisé pendant une longue période, il est
nécessaire d’amorcer (c’est-à-dire de remplir d’eau) le
réservoir interne pendant que le défroisseur se prépare
à produire de la vapeur. Il se peut que vous entendiez de
petits claquements pendant le processus de chauage;
c’est normal.
5. Votre défroisseur est doté de 5 réglages de vapeur.
Appuyez plusieurs fois sur le bouton SETTING jusqu’à
ce que vous atteigniez le réglage souhaité. Un témoin
rouge allumé correspond au débit de vapeur minimum
– pour les tissus délicats, tandis que 5 témoins rouges
allumés correspondent au réglage TURBO BOOST – pour
les tissus plus épais et les articles très froissés. Dirigez
toujours la tête du défroisseur loin de vous ou de toute
autre personne présente dans la pièce. (Fig. 2)
6. Pour libérer le ux de vapeur, appuyez sur le bouton
.
7. Pour arrêter le ux de vapeur, pressez à nouveau le
bouton
.
8. Lors de la première utilisation de l’appareil, faites un
essai sur un vieux chion, car il peut rester des sédiments
provenant du processus de fabrication ou du transport.
9. Appuyez sur le bouton
pour éteindre l’appareil.
10. Débranchez l’appareil lorsque vous ne l’utilisez pas.
UTILISATION DE L’ACCESSOIRE DE PLI (Fig. 3-4)
Ce défroisseur de vêtements est doté d’un accessoire de
pli intégré sur le dessus de l’appareil. Pour l’utiliser, glissez
le vêtement sous le clip et alignez le bord avec le motif
marqué sur l’accessoire de pli.
Appuyez sur le bouton
et la vapeur sortira de l’orice
situé sur le dessus de l’appareil. Faites glisser le défroisseur
le long du bord du vêtement pour créer un pli net.
REMARQUE : la vapeur continue à sortir de l’embout du
défroisseur situé à l’avant de l’appareil pendant l’utilisation
de l’accessoire de pli.
UTILISATION DE L’ACCESSOIRE 3 EN 1
Lorsque le défroisseur est éteint et refroidi, xez la bande
en silicone (g. 5) sur la tête du défroisseur, et assurez-vous
que l’accessoire est correctement xé. Vous pouvez alors
utiliser la bande en silicone ou placer l’insert avec brosse à
poils durs (Fig. 6) ou l’espaceur pour textiles délicats (Fig.7)
dans la rainure située au-dessus de l’accessoire à bande en
silicone, au choix.
REMARQUE : une seule fonction de l’accessoire 3 en 1
peut être utilisée à la fois.
ATTENTION : soyez extrêmement prudent lorsque vous
changez les accessoires après l’utilisation de l’appareil, car
la tête du défroisseur reste chaude.
CONSEILS POUR LE DÉFROISSAGE
1. Commencez par tester l’appareil sur une zone peu
visible de l’article à défroisser en utilisant le réglage de
vapeur le plus faible pour vous assurer que le tissu peut
supporter les eets de la vapeur. Si vous ne constatez
pas de dommages, vous pouvez utiliser le défroisseur
sur l’article.
2. Pour préparer votre tissu avant le défroissage, brossez-le
avec l’accessoire « brosse à poils rigides ». Cela permet
de détendre les bres an de mieux faire pénétrer la
vapeur.
3. Suspendez votre vêtement ou textile.
REMARQUE : évitez si possible d’utiliser des cintres en
métal.
ATTENTION : si vous suspendez un vêtement à une porte
pour le défroissage, veillez à ne pas endommager la porte
avec la vapeur.
4. Diusez les jets de vapeur juste au-dessus du tissu,
où se trouvent les plis. Plusieurs passages peuvent être
nécessaires pour éliminer complètement les plis.
5. Pour éliminer les plis sur des tissus plus lourds ou
très froissés, vous pouvez placer la tête du défroisseur
directement sur le tissu pendant quelques secondes. La
prudence est de mise lorsque vous traitez des textiles
délicats.
6. Après utilisation, éteignez l’appareil en relâchant le
bouton
. Mettez ensuite le bouton sur la position
OFF. Débranchez le défroisseur de la prise de courant en
veillant à avoir les mains sèches. Videz l’eau restante du
réservoir pour éviter les fuites.
ASSUREZ-VOUS DE METTRE LE BOUTON
EN
POSITION OFF AVANT DE DÉBRANCHER L’APPAREIL.
7. Lors du défroissage vapeur, l’appareil doit toujours
être en mouvement. Ne tenez pas continuellement le
défroisseur au-dessus d’une zone et ne laissez pas les
jets de vapeur toucher directement le tissu pendant plus
de quelques secondes, car cela peut endommager le
textile, notamment provoquer le rétrécissement, la fonte
ou la décoloration de certains types de tissus.
8. Dans le cas de tissus plus lourds et durables, tels que les
manteaux en laine ou la literie, le réglage TURBO BOOST
(5 témoins lumineux rouges allumés) et des passages
plus lents du défroisseur peuvent s’avérer nécessaires
pour obtenir les résultats souhaités. Comme toujours,
commencez par tester l’appareil sur une zone peu visible
de l’article à défroisser en utilisant le réglage de vapeur
ordinaire pour vous assurer que le tissu peut supporter
les eets de la vapeur, et ajustez votre technique si
nécessaire pour obtenir les résultats souhaités.
NETTOYAGE ET ENTRETIEN
Pour garder votre appareil dans des conditions optimales,
veuillez suivre les instructions ci-dessous :
• N’enroulez pas le cordon d’alimentation autour de
l’appareil. Enroulez-le plutôt séparément, à côté de
l’appareil.
• Veillez à ne pas tendre à l’extrême le cordon d’alimentation
lorsque vous utilisez l’appareil.
• Débranchez l’appareil après chaque utilisation.
TUE 99,9 % DES BACTÉRIES*
1. Placez la semelle du défroisseur à une distance minimale
de 1,3 cm du matériau à traiter.
2. Restez dans cette position pendant 2 minutes, puis
passez à la zone à traiter suivante et répétez l’opération.
* Le taux de réduction des bactéries a été mesuré après
que les échantillons testés aient été exposés à la semelle
du défroisseur à une distance de 1,3 cm pendant 2
minutes. Des tests ont été eectués sur E.coli.
NOTE: Before rst use or when the unit has not been used
for a long period of time, it will be necessary to prime
(i.e., ll with water) the internal tank while the steamer
prepares to steam. You may hear a small tapping noise
during the heat-up process; this is normal.
5. Your steamer has 5 steam settings. Press the SETTING
button repeatedly until you reach your desired setting.
One red light indicates the minimum steam rate for use
on delicate fabrics, while 5 red lights indicate TURBO
BOOST setting for use on thicker fabrics and heavily
wrinkled articles. Always have the steam facing away
from you or anyone else in the room. (Fig. 2)
6. Press
button to release the ow of steam.
7. To stop the ow of steam, press the
button again.
8. When rst using the device, test on an old cloth, as there
may be sediment left from the manufacturing process
or transportation.
9. Press
button to turn unit OFF.
10. Unplug the device when it is not in use.
USING CREASER (Fig. 3-4)
This garment steamer has a built-in creaser on the top of
the unit. To use, slide garment under the clip and align
edge with the pattern as marked on the creaser.
Press the
button and steam will issue from
the port on the top of the unit. Slide the steamer along the
edge of the garment to create a sharp crease.
NOTE: Steam will continue to emit from the steam nozzle
on the front of the unit during creaser use.
USING 3-IN-1 ATTACHMENT
With the garment steamer o and cool, snap the Silicone
Band attachment (Fig. 5) over the steam head, ensuring it
is rmly axed. At this point the Silicone Band can be used
or you can choose to ax either the Bristle Brush (Fig. 6)
or Delicate Fabric Spacer (Fig. 7) inserts into the channel
on the top of the Silicone Band attachment, as desired.
NOTE: Only one function of the 3-In-1 attachment can be
used at a time.
CAUTION: Use extreme care when changing the
attachments after the unit has been in use, as the steam
head will continue to be hot.
STEAMING TIPS
1. First, test unit on an inconspicuous area of the item to be
steamed using the lowest Steam setting to ensure fabric
can tolerate the eects of steam. If there is no evidence
of damage, you can proceed to use the steamer on that
item.
2. To prepare your fabric for steaming, brush it with the
brush attachment. This will loosen the bers and allow
better steam penetration.
3. Hang your garment or fabric.
NOTE: Avoid using metal clothes hangers, if possible.
CAUTION: If hanging garment on a door while steaming,
be careful not to damage the door with steam.
4. Pass the steam jets just above the fabric where the
wrinkles are. It may take a few passes to remove the
wrinkles completely.
5. For heavier fabrics or severely wrinkled fabrics, you
may position the steamer head directly on the fabric
for a few seconds to remove wrinkles. Be cautious when
working with delicate fabrics.
6. After use, turn unit OFF by depressing the
button.
Then press the
button to the OFF position. With dry
hands, unplug your garment steamer from the outlet.
Empty any remaining water from the tank to avoid
leakage.
BE SURE TO PRESS THE
BUTTON TO THE OFF
POSITION PRIOR TO UNPLUGGING THE UNIT.
7. When steaming, always keep the unit in motion. Do
not continuously hold steamer over an area or touch
steamer jets directly to fabric for more than a few
seconds, as this can cause damage, including shrinkage,
melting, or color shift on certain types of material.
8. In the case of heavier, durable fabrics such as wool coats
or bedding, the TURBO BOOST setting (5 red indicator
lights) and slower passes with the steamer may be
necessary to achieve desired results. As always, start
by testing on an inconspicuous area of the item to be
steamed, using the regular Steam setting to ensure
fabric can tolerate the eects of steam, and adjust your
technique as needed to obtain the results desired.
CARE & MAINTENANCE
To help keep your appliance in the best possible condition
follow the steps below:
• Do not wrap the lead around the appliance, instead coil
the lead loosely by the side of the appliance.
• Do not use the appliance at a stretch from the power
point.
• Always unplug after use.
KILLS 99.9% OF BACTERIA*
1. Position the garment steamer’s soleplate at a minimum
distance of 0.5 inch (1.3 cm) from material to be treated.
2. Remain steaming in this position for 2 minutes, then
move to the next area to be treated and repeat.
* Bacteria reduction rate was measured after exposing
the tested samples for 2 minutes at a ½-inch distance
from the garment steamer’s soleplate. Testing was
performed on E.coli.
erhältlich). Wir empfehlen, ausschließlich destilliertes
Wasser zu verwenden, um Mineralablagerungen im
Wasserheizbereich zu vermeiden, die die Leistung
beeinträchtigen oder das Wassersystem verstopfen
könnten.
7. Die Innenabdeckung wieder schließen und den
Behälter wieder einsetzen. Achten Sie dabei darauf, dass
er einrastet und fest sitzt.
BEDIENUNGSANLEITUNG
1. Den Wasserbehälter mit destilliertem Wasser füllen.
2. Das Gerät an den Netzstrom anschließen.
3. Die Taste
drücken, um den Dampfglätter
EINZUSCHALTEN.
4. Die blaue READY-Anzeige leuchtet auf und beginnt zu
blinken. 40 Sekunden warten, bis das Gerät aufgeheizt
ist. Das Gerät ist betriebsbereit, wenn die Anzeige
READY nicht mehr blinkt, sondern durchgehend
leuchtet.
ANMERKUNG: Vor dem ersten Gebrauch oder wenn das
Gerät längere Zeit nicht benutzt wurde, muss der interne
Tank entlüftet (d. h. mit Wasser gefüllt) werden, während
sich der Dampfer auf das Dampfen vorbereitet. Während
des Aufheizvorgangs könnte ein leichtes Klopfgeräusch
zu hören sein; das ist normal.
5. Der Dampfglätter verfügt über 5 Dampfstufen.
Wiederholt die Taste SETTING drücken, bis die
gewünschte Einstellung erreicht ist. Ein rotes Licht zeigt
die minimale Dampfmenge für empndliche Stoe an,
während 5 rote Lichter die TURBO BOOST-Einstellung
für dickere Stoe und stark verknitterte Artikel
anzeigen. Richten Sie den Dampfkopf niemals auf sich
selbst oder andere Anwesende. (Fig. 2)
6. Die Taste
drücken, um Dampf abzugeben.
7. Um den Dampfausstoß zu unterbrechen, erneut die
Taste
drücken.
8. Wenn Sie das Gerät zum ersten Mal benutzen,
testen Sie es auf einem alten Tuch, da sich durch den
Herstellungsprozess oder den Transport Ablagerungen
gebildet haben können.
9. Die Taste
drücken, um das Gerät AUSZUSCHALTEN.
10. Den Netzstecker ziehen, wenn das Gerät nicht
verwendet wird.
VERWENDUNG DES BÜGELFALTEN-CLIPS(Fig. 3-4)
Dieser Dampfglätter verfügt über einen eingebauten
Bügelfaltenclip an der Oberseite des Geräts. Das
Kleidungsstück unter den Clip schieben und die Kante
an dem auf dem Bügelfaltenclip markierten Muster
ausrichten.
Die Taste
drücken, und es wird Dampf aus der Önung
an der Oberseite des Geräts ausgestoßen. Schieben Sie
den Dampfglätter an der Kante des Kleidungsstücks
entlang, um eine scharfe Bügelfalte zu erzeugen.
ANMERKUNG: Aus der Dampfdüse an der Vorderseite des
Geräts wird während des Betriebs des Bügelfaltenclips
kontinuierlich Dampf ausgestoßen.
VERWENDEN DES 3-IN-1-AUFSATZ
Bei ausgeschaltetem und abgekühltem Gerät den
Silikonbandaufsatz (Fig.5) über den Dampfkopf stecken
und einrasten lassen, so dass der Aufsatz fest sitzt. An
dieser Stelle kann der Silikonband-Aufsatz verwendet
werden, oder Sie können auch den Borstenbürstenaufsatz
(Fig.6) oder den Abstandhalter für empndliche Gewebe
(Fig.7) in den Kanal oben am Silikonbandaufsatz stecken.
ANMERKUNG: Es kann jeweils nur eine Funktion des 3-in-
1-Aufsatzes verwendet werden.
ACHTUNG: Seien Sie besonders vorsichtig, wenn Sie die
Aufsätze wechseln, nachdem das Gerät in Gebrauch war,
da der Dampfkopf weiterhin heiß ist.
TIPPS ZUM DAMPFGLÄTTEN
1. Das Gerät zunächst an einer unauälligen Stelle
des zu bedampfenden Artikels mit der niedrigsten
Dampfeinstellung testen, um sicherzustellen, dass
der Sto die Dampfeinwirkung aushält. Wenn es keine
Anzeichen für eine Beschädigung gibt, können Sie den
Dampfglätter für dieses Kleidungsstück verwenden.
2. Um Ihren Sto für das Dämpfen vorzubereiten, bürsten
Sie ihn mit dem Bürstenaufsatz. Dadurch werden
die Fasern gelockert und der Dampf kann besser
eindringen.
3. Hängen Sie Ihr Kleidungsstück oder Ihren Sto auf.
ANMERKUNG: Vermeiden Sie nach Möglichkeit die
Verwendung von Kleiderbügeln aus Metall.
ACHTUNG: Wenn Sie das Kleidungsstück während des
Dämpfens an einer Tür aufhängen, achten Sie darauf, dass
die Tür nicht durch den Dampf beschädigt werden kann.
4. Führen Sie die Dampfdüsen direkt dort über den Sto,
wo er geknittert ist. Es kann ein paar Durchgänge
dauern, bis die Falten vollständig entfernt sind.
5. Bei schwereren Stoen oder stark zerknitterten Stoen
können Sie den Dampfkopf einige Sekunden lang direkt
auf den Sto setzen, um Falten zu entfernen. Seien Sie
vorsichtig beim Glätten von empndlichen Stoen.
6. Das Gerät nach dem Gebrauch durch Lösen der Taste
AUSSCHALTEN. Danach die Taste auf die Position
GS59XE
WICHTIGE HINWEISE ZUR SICHERHEIT
Bei der Verwendung von Elektrogeräten, besonders
wenn Kinder in der Nähe sind, sollten stets grundlegende
Sicherheitsvorkehrungen getroen werden, darunter die
folgenden:
VOR GEBRAUCH ALLE ANWEISUNGEN LESEN
VON WASSER FERNHALTEN
• Dieses Gerät sollte nur nach der beiliegenden
Gebrauchsanleitung benutzt werden. Bitte für spätere
Konsultationen aufbewahren.
• Das Gerät nicht im Badezimmer benutzen.
• Das Gerät nicht in der Nähe von mit Wasser gefüllten
Becken, Badewannen oder anderen Behältern benutzen.
• Nicht in Wasser oder andere Flüssigkeiten tauchen.
• WICHTIG: Da dieses Gerät Dampf ausstößt, kann
es bei unsachgemäßem Gebrauch Verbrennungen
verursachen. Dieses Gerät sollte mir Vorsicht verwendet
werden, da es Dampf ausstößt.
• Den Sto-Dampfglätter und das dazugehörige Kabel
außerhalb der Reichweite von Kindern unter 8 Jahren
halten, wenn er eingeschaltet ist oder gerade abkühlt.
• WICHTIGER WARNHINWEIS - VERMEIDEN SIE
VERBRÜHUNGEN IHRER HAUT DURCH HEISSEN
DAMPF.
• Die Oberächen dieses Geräts können während des
Gebrauchs heiß sein.
• Achten Sie darauf, dass die heißen Oberächen des
Gerätes nicht direkt mit der Haut, insbesondere Augen,
Ohren, Gesicht und Hals in Berührung kommt.
• WICHTIG: Ziehen Sie immer den Netzstecker aus der
Steckdose, wenn Sie das Gerät nicht benutzen und bevor
Sie den Wasserbehälter füllen oder das Gerät reinigen.
• Gehen Sie beim Auüllen des Wasserbehälters vorsichtig
vor. Stellen Sie sicher, dass der Dampfglätter während
des Nachfüllens ausgeschaltet und der Netzstecker
gezogen ist.
• Dieses Gerät darf nicht verwendet werden, wenn es
heruntergefallen ist, sichtbare Schäden aufweist oder
undicht ist.
• Nicht verwenden, wenn das Gerät oder das Netzkabel
beschädigt ist. Im Falle einer Beschädigung den Betrieb
sofort einstellen und den Kundendienst kontaktieren,
um Gefahren zu vermeiden.
• Falls das Gerät nicht korrekt funktioniert, den Gebrauch
unverzüglich einstellen und den Kundendienst
benachrichtigen.
• Das Gerät niemals unbeaufsichtigt lassen, wenn es
eingeschaltet oder an den Netzstrom angeschlossen ist.
• Das Gerät während des Gebrauchs nicht auf
hitzeempndliche Oberächen stellen.
• Ausschließlich die mitgelieferten Zubehörteile
verwenden.
• Dieses Gerät sollte nicht von Kindern oder Erwachsenen
verwendet werden, deren fehlende Erfahrung,
Produktkenntnisse oder Behinderung eine Gefahr
bedeuten könnten, wenn sie nicht vorher korrekt
unterwiesen und angemessen beaufsichtigt werden.
• Dieses Gerät sollte mir Vorsicht verwendet werden, da es
Dampf ausstößt.
• Kinder sollten immer beaufsichtigt werden, damit sie
nicht mit diesem Produkt spielen.
• Außerhalb der Reichweite von Kindern aufbewahren.
• Das Gerät vor dem Verstauen abkühlen lassen.
• Immer den Wassertank leeren, bevor Sie das Gerät
wegräumen
• Nach dem Gebrauch das Kabel nicht um das Gerät
wickeln, es könnte hierdurch beschädigt werden.
Stattdessen lose neben dem Gerät aufrollen.
• Dieses Produkt entspricht in vollem Umfang allen
einschlägigen Rechtsvorschriften der EU und
Großbritanniens und den für diesen Gerätetyp und
diese Geräteklasse relevanten Normen. Wir sind ein
nach ISO9001:2015 zertiziertes Unternehmen, das
die Leistung unseres Qualitätsmanagementsystems
kontinuierlich bewertet. Bei Fragen zur Produktsicherheit
und Konformität wenden Sie sich bitte an unseren
Kundendienst
WICHTIG
AUSSCHLIESSLICH FÜR DEN HAUSGEBRAUCH
BESTIMMT
HINWEISE ZUM BEFÜLLEN
1. Vergewissern Sie sich, dass das Gerät vom Stromnetz
getrennt ist.
2. Das Gerät auf einen Tisch stellen und mit einer Hand
festhalten.
3. Mit der anderen Hand den Entriegelungsschalter nach
oben in Richtung der
-Taste bewegen.
4. Den Wasserbehälter aus dem Dampfglätter ziehen.
5. Die Innenabdeckung aus Gummi bendet sich oben am
Wasserbehälter. (Fig. 1)
6. Die Innenabdeckung önen und den Behälter mit
destilliertem Wasser füllen (im Lebensmittelhandel
GS59XE
IMPORTANT SAFETY INSTRUCTIONS
When using electrical appliances, especially when children
are present, basic safety precautions should always be
followed, including the following:
READ ALL INSTRUCTIONS BEFORE USING
KEEP AWAY FROM WATER
• This appliance should only be used as described within
this instruction booklet. Please retain for reference.
• Do not use the appliance in the bathroom.
• Do not use the appliance near water contained in basins,
bathtubs or other vessels.
• Do not immerse the appliance in water or other liquids.
• IMPORTANT Whilst emitting steam, this appliance may
cause burns if used incorrectly. Care should be taken
when using the appliance due to the emission of steam.
• Keep the fabric steamer and its cord out of reach of
children less than 8 years of age when it is energised or
cooling down.
• IMPORTANT CAUTION - AVOID SCALDING YOUR SKIN
WITH HOT STEAM.
• Surfaces of this appliance may be hot when in use.
• Take care to avoid the hot surfaces of the appliance
coming into direct contact with the skin, in particular the
eyes, ears, face and neck.
• IMPORTANT Always unplug the appliance when not
in use and before lling the water tank or cleaning the
appliance.
• Take care when relling the water tank. Ensure the
steamer is switched o and unplugged from the mains
whilst relling.
• This appliance should not be used if it has been dropped,
if there are visible signs of damage or if it is leaking.
• Do not use if the appliance or supply cord are damaged.
In the event of damage, discontinue use immediately
and contact the Customer Care Line in order to avoid a
hazard.
• In the event of a fault, discontinue use immediately and
contact the Customer Care Line.
• Do not leave the appliance unattended when switched
on or plugged in.
• Do not place the appliance or nozzle on any heat sensitive
surface whilst in operation.
• Do not use any other attachments than those supplied
with the product.
• This appliance should not be used by adults or children
whose lack of experience, product knowledge or
disability might cause a hazard, unless they have been
correctly instructed and are adequately supervised.
• Care should be take, when using the appliance due to
emission of steam.
• Children should always be supervised to ensure that they
do not play with this product.
• Keep out of the reach of children.
• Allow the appliance to cool before storing away.
• Always empty the water tank before storage
• After use, do not coil the lead around the appliance as
this may cause damage. Instead coil loosely by the side
of the appliance.
• This product complies fully with all appropriate EU
and UK Legislation and the Standards relevant to this
type and class of appliance. We are an ISO9001:2015
certied company that continually evaluates our Quality
Management System performance. If you have any
querie regarding product safety and compliance, please
contact the Customer Care Line.
IMPORTANT
FOR HOUSEHOLD USE ONLY
FILLING INSTRUCTIONS
1. Make sure the unit is unplugged.
2. Stand the unit on a table and grasp with one hand.
3. With other hand, move the release switch up toward
the
button.
4. Pull the reservoir out, away from the steamer body.
5. The rubber inlet cover is located on the top of the water
reservoir. (Fig. 1)
6. Open the inlet cover and ll the reservoir with distilled
water (which can be found in grocery stores). We
recommend that you use distilled water only, as this
will prevent mineral deposits in the boiler that can
reduce performance or clog the water system.
7. Close the inlet cover and return the reservoir to its
place, making sure that it snaps in place and is secure.
OPERATING INSTRUCTIONS
1. Fill water reservoir with distilled water.
2. Plug the unit into the electrical outlet.
3. Press the
button to turn steamer ON.
4. The blue READY light will illuminate and begin
blinking. Allow 40 seconds for the unit to warm up. The
appliance is ready to use when the READY light stops
blinking and remains solid.
GS59XE
INSTRUCTIONS DE SÉCURITÉ IMPORTANTES
Lors de l’utilisation d’appareils électriques, en particulier
en présence d’enfants, les mesures de sécurité de base
doivent toujours être respectées, notamment :
LISEZ TOUTES LES INSTRUCTIONS AVANT UTILISATION
TENIR L’APPAREIL À L’ÉCART DE L’EAU
• Cet appareil doit être réservé aux utilisations décrites
dans le présent mode d’emploi. Veuillez conserver ce
document pour référence.
• N’utilisez pas l’appareil dans la salle de bains.
• N’utilisez pas l’appareil à proximité d’éviers et de lavabos,
de baignoires ou d’autres récipients remplis d’eau.
• N’immergez pas l’appareil dans l’eau ou dans d’autres
liquides.
• IMPORTANT : lorsqu’il émet de la vapeur, cet appareil
peut causer des brûlures s’il est mal utilisé. Étant donné
le dégagement de vapeur, cet appareil doit être employé
avec précaution.
• Gardez le défroisseur vapeur et son cordon d’alimentation
hors de portée des enfants de moins de 8 ans lorsqu’il est
sous tension ou en train de refroidir.
• MISE EN GARDE IMPORTANTE – RISQUE DE BRÛLURE
AVEC LA VAPEUR BRÛLANTE.
• Les surfaces de cet appareil peuvent être chaudes lors de
l’utilisation.
• Prenez soin d’éviter tout contact direct entre la surface
brûlante de l’appareil et la peau, en particulier les yeux,
les oreilles, le visage et le cou.
• IMPORTANT : débranchez toujours l’appareil lorsqu’il
n’est pas utilisé, avant de le remplir et avant de le nettoyer.
• La prudence est de mise lorsque vous remplissez le
réservoir d’eau. Veillez à éteindre et débrancher le
défroisseur vapeur lorsque vous le remplissez.
• N’utilisez pas l’appareil s’il est tombé, s’il présente des
signes visibles de dommages ou s’il fuit.
• N’utilisez pas l’appareil s’il est défectueux ou si le cordon
d’alimentation est endommagé. En cas de dommage,
cessez immédiatement d’utiliser l’appareil et prenez
contact avec le service d’assistance à la clientèle an
d’éviter tout risque.
• En cas de défaut, cessez immédiatement d’utiliser
l’appareil et prenez contact avec le service d’assistance
à la clientèle.
• Ne laissez pas l’appareil allumé ou branché sans
surveillance.
• Ne placez pas l’appareil ni son embout sur une surface
sensible à la chaleur lorsqu’il fonctionne.
• N’utilisez pas d’autres accessoires que ceux fournis avec
le produit.
• Cet appareil ne doit pas être utilisé par des adultes ou des
enfants dont le manque d’expérience, la méconnaissance
du produit ou l’incapacité peuvent entraîner un risque,
à moins qu’ils aient été correctement instruits et qu’ils
soient supervisés.
• Étant donné le dégagement de vapeur, cet appareil doit
être utilisé avec précaution.
• Veillez en permanence à ce que les enfants ne jouent pas
avec cet appareil.
• Conservez-le hors de portée des enfants.
• Laissez l’appareil refroidir avant de le ranger.
• Videz toujours le réservoir d’eau avant de ranger
l’appareil.
• Après utilisation, n’enroulez pas le cordon d’alimentation
autour de l’appareil pour ne pas l’endommager.
• Enroulez-le plutôt sans serrer, à côté de l’appareil.
• Cet appareil est parfaitement conforme à la législation
et aux normes britanniques et européennes applicables
à ce type et à cette classe d’appareils. Notre entreprise
est certiée ISO9001:2015, une norme qui évalue en
permanence la performance de notre système de gestion
de la qualité. Si vous avez des questions concernant la
sécurité et la conformité de ce produit, veuillez prendre
contact avec le service à la clientèle.
IMPORTANT
À USAGE DOMESTIQUE UNIQUEMENT
INSTRUCTIONS DE REMPLISSAGE
1. Assurez-vous que l’appareil est débranché.
2. Placez l’appareil sur une table et saisissez-le d’une main.
3. De l’autre main, glissez l’interrupteur vers le haut, en
direction du bouton
.
4. Tirez le réservoir vers l’extérieur, en l’éloignant du corps
de l’appareil.
5. Le couvercle de remplissage en caoutchouc est situé sur
le dessus du réservoir d’eau. (Fig. 1)
6. Ouvrez le couvercle de remplissage et versez de l’eau
distillée (disponible en épicerie) dans le réservoir.
Nous vous recommandons d’utiliser uniquement de
l’eau distillée, an d’éviter les dépôts minéraux dans
la chaudière de l’appareil ; ceux-ci pourraient en eet
réduire les performances ou obstruer le système de
dégagement de vapeur.
7. Fermez le couvercle de remplissage et remettez le
BABYLISS SARL
ZI du Val de Calvigny
59141 Iwuy
France
www.babyliss.com
FAC 2024/04
IB-24/089-1
Made in China
Fabriqué en Chine
GS59XE - V20a
21. Never steam clothes you, or someone else,
are wearing.
22. When emitting steam, this appliance may
cause burns if it is used too close to the skin
or eyes, or if it is used incorrectly. To reduce
the risk of contact with hot water emitting from
the steam vents, test appliance before use by
holding it away from the body.
SAVE THESE
INSTRUCTIONS
IMPORTANT SAFETY
INSTRUCTIONS
When using electric appliances, especially when
children are present, basic safety precautions
should always be taken, including the following:
READ ALL INSTRUCTIONS
BEFORE USING
DANGER – Any appliance is electrically
live even when the switch is off.
To reduce the risk of death by electric shock:
1. Always unplug appliance immediately
after use and before cleaning.
2. Do not place or store appliance where it can
fall or be pulled into a tub or sink.
3. Do not place in, or drop into water or
other liquids.
4. Do not reach for an appliance that has fallen
into water. Unplug immediately.
5. Use only in a dry area.
WARNING – To reduce the risk of
burns, electrocution, fire, or injury to persons:
1. This appliance should never be left
unattended when plugged in.
2. This appliance is not a toy and is not to be
used by children.
3. Close supervision is necessary when this
appliance is used near children or individuals
with certain disabilities. Unsupervised use could
result in fire or personal injury.
4. Use this appliance only for its intended
use as described in this manual. Do not
use attachments not recommended by the
manufacturer.
5. Rest the appliance on a stable surface when
placing on its base.
6. Never operate this appliance if it has a
damaged cord or plug, if it is not working
properly, if it has been dropped or damaged,
or dropped into water. Do not attempt to
repair the appliance. Incorrect reassembly
or repair could cause a risk of fire, electric
shock, or injury to persons when the
appliance is used. Return the appliance to
an authorized service center for examination
and repair.
7. Keep the cord away from heated surfaces.
Do not allow cord to contact heated surfaces.
Do not pull or twist cord. Let appliance cool
completely before putting away. Loop cord
loosely around appliance when storing.
8. To reduce the risk of electric shock, this
appliance has a polarized plug (one blade is
wider than the other). As a safety feature, this
plug will fit in a polarized outlet only one way. If
the plug does not fit fully in the outlet, reverse
the plug. If it still does not fit, contact a qualified
electrician. Do not attempt to defeat this safety
feature.
9. Never drop or insert any object into
any opening.
10. Do not use outdoors or operate where
aerosol (spray) products are being used or
where oxygen is being administered.
11. If an extension cord is absolutely necessary,
a 15 ampere-rated cord should be used. Cords
rated for less amperage may overheat. Care
should be taken to arrange the cord so that the
cord cannot be pulled or tripped over.
12. Surfaces of this appliance are hot when
in use. Do not let heated surfaces touch eyes
or skin.
13. Do not place the steam nozzle directly on
any surface or on the appliance power cord
while it is hot or plugged in.
14. Unplug this appliance before filling or
emptying the water container and when not in
use.
15. Do not operate steamer without properly
filling the water container with distilled water.
16. Never yank cord to disconnect from
outlet; instead, grasp plug and pull
to disconnect.
17. Burns could occur from touching hot parts,
hot water, or steam. Use care when removing
water reservoir or when you turn a steam
appliance upside down – there may be hot
water in reservoir. Always position steamer
with head away from you and any other person
when turning on.
18. Do not hold hand in front of steam.
19. To reduce likelihood of circuit overload, do
not operate another high-wattage appliance on
the same circuit.
20. Use caution when installing or removing
an attachment, as it may contain hot water
from condensation. Ensure that the unit is off,
attachment is dry or cooled off to avoid contact
with hot water.
GETTING TO KNOW YOUR STEAMER
Setting button
Steam nozzles
Steam button
Water reservoir
release switch
Easy-to-fill
water reservoir
Built-in creaser clip
with garment guides
3-in-1 Attachment
Silicone Band
Pulls fabric taut for
easier steaming.
Bristle Brush
Loosens fibers for better
steam penetration.
Delicate Fabric
Spacer
Helps protect delicate
fabric and trims.
IMPORTANT
FOR HOUSEHOLD USE ONLY
FILLING INSTRUCTIONS
1. Make sure the unit is unplugged.
2. Stand the unit on a table and grasp
with one hand.
3. With other hand, move the release switch up
toward the STEAM button.
4. Pull the reservoir out, away from the steamer
body.
5. The rubber inlet cover is located on the top
of the water reservoir.
6. Open the inlet cover and fill the reservoir with
distilled water (which can be found in grocery
stores).
We recommend that you use distilled water
only, as this will prevent mineral deposits in the
boiler that can reduce performance or clog the
water system.
7. Close the inlet cover and return the reservoir
to its place, making sure that it snaps in place
and is secure.
Rubber Inlet Cover
ON/OFF
button and 9 ft.
power cord
Ready light - Blue
Ceramic-coated
soleplate
Steam setting indicator lights
OPERATING
INSTRUCTIONS
1. Fill water reservoir with distilled water.
2. Plug the unit into the electrical outlet.
3. Press the ON/OFF button to turn steamer ON.
4. The blue READY light will illuminate and
begin blinking. Allow 40 seconds for the unit to
warm up. The appliance is ready to use when
the READY light stops blinking and remains
solid. NOTE: Before first use or when the unit
has not been used for a long period of time, it
will be necessary to prime (i.e., fill with water)
the internal tank while the steamer prepares
to steam. You may hear a small tapping noise
during the heat-up process; this is normal.
5. Your steamer has 5
steam settings. Press the
SETTING button repeatedly
until you reach your desired
setting. One red light
indicates the minimum
steam rate for use on
delicate fabrics, while 5
red lights indicate TURBO
BOOST setting for use on
thicker fabrics and heavily wrinkled articles.
Always have the steam facing away from
you or anyone else in the room.
6. Press STEAM button to release the flow of
steam.
7. To stop the flow of steam, depress the
STEAM button.
8. When first using the device, test on an old
cloth, as there may be sediment left from the
manufacturing process or transportation.
9. Press ON/OFF button to turn unit OFF.
10. Unplug the device when it is not in use.
USING CREASER
This garment steamer has
a built-in creaser on the top
of the unit. To use, slide
garment under the clip and
align edge with the pattern
as marked on the creaser.
Press the STEAM button
and steam will issue from
the port on the top of the
unit. Slide the steamer along
the edge of the garment to
create a sharp crease. NOTE:
Steam will continue to emit
from the steam nozzle on the front of the unit
during creaser use.
USING 3-IN-1 ATTACHMENT
With the garment steamer
off and cool, snap the
Silicone Band attachment
(Fig. 1) over the steam
head, ensuring it is firmly
affixed. At this point the
Silicone Band can be used
or you can choose to affix
either the Bristle Brush (Fig.
2) or Delicate Fabric Spacer
(Fig. 3) inserts into the
channel on the top of the
Silicone Band attachment,
as desired. NOTE: Only
one function of the 3-In-1
attachment can be used at
a time.
Fig. 1
Fig. 3
Fig. 2
18. No ponga la mano frente al vapor.
19. Para evitar las sobrecargas eléctricas, no
conecte otro aparato de alta potencia al mismo
circuito eléctrico.
20. Tenga cuidado al instalar/sacar accesorios,
puesto que pueden estar calientes o contener
agua caliente. Cerciórese de que el aparato está
apagado y de que los accesorios están secos y
fríos antes de manipularlos.
21. Nunca use el aparato en prendas que usted
o alguien lleven puestas.
22. El vapor que sale de la boquilla durante el
uso puede causar quemaduras si usa la unidad
muy cerca de la piel, del cuero cabelludo o
de los ojos, o si la usa en forma incorrecta.
Para reducir el riesgo de quemaduras, pruebe
el vapor lejos de su cuerpo antes de usar el
aparato.
GUARDE ESTAS
INSTRUCCIONES
MEDIDAS DE
SEGURIDAD
IMPORTANTES
Al usar aparatos eléctricos, especialmente
en presencia de niños, siempre debe tomar
precauciones básicas de seguridad, entre ellas
las siguientes:
LEA TODAS LAS
INSTRUCCIONES
ANTES DE USARLO
PELIGRO – Cualquier aparato
enchufado permanece bajo tensión, aunque
esté apagado.
Para reducir el riesgo de electrocución:
1. Siempre desenchufe el aparato
inmediatamente después del uso y antes
de limpiarlo.
2. No coloque ni guarde el aparato donde pueda
caerse o ser empujado a una bañera o un
lavabo.
3. No coloque el aparato ni lo deje caer al agua
u otro líquido.
4. No trate de alcanzar el aparato después
de que se haya caído al agua; desenchúfelo
inmediatamente.
5. Utilícelo solamente en un lugar seco.
ADVERTENCIA – Para reducir el
riesgo de quemaduras, electrocución, incendio
o heridas:
1. Nunca descuide/deje el aparato sin
vigilancia mientras está conectado.
2. Este aparato no es un juguete; no debe
ser usado por niños.
3. Supervise el uso de este aparato
cuidadosamente cuando sea usado cerca de
niños o personas con ciertas discapacidades.
El uso sin supervisión de este aparato puede
causar un incendio o una herida.
4. Utilice este aparato únicamente con el
propósito para el cual fue diseñado y solamente
según las instrucciones. Solo use accesorios
recomendados por el fabricante.
5. Ponga la base del aparato sobre una
superficie llana y segura.
6. No utilice este aparato si el cable o el
enchufe están dañados, si no funciona
correctamente, si está dañado, o después
de que se haya caído, incluso en el agua;
No intente reparar el aparato. El ensamblar
las partes de manera incorrecta aumenta
los riesgos de incendio, descarga eléctrica
y heridas. regréselo a un centro de servicio
autorizado para su revisión y reparación.
7. Mantenga el cable alejado de superficies
calientes. No permita que el cable tenga
contacto con superficies calientes. No jale ni
retuerza el cable. Permita que el aparato se
enfríe completamente antes de guardarlo.
Enrolle el cable sin apretar alrededor del
aparato para guardarlo.
8. Para reducir el riesgo de descarga eléctrica,
el cable de este aparato está dotado de un
enchufe polarizado (una pata es más ancha
que la otra). Como medida de seguridad, se
podrá enchufar de una sola manera en la
toma de corriente polarizada. Si no entra en
la toma de corriente, inviértalo. Si aun así no
entra completamente, comuníquese con un
electricista. No intente ir en contra de esta
función de seguridad.
9. Nunca deje caer ni inserte ningún objeto en
ninguna de las aberturas.
10. No utilice el aparato en exteriores, ni
lo haga funcionar donde se estén usando
productos en aerosol (spray) o donde se esté
administrando oxígeno.
11. Si debe usar el aparato con una extensión,
utilice una extensión de 15 amperios. Una
extensión de menor amperaje podría calentar
excesivamente. Coloque la extensión de manera
que nadie la pueda jalar o tropezar con ella.
12. Las superficies de este aparato se ponen
muy calientes durante el uso; mantenga los ojos
y la piel alejados de las superficies calientes.
13. No coloque la boquilla sobre ninguna
superficie mientras está caliente o mientras el
aparato está conectado, y manténgala alejada
del cable eléctrico.
14. Siempre desenchufe el aparato antes de
llenar o vaciar el depósito de agua, y cuando
no lo usa.
15. Siempre llene el depósito de agua con agua
destilada antes de encender el aparato.
16. Nunca jale el cable para desconectar el
aparato; agárrelo por la clavija.
17. Las piezas calientes, el agua caliente y
el vapor pueden causar quemaduras. Tenga
cuidado al vaciar el depósito de agua o al
voltear el aparato, puesto que el depósito
puede contener agua caliente. Siempre oriente
la boquilla de tal manera que el vapor no esté
dirigido a nadie, incluso al encender el aparato.
FAMILIARÍCESE CON SU VAPORIZADOR DE PRENDAS
Botón SETTING
Boquillas de
vaporización
Botón STEAM
Botón de liberación
del depósito de agua
Depósito de agua
fácil de llenar
Accesorio integrado
para pliegues con
guías para las
prendas
Accesorio 3 en 1
Accesorio con
tira de silicona
Estira la tela para un
desarrugado más fácil.
Cepillo duro
Suelta las fibras para
una mejor penetración
del vapor.
Separador para
telas delicadas
Ayuda a proteger las
telas delicadas y los
apliques/bordados/
adornos.
IMPORTANTE
PARA USO DOMÉSTICO
SOLAMENTE
LLENADO DEL DEPÓSITO
1. Cerciórese de que el aparato está
desenchufado.
2. Coloque la unidad sobre una mesa y agárrela
con una mano.
3. Con la otra mano, deslice el botón de
liberación del depósito de agua hacia el botón
STEAM.
4. Saque el depósito de agua.
5. Localice el tapón de caucho ubicado arriba
del depósito de agua.
6. Abra el tapón de caucho y llene el depósito
con agua destilada (disponible en la mayoría de
los supermercados).
Nota: a fin de evitar los depósitos minerales,
los cuales pueden perjudicar el rendimiento
del aparato o tapar el sistema de vaporización,
le aconsejamos que use agua destilada
solamente.
7. Cierre el tapón y vuelva a instalar el depósito
de manera segura.
Tapón de caucho
Botón de
encendido/apagado
y cable de 2.75 m
Luz de listo (azul)
Indicadores luminosos
INSTRUCCIONES
DE OPERACIÓN
1. Llene el depósito de agua con agua
destilada.
2. Enchufe el aparato en una toma de corriente.
3. Oprima el botón de encendido/apagado para
encender el aparato.
4. La luz azul “READY” se encenderá y
empezará a parpadear. Permita que la unidad
se caliente por 40 segundos. El aparato está
listo cuando la luz “READY” deja de parpadear y
permanece encendida. NOTA: antes del primer
uso o cuando la unidad no haya sido usada
por un tiempo prolongado, el depósito interno
se cebará (se llenará con agua) durante el
calentamiento. Escuchará un pequeño golpeteo;
esto es normal.
5. Su vaporizador de
prendas tiene 5 ajustes
de vaporización. Oprima
repetidamente el botón
SETTING para elegir el nivel
de vaporización deseado.
Una luz roja corresponde
al nivel de vaporización
mínimo, para uso en telas
delicadas, mientras 5 luces
rojas corresponden a la función “turbo” para
uso en telas gruesas y artículos arrugados.
Siempre oriente la boquilla de tal manera
que el vapor no esté dirigido a nadie.
6. Oprima el botón STEAM para producir vapor.
7. Suelte el botón STEAM para detener el flujo
de vapor.
Suela con revestimiento
de cerámica
8. Antes del primer uso, haga una prueba
en un trapo para eliminar el polvo y otros
residuos acumulados durante la fabricación y el
transporte.
9. Oprima el botón de encendido/apagado para
apagar el aparato.
10. Desenchufe la unidad cuando no está en uso.
MODO DE EMPLEO DEL
ACCESORIO PARA PLIEGUES
Su vaporizador de prendas
cuenta con un accesorio
para pliegues integrado.
Para usarlo, deslice la
prenda por debajo del clip,
alineando el borde con el
estampado según se indica
en la unidad. Presione el
botón STEAM; el vapor
saldrá por el puerto arriba
de la unidad. Deslice el
vaporizador a lo largo del
borde de la prenda para
crear un pliegue preciso. NOTA: durante este
proceso, el vapor seguirá saliendo por la
boquilla.
21. Never steam clothes you, or someone else,
are wearing.
22. When emitting steam, this appliance may
cause burns if it is used too close to the skin
or eyes, or if it is used incorrectly. To reduce
the risk of contact with hot water emitting from
the steam vents, test appliance before use by
holding it away from the body.
SAVE THESE
INSTRUCTIONS
IMPORTANT SAFETY
INSTRUCTIONS
When using electric appliances, especially when
children are present, basic safety precautions
should always be taken, including the following:
READ ALL INSTRUCTIONS
BEFORE USING
DANGER – Any appliance is electrically
live even when the switch is off.
To reduce the risk of death by electric shock:
1. Always unplug appliance immediately
after use and before cleaning.
2. Do not place or store appliance where it can
fall or be pulled into a tub or sink.
3. Do not place in, or drop into water or
other liquids.
4. Do not reach for an appliance that has fallen
into water. Unplug immediately.
5. Use only in a dry area.
WARNING – To reduce the risk of
burns, electrocution, fire, or injury to persons:
1. This appliance should never be left
unattended when plugged in.
2. This appliance is not a toy and is not to be
used by children.
3. Close supervision is necessary when this
appliance is used near children or individuals
with certain disabilities. Unsupervised use could
result in fire or personal injury.
4. Use this appliance only for its intended
use as described in this manual. Do not
use attachments not recommended by the
manufacturer.
5. Rest the appliance on a stable surface when
placing on its base.
6. Never operate this appliance if it has a
damaged cord or plug, if it is not working
properly, if it has been dropped or damaged,
or dropped into water. Do not attempt to
repair the appliance. Incorrect reassembly
or repair could cause a risk of fire, electric
shock, or injury to persons when the
appliance is used. Return the appliance to
an authorized service center for examination
and repair.
7. Keep the cord away from heated surfaces.
Do not allow cord to contact heated surfaces.
Do not pull or twist cord. Let appliance cool
completely before putting away. Loop cord
loosely around appliance when storing.
8. To reduce the risk of electric shock, this
appliance has a polarized plug (one blade is
wider than the other). As a safety feature, this
plug will fit in a polarized outlet only one way. If
the plug does not fit fully in the outlet, reverse
the plug. If it still does not fit, contact a qualified
electrician. Do not attempt to defeat this safety
feature.
9. Never drop or insert any object into
any opening.
10. Do not use outdoors or operate where
aerosol (spray) products are being used or
where oxygen is being administered.
11. If an extension cord is absolutely necessary,
a 15 ampere-rated cord should be used. Cords
rated for less amperage may overheat. Care
should be taken to arrange the cord so that the
cord cannot be pulled or tripped over.
12. Surfaces of this appliance are hot when
in use. Do not let heated surfaces touch eyes
or skin.
13. Do not place the steam nozzle directly on
any surface or on the appliance power cord
while it is hot or plugged in.
14. Unplug this appliance before filling or
emptying the water container and when not in
use.
15. Do not operate steamer without properly
filling the water container with distilled water.
16. Never yank cord to disconnect from
outlet; instead, grasp plug and pull
to disconnect.
17. Burns could occur from touching hot parts,
hot water, or steam. Use care when removing
water reservoir or when you turn a steam
appliance upside down – there may be hot
water in reservoir. Always position steamer
with head away from you and any other person
when turning on.
18. Do not hold hand in front of steam.
19. To reduce likelihood of circuit overload, do
not operate another high-wattage appliance on
the same circuit.
20. Use caution when installing or removing
an attachment, as it may contain hot water
from condensation. Ensure that the unit is off,
attachment is dry or cooled off to avoid contact
with hot water.
GETTING TO KNOW YOUR STEAMER
Setting button
Steam nozzles
Steam button
Water reservoir
release switch
Easy-to-fill
water reservoir
Built-in creaser clip
with garment guides
3-in-1 Attachment
Silicone Band
Pulls fabric taut for
easier steaming.
Bristle Brush
Loosens fibers for better
steam penetration.
Delicate Fabric
Spacer
Helps protect delicate
fabric and trims.
IMPORTANT
FOR HOUSEHOLD USE ONLY
FILLING INSTRUCTIONS
1. Make sure the unit is unplugged.
2. Stand the unit on a table and grasp
with one hand.
3. With other hand, move the release switch up
toward the STEAM button.
4. Pull the reservoir out, away from the steamer
body.
5. The rubber inlet cover is located on the top
of the water reservoir.
6. Open the inlet cover and fill the reservoir with
distilled water (which can be found in grocery
stores).
We recommend that you use distilled water
only, as this will prevent mineral deposits in the
boiler that can reduce performance or clog the
water system.
7. Close the inlet cover and return the reservoir
to its place, making sure that it snaps in place
and is secure.
Rubber Inlet Cover
ON/OFF
button and 9 ft.
power cord
Ready light - Blue
Ceramic-coated
soleplate
Steam setting indicator lights
OPERATING
INSTRUCTIONS
1. Fill water reservoir with distilled water.
2. Plug the unit into the electrical outlet.
3. Press the ON/OFF button to turn steamer ON.
4. The blue READY light will illuminate and
begin blinking. Allow 40 seconds for the unit to
warm up. The appliance is ready to use when
the READY light stops blinking and remains
solid. NOTE: Before first use or when the unit
has not been used for a long period of time, it
will be necessary to prime (i.e., fill with water)
the internal tank while the steamer prepares
to steam. You may hear a small tapping noise
during the heat-up process; this is normal.
5. Your steamer has 5
steam settings. Press the
SETTING button repeatedly
until you reach your desired
setting. One red light
indicates the minimum
steam rate for use on
delicate fabrics, while 5
red lights indicate TURBO
BOOST setting for use on
thicker fabrics and heavily wrinkled articles.
Always have the steam facing away from
you or anyone else in the room.
6. Press STEAM button to release the flow of
steam.
7. To stop the flow of steam, depress the
STEAM button.
8. When first using the device, test on an old
cloth, as there may be sediment left from the
manufacturing process or transportation.
9. Press ON/OFF button to turn unit OFF.
10. Unplug the device when it is not in use.
USING CREASER
This garment steamer has
a built-in creaser on the top
of the unit. To use, slide
garment under the clip and
align edge with the pattern
as marked on the creaser.
Press the STEAM button
and steam will issue from
the port on the top of the
unit. Slide the steamer along
the edge of the garment to
create a sharp crease. NOTE:
Steam will continue to emit
from the steam nozzle on the front of the unit
during creaser use.
USING 3-IN-1 ATTACHMENT
With the garment steamer
off and cool, snap the
Silicone Band attachment
(Fig. 1) over the steam
head, ensuring it is firmly
affixed. At this point the
Silicone Band can be used
or you can choose to affix
either the Bristle Brush (Fig.
2) or Delicate Fabric Spacer
(Fig. 3) inserts into the
channel on the top of the
Silicone Band attachment,
as desired. NOTE: Only
one function of the 3-In-1
attachment can be used at
a time.
Fig. 1
Fig. 3
Fig. 2
18. No ponga la mano frente al vapor.
19. Para evitar las sobrecargas eléctricas, no
conecte otro aparato de alta potencia al mismo
circuito eléctrico.
20. Tenga cuidado al instalar/sacar accesorios,
puesto que pueden estar calientes o contener
agua caliente. Cerciórese de que el aparato está
apagado y de que los accesorios están secos y
fríos antes de manipularlos.
21. Nunca use el aparato en prendas que usted
o alguien lleven puestas.
22. El vapor que sale de la boquilla durante el
uso puede causar quemaduras si usa la unidad
muy cerca de la piel, del cuero cabelludo o
de los ojos, o si la usa en forma incorrecta.
Para reducir el riesgo de quemaduras, pruebe
el vapor lejos de su cuerpo antes de usar el
aparato.
GUARDE ESTAS
INSTRUCCIONES
MEDIDAS DE
SEGURIDAD
IMPORTANTES
Al usar aparatos eléctricos, especialmente
en presencia de niños, siempre debe tomar
precauciones básicas de seguridad, entre ellas
las siguientes:
LEA TODAS LAS
INSTRUCCIONES
ANTES DE USARLO
PELIGRO –
Cualquier aparato
enchufado permanece bajo tensión, aunque
esté apagado.
Para reducir el riesgo de electrocución:
1. Siempre desenchufe el aparato
inmediatamente después del uso y antes
de limpiarlo.
2. No coloque ni guarde el aparato donde pueda
caerse o ser empujado a una bañera o un
lavabo.
3. No coloque el aparato ni lo deje caer al agua
u otro líquido.
4. No trate de alcanzar el aparato después
de que se haya caído al agua; desenchúfelo
inmediatamente.
5. Utilícelo solamente en un lugar seco.
ADVERTENCIA – Para reducir el
riesgo de quemaduras, electrocución, incendio
o heridas:
1. Nunca descuide/deje el aparato sin
vigilancia mientras está conectado.
2. Este aparato no es un juguete; no debe
ser usado por niños.
3. Supervise el uso de este aparato
cuidadosamente cuando sea usado cerca de
niños o personas con ciertas discapacidades.
El uso sin supervisión de este aparato puede
causar un incendio o una herida.
4. Utilice este aparato únicamente con el
propósito para el cual fue diseñado y solamente
según las instrucciones. Solo use accesorios
recomendados por el fabricante.
5. Ponga la base del aparato sobre una
superficie llana y segura.
6. No utilice este aparato si el cable o el
enchufe están dañados, si no funciona
correctamente, si está dañado, o después
de que se haya caído, incluso en el agua;
No intente reparar el aparato. El ensamblar
las partes de manera incorrecta aumenta
los riesgos de incendio, descarga eléctrica
y heridas. regréselo a un centro de servicio
autorizado para su revisión y reparación.
7. Mantenga el cable alejado de superficies
calientes. No permita que el cable tenga
contacto con superficies calientes. No jale ni
retuerza el cable. Permita que el aparato se
enfríe completamente antes de guardarlo.
Enrolle el cable sin apretar alrededor del
aparato para guardarlo.
8. Para reducir el riesgo de descarga eléctrica,
el cable de este aparato está dotado de un
enchufe polarizado (una pata es más ancha
que la otra). Como medida de seguridad, se
podrá enchufar de una sola manera en la
toma de corriente polarizada. Si no entra en
la toma de corriente, inviértalo. Si aun así no
entra completamente, comuníquese con un
electricista. No intente ir en contra de esta
función de seguridad.
9. Nunca deje caer ni inserte ningún objeto en
ninguna de las aberturas.
10. No utilice el aparato en exteriores, ni
lo haga funcionar donde se estén usando
productos en aerosol (spray) o donde se esté
administrando oxígeno.
11. Si debe usar el aparato con una extensión,
utilice una extensión de 15 amperios. Una
extensión de menor amperaje podría calentar
excesivamente. Coloque la extensión de manera
que nadie la pueda jalar o tropezar con ella.
12. Las superficies de este aparato se ponen
muy calientes durante el uso; mantenga los ojos
y la piel alejados de las superficies calientes.
13. No coloque la boquilla sobre ninguna
superficie mientras está caliente o mientras el
aparato está conectado, y manténgala alejada
del cable eléctrico.
14. Siempre desenchufe el aparato antes de
llenar o vaciar el depósito de agua, y cuando
no lo usa.
15. Siempre llene el depósito de agua con agua
destilada antes de encender el aparato.
16. Nunca jale el cable para desconectar el
aparato; agárrelo por la clavija.
17. Las piezas calientes, el agua caliente y
el vapor pueden causar quemaduras. Tenga
cuidado al vaciar el depósito de agua o al
voltear el aparato, puesto que el depósito
puede contener agua caliente. Siempre oriente
la boquilla de tal manera que el vapor no esté
dirigido a nadie, incluso al encender el aparato.
FAMILIARÍCESE CON SU VAPORIZADOR DE PRENDAS
Botón SETTING
Boquillas de
vaporización
Botón STEAM
Botón de liberación
del depósito de agua
Depósito de agua
fácil de llenar
Accesorio integrado
para pliegues con
guías para las
prendas
Accesorio 3 en 1
Accesorio con
tira de silicona
Estira la tela para un
desarrugado más fácil.
Cepillo duro
Suelta las fibras para
una mejor penetración
del vapor.
Separador para
telas delicadas
Ayuda a proteger las
telas delicadas y los
apliques/bordados/
adornos.
IMPORTANTE
PARA USO DOMÉSTICO
SOLAMENTE
LLENADO DEL DEPÓSITO
1. Cerciórese de que el aparato está
desenchufado.
2. Coloque la unidad sobre una mesa y agárrela
con una mano.
3. Con la otra mano, deslice el botón de
liberación del depósito de agua hacia el botón
STEAM.
4. Saque el depósito de agua.
5. Localice el tapón de caucho ubicado arriba
del depósito de agua.
6. Abra el tapón de caucho y llene el depósito
con agua destilada (disponible en la mayoría de
los supermercados).
Nota: a fin de evitar los depósitos minerales,
los cuales pueden perjudicar el rendimiento
del aparato o tapar el sistema de vaporización,
le aconsejamos que use agua destilada
solamente.
7. Cierre el tapón y vuelva a instalar el depósito
de manera segura.
Tapón de caucho
Botón de
encendido/apagado
y cable de 2.75 m
Luz de listo (azul)
Indicadores luminosos
INSTRUCCIONES
DE OPERACIÓN
1. Llene el depósito de agua con agua
destilada.
2. Enchufe el aparato en una toma de corriente.
3. Oprima el botón de encendido/apagado para
encender el aparato.
4. La luz azul “READY” se encenderá y
empezará a parpadear. Permita que la unidad
se caliente por 40 segundos. El aparato está
listo cuando la luz “READY” deja de parpadear y
permanece encendida. NOTA: antes del primer
uso o cuando la unidad no haya sido usada
por un tiempo prolongado, el depósito interno
se cebará (se llenará con agua) durante el
calentamiento. Escuchará un pequeño golpeteo;
esto es normal.
5. Su vaporizador de
prendas tiene 5 ajustes
de vaporización. Oprima
repetidamente el botón
SETTING para elegir el nivel
de vaporización deseado.
Una luz roja corresponde
al nivel de vaporización
mínimo, para uso en telas
delicadas, mientras 5 luces
rojas corresponden a la función “turbo” para
uso en telas gruesas y artículos arrugados.
Siempre oriente la boquilla de tal manera
que el vapor no esté dirigido a nadie.
6. Oprima el botón STEAM para producir vapor.
7. Suelte el botón STEAM para detener el flujo
de vapor.
Suela con revestimiento
de cerámica
8. Antes del primer uso, haga una prueba
en un trapo para eliminar el polvo y otros
residuos acumulados durante la fabricación y el
transporte.
9. Oprima el botón de encendido/apagado para
apagar el aparato.
10. Desenchufe la unidad cuando no está en uso.
MODO DE EMPLEO DEL
ACCESORIO PARA PLIEGUES
Su vaporizador de prendas
cuenta con un accesorio
para pliegues integrado.
Para usarlo, deslice la
prenda por debajo del clip,
alineando el borde con el
estampado según se indica
en la unidad. Presione el
botón STEAM; el vapor
saldrá por el puerto arriba
de la unidad. Deslice el
vaporizador a lo largo del
borde de la prenda para
crear un pliegue preciso. NOTA: durante este
proceso, el vapor seguirá saliendo por la
boquilla.
21. Never steam clothes you, or someone else,
are wearing.
22. When emitting steam, this appliance may
cause burns if it is used too close to the skin
or eyes, or if it is used incorrectly. To reduce
the risk of contact with hot water emitting from
the steam vents, test appliance before use by
holding it away from the body.
SAVE THESE
INSTRUCTIONS
IMPORTANT SAFETY
INSTRUCTIONS
When using electric appliances, especially when
children are present, basic safety precautions
should always be taken, including the following:
READ ALL INSTRUCTIONS
BEFORE USING
DANGER – Any appliance is electrically
live even when the switch is off.
To reduce the risk of death by electric shock:
1. Always unplug appliance immediately
after use and before cleaning.
2. Do not place or store appliance where it can
fall or be pulled into a tub or sink.
3. Do not place in, or drop into water or
other liquids.
4. Do not reach for an appliance that has fallen
into water. Unplug immediately.
5. Use only in a dry area.
WARNING – To reduce the risk of
burns, electrocution, fire, or injury to persons:
1. This appliance should never be left
unattended when plugged in.
2. This appliance is not a toy and is not to be
used by children.
3. Close supervision is necessary when this
appliance is used near children or individuals
with certain disabilities. Unsupervised use could
result in fire or personal injury.
4. Use this appliance only for its intended
use as described in this manual. Do not
use attachments not recommended by the
manufacturer.
5. Rest the appliance on a stable surface when
placing on its base.
6. Never operate this appliance if it has a
damaged cord or plug, if it is not working
properly, if it has been dropped or damaged,
or dropped into water. Do not attempt to
repair the appliance. Incorrect reassembly
or repair could cause a risk of fire, electric
shock, or injury to persons when the
appliance is used. Return the appliance to
an authorized service center for examination
and repair.
7. Keep the cord away from heated surfaces.
Do not allow cord to contact heated surfaces.
Do not pull or twist cord. Let appliance cool
completely before putting away. Loop cord
loosely around appliance when storing.
8. To reduce the risk of electric shock, this
appliance has a polarized plug (one blade is
wider than the other). As a safety feature, this
plug will fit in a polarized outlet only one way. If
the plug does not fit fully in the outlet, reverse
the plug. If it still does not fit, contact a qualified
electrician. Do not attempt to defeat this safety
feature.
9. Never drop or insert any object into
any opening.
10. Do not use outdoors or operate where
aerosol (spray) products are being used or
where oxygen is being administered.
11. If an extension cord is absolutely necessary,
a 15 ampere-rated cord should be used. Cords
rated for less amperage may overheat. Care
should be taken to arrange the cord so that the
cord cannot be pulled or tripped over.
12. Surfaces of this appliance are hot when
in use. Do not let heated surfaces touch eyes
or skin.
13. Do not place the steam nozzle directly on
any surface or on the appliance power cord
while it is hot or plugged in.
14. Unplug this appliance before filling or
emptying the water container and when not in
use.
15. Do not operate steamer without properly
filling the water container with distilled water.
16. Never yank cord to disconnect from
outlet; instead, grasp plug and pull
to disconnect.
17. Burns could occur from touching hot parts,
hot water, or steam. Use care when removing
water reservoir or when you turn a steam
appliance upside down – there may be hot
water in reservoir. Always position steamer
with head away from you and any other person
when turning on.
18. Do not hold hand in front of steam.
19. To reduce likelihood of circuit overload, do
not operate another high-wattage appliance on
the same circuit.
20. Use caution when installing or removing
an attachment, as it may contain hot water
from condensation. Ensure that the unit is off,
attachment is dry or cooled off to avoid contact
with hot water.
GETTING TO KNOW YOUR STEAMER
Setting button
Steam nozzles
Steam button
Water reservoir
release switch
Easy-to-fill
water reservoir
Built-in creaser clip
with garment guides
3-in-1 Attachment
Silicone Band
Pulls fabric taut for
easier steaming.
Bristle Brush
Loosens fibers for better
steam penetration.
Delicate Fabric
Spacer
Helps protect delicate
fabric and trims.
IMPORTANT
FOR HOUSEHOLD USE ONLY
FILLING INSTRUCTIONS
1. Make sure the unit is unplugged.
2. Stand the unit on a table and grasp
with one hand.
3. With other hand, move the release switch up
toward the STEAM button.
4. Pull the reservoir out, away from the steamer
body.
5. The rubber inlet cover is located on the top
of the water reservoir.
6. Open the inlet cover and fill the reservoir with
distilled water (which can be found in grocery
stores).
We recommend that you use distilled water
only, as this will prevent mineral deposits in the
boiler that can reduce performance or clog the
water system.
7. Close the inlet cover and return the reservoir
to its place, making sure that it snaps in place
and is secure.
Rubber Inlet Cover
ON/OFF
button and 9 ft.
power cord
Ready light - Blue
Ceramic-coated
soleplate
Steam setting indicator lights
OPERATING
INSTRUCTIONS
1. Fill water reservoir with distilled water.
2. Plug the unit into the electrical outlet.
3. Press the ON/OFF button to turn steamer ON.
4. The blue READY light will illuminate and
begin blinking. Allow 40 seconds for the unit to
warm up. The appliance is ready to use when
the READY light stops blinking and remains
solid. NOTE: Before first use or when the unit
has not been used for a long period of time, it
will be necessary to prime (i.e., fill with water)
the internal tank while the steamer prepares
to steam. You may hear a small tapping noise
during the heat-up process; this is normal.
5. Your steamer has 5
steam settings. Press the
SETTING button repeatedly
until you reach your desired
setting. One red light
indicates the minimum
steam rate for use on
delicate fabrics, while 5
red lights indicate TURBO
BOOST setting for use on
thicker fabrics and heavily wrinkled articles.
Always have the steam facing away from
you or anyone else in the room.
6. Press STEAM button to release the flow of
steam.
7. To stop the flow of steam, depress the
STEAM button.
8. When first using the device, test on an old
cloth, as there may be sediment left from the
manufacturing process or transportation.
9. Press ON/OFF button to turn unit OFF.
10. Unplug the device when it is not in use.
USING CREASER
This garment steamer has
a built-in creaser on the top
of the unit. To use, slide
garment under the clip and
align edge with the pattern
as marked on the creaser.
Press the STEAM button
and steam will issue from
the port on the top of the
unit. Slide the steamer along
the edge of the garment to
create a sharp crease. NOTE:
Steam will continue to emit
from the steam nozzle on the front of the unit
during creaser use.
USING 3-IN-1 ATTACHMENT
With the garment steamer
off and cool, snap the
Silicone Band attachment
(Fig. 1) over the steam
head, ensuring it is firmly
affixed. At this point the
Silicone Band can be used
or you can choose to affix
either the Bristle Brush (Fig.
2) or Delicate Fabric Spacer
(Fig. 3) inserts into the
channel on the top of the
Silicone Band attachment,
as desired. NOTE: Only
one function of the 3-In-1
attachment can be used at
a time.
Fig. 1
Fig. 3
Fig. 2
18. No ponga la mano frente al vapor.
19. Para evitar las sobrecargas eléctricas, no
conecte otro aparato de alta potencia al mismo
circuito eléctrico.
20. Tenga cuidado al instalar/sacar accesorios,
puesto que pueden estar calientes o contener
agua caliente. Cerciórese de que el aparato está
apagado y de que los accesorios están secos y
fríos antes de manipularlos.
21. Nunca use el aparato en prendas que usted
o alguien lleven puestas.
22. El vapor que sale de la boquilla durante el
uso puede causar quemaduras si usa la unidad
muy cerca de la piel, del cuero cabelludo o
de los ojos, o si la usa en forma incorrecta.
Para reducir el riesgo de quemaduras, pruebe
el vapor lejos de su cuerpo antes de usar el
aparato.
GUARDE ESTAS
INSTRUCCIONES
MEDIDAS DE
SEGURIDAD
IMPORTANTES
Al usar aparatos eléctricos, especialmente
en presencia de niños, siempre debe tomar
precauciones básicas de seguridad, entre ellas
las siguientes:
LEA TODAS LAS
INSTRUCCIONES
ANTES DE USARLO
PELIGRO – Cualquier aparato
enchufado permanece bajo tensión, aunque
esté apagado.
Para reducir el riesgo de electrocución:
1. Siempre desenchufe el aparato
inmediatamente después del uso y antes
de limpiarlo.
2. No coloque ni guarde el aparato donde pueda
caerse o ser empujado a una bañera o un
lavabo.
3. No coloque el aparato ni lo deje caer al agua
u otro líquido.
4. No trate de alcanzar el aparato después
de que se haya caído al agua; desenchúfelo
inmediatamente.
5. Utilícelo solamente en un lugar seco.
ADVERTENCIA – Para reducir el
riesgo de quemaduras, electrocución, incendio
o heridas:
1. Nunca descuide/deje el aparato sin
vigilancia mientras está conectado.
2. Este aparato no es un juguete; no debe
ser usado por niños.
3. Supervise el uso de este aparato
cuidadosamente cuando sea usado cerca de
niños o personas con ciertas discapacidades.
El uso sin supervisión de este aparato puede
causar un incendio o una herida.
4. Utilice este aparato únicamente con el
propósito para el cual fue diseñado y solamente
según las instrucciones. Solo use accesorios
recomendados por el fabricante.
5. Ponga la base del aparato sobre una
superficie llana y segura.
6. No utilice este aparato si el cable o el
enchufe están dañados, si no funciona
correctamente, si está dañado, o después
de que se haya caído, incluso en el agua;
No intente reparar el aparato. El ensamblar
las partes de manera incorrecta aumenta
los riesgos de incendio, descarga eléctrica
y heridas. regréselo a un centro de servicio
autorizado para su revisión y reparación.
7. Mantenga el cable alejado de superficies
calientes. No permita que el cable tenga
contacto con superficies calientes. No jale ni
retuerza el cable. Permita que el aparato se
enfríe completamente antes de guardarlo.
Enrolle el cable sin apretar alrededor del
aparato para guardarlo.
8. Para reducir el riesgo de descarga eléctrica,
el cable de este aparato está dotado de un
enchufe polarizado (una pata es más ancha
que la otra). Como medida de seguridad, se
podrá enchufar de una sola manera en la
toma de corriente polarizada. Si no entra en
la toma de corriente, inviértalo. Si aun así no
entra completamente, comuníquese con un
electricista. No intente ir en contra de esta
función de seguridad.
9. Nunca deje caer ni inserte ningún objeto en
ninguna de las aberturas.
10. No utilice el aparato en exteriores, ni
lo haga funcionar donde se estén usando
productos en aerosol (spray) o donde se esté
administrando oxígeno.
11. Si debe usar el aparato con una extensión,
utilice una extensión de 15 amperios. Una
extensión de menor amperaje podría calentar
excesivamente. Coloque la extensión de manera
que nadie la pueda jalar o tropezar con ella.
12. Las superficies de este aparato se ponen
muy calientes durante el uso; mantenga los ojos
y la piel alejados de las superficies calientes.
13. No coloque la boquilla sobre ninguna
superficie mientras está caliente o mientras el
aparato está conectado, y manténgala alejada
del cable eléctrico.
14. Siempre desenchufe el aparato antes de
llenar o vaciar el depósito de agua, y cuando
no lo usa.
15. Siempre llene el depósito de agua con agua
destilada antes de encender el aparato.
16. Nunca jale el cable para desconectar el
aparato; agárrelo por la clavija.
17. Las piezas calientes, el agua caliente y
el vapor pueden causar quemaduras. Tenga
cuidado al vaciar el depósito de agua o al
voltear el aparato, puesto que el depósito
puede contener agua caliente. Siempre oriente
la boquilla de tal manera que el vapor no esté
dirigido a nadie, incluso al encender el aparato.
FAMILIARÍCESE CON SU VAPORIZADOR DE PRENDAS
Botón SETTING
Boquillas de
vaporización
Botón STEAM
Botón de liberación
del depósito de agua
Depósito de agua
fácil de llenar
Accesorio integrado
para pliegues con
guías para las
prendas
Accesorio 3 en 1
Accesorio con
tira de silicona
Estira la tela para un
desarrugado más fácil.
Cepillo duro
Suelta las fibras para
una mejor penetración
del vapor.
Separador para
telas delicadas
Ayuda a proteger las
telas delicadas y los
apliques/bordados/
adornos.
IMPORTANTE
PARA USO DOMÉSTICO
SOLAMENTE
LLENADO DEL DEPÓSITO
1. Cerciórese de que el aparato está
desenchufado.
2. Coloque la unidad sobre una mesa y agárrela
con una mano.
3. Con la otra mano, deslice el botón de
liberación del depósito de agua hacia el botón
STEAM.
4. Saque el depósito de agua.
5. Localice el tapón de caucho ubicado arriba
del depósito de agua.
6. Abra el tapón de caucho y llene el depósito
con agua destilada (disponible en la mayoría de
los supermercados).
Nota: a fin de evitar los depósitos minerales,
los cuales pueden perjudicar el rendimiento
del aparato o tapar el sistema de vaporización,
le aconsejamos que use agua destilada
solamente.
7. Cierre el tapón y vuelva a instalar el depósito
de manera segura.
Tapón de caucho
Botón de
encendido/apagado
y cable de 2.75 m
Luz de listo (azul)
Indicadores luminosos
INSTRUCCIONES
DE OPERACIÓN
1. Llene el depósito de agua con agua
destilada.
2. Enchufe el aparato en una toma de corriente.
3. Oprima el botón de encendido/apagado para
encender el aparato.
4. La luz azul “READY” se encenderá y
empezará a parpadear. Permita que la unidad
se caliente por 40 segundos. El aparato está
listo cuando la luz “READY” deja de parpadear y
permanece encendida. NOTA: antes del primer
uso o cuando la unidad no haya sido usada
por un tiempo prolongado, el depósito interno
se cebará (se llenará con agua) durante el
calentamiento. Escuchará un pequeño golpeteo;
esto es normal.
5. Su vaporizador de
prendas tiene 5 ajustes
de vaporización. Oprima
repetidamente el botón
SETTING para elegir el nivel
de vaporización deseado.
Una luz roja corresponde
al nivel de vaporización
mínimo, para uso en telas
delicadas, mientras 5 luces
rojas corresponden a la función “turbo” para
uso en telas gruesas y artículos arrugados.
Siempre oriente la boquilla de tal manera
que el vapor no esté dirigido a nadie.
6. Oprima el botón STEAM para producir vapor.
7. Suelte el botón STEAM para detener el flujo
de vapor.
Suela con revestimiento
de cerámica
8. Antes del primer uso, haga una prueba
en un trapo para eliminar el polvo y otros
residuos acumulados durante la fabricación y el
transporte.
9. Oprima el botón de encendido/apagado para
apagar el aparato.
10. Desenchufe la unidad cuando no está en uso.
MODO DE EMPLEO DEL
ACCESORIO PARA PLIEGUES
Su vaporizador de prendas
cuenta con un accesorio
para pliegues integrado.
Para usarlo, deslice la
prenda por debajo del clip,
alineando el borde con el
estampado según se indica
en la unidad. Presione el
botón STEAM; el vapor
saldrá por el puerto arriba
de la unidad. Deslice el
vaporizador a lo largo del
borde de la prenda para
crear un pliegue preciso. NOTA: durante este
proceso, el vapor seguirá saliendo por la
boquilla.
Fig. 5
Fig. 3
Fig. 2
Fig. 4
Fig. 7
Fig. 6
Fig. 1
DEUTSCH


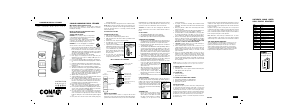
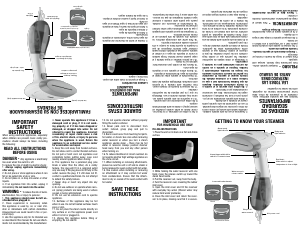
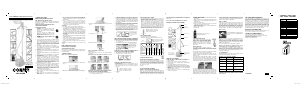
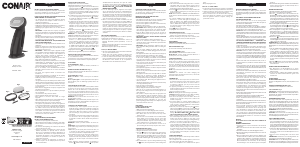
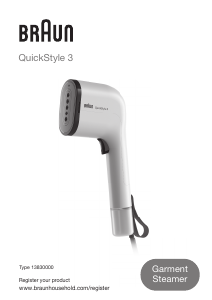
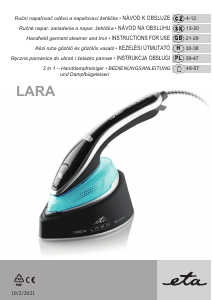
Delta i konversationen om denna produkt
Här kan du dela vad du tycker om Conair GS59XE Handhållen steamer. Om du har en fråga, läs först noggrant igenom manualen. Att begära en manual kan göras genom att använda vårt kontaktformulär.