5
Operation Guide 3173 3246
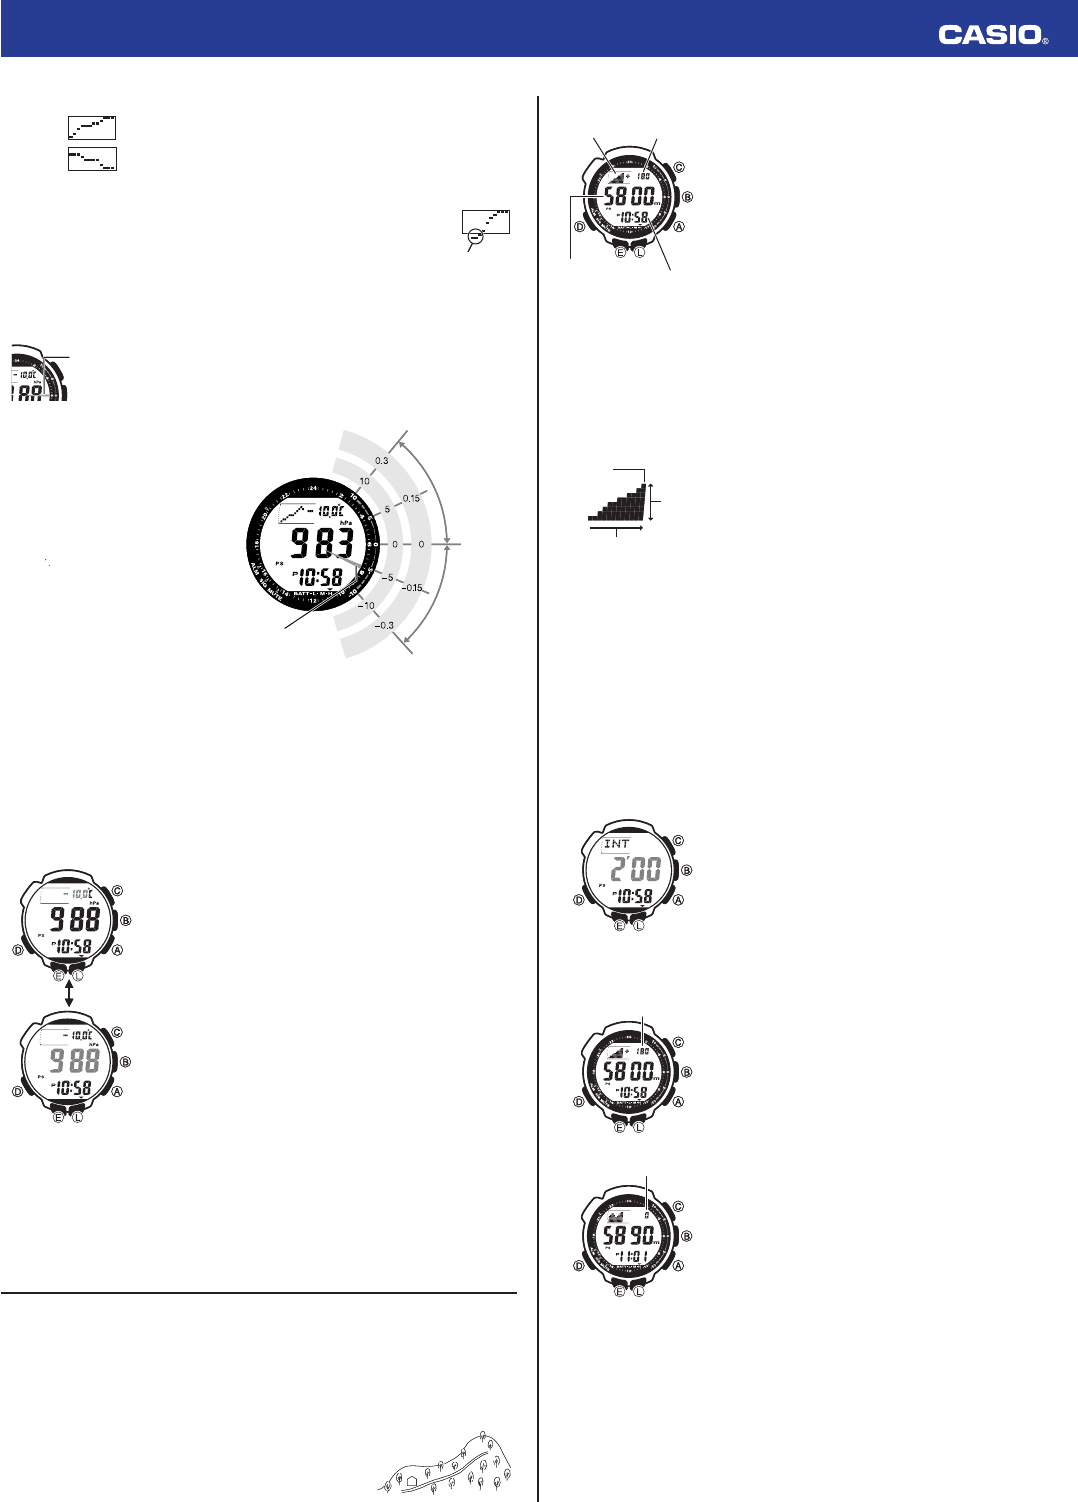
The following shows how to interpret the data that appears on the barometric pressure graph.
A rising graph generally means improving weather.
A falling graph generally means deteriorating weather.
Note
• If there are sudden changes in weather or temperature, the graph line of past
measurements may run off the top or bottom of the display. The entire graph will
become visible once barometric conditions stabilize.
• The following conditions cause the barometric pressure measurement to be
skipped, with the corresponding point on the barometric pressure graph being
left blank.
– Barometric reading that is out of range (260 hPa to 1,100 hPa or 7.65 inHg to
32.45 inHg)
– Sensor malfunction
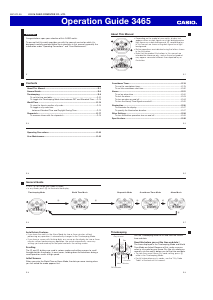
Barometric Pressure Differential Pointer
This pointer indicates the relative difference between the most recent
barometric pressure reading indicated on the barometric pressure graph,
and the current barometric pressure value displayed in the Barometer/
Thermometer Mode.
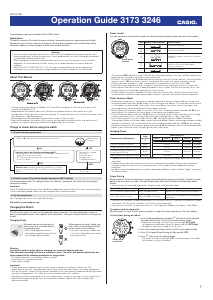
Reading Barometric Pressure Differential Pointer
Pressure differential is indicated in the range of
±10 hPa, in 1-hPa units.
• The nearby screen shot, for example, shows
what the pointer would indicate when the
calculated pressure differential is
approximately – 5 hPa (approximately – 0.15
inHg).
• Barometric pressure is calculated and
displayed using hPa as the standard. The
barometric pressure differential also can be
read in inHg units as shown in the illustration
(1 hPa
=
0.03 inHg).
Pressure Sensor and Temperature Sensor Calibration
The pressure sensor and temperature sensor built into the watch are calibrated at the factory and normally
require no further adjustment. If you notice serious errors in the pressure readings and temperature
readings produced by the watch, you can calibrate the sensor to correct the errors.
Important!
• Incorrectly calibrating the barometric pressure sensor can result in incorrect readings. Before
performing the calibration procedure, compare the readings produced by the watch with those of
another reliable and accurate barometer.
• Incorrectly calibrating the temperature sensor can result in incorrect readings.
Carefully read the following before doing anything.
–
Compare the readings produced by the watch with those of another reliable and accurate thermometer.
– If adjustment is required, remove the watch from your wrist and wait for 20 or 30 minutes to give the
temperature of the watch time to stabilize.
To calibrate the pressure sensor and the temperature sensor
1. While in the Timekeeping Mode or in any of the sensor modes, press
B
to enter the Barometer/Thermometer Mode.
2. Hold down
E
until the current temperature value starts to fl ash on the
display. This is the setting screen.
• Before the temperature value starts to fl ash, the message SET
Hold will appear on the display. Keep
E
depressed until SET Hold
disappears.
3. Press
D
to move the fl ashing between the temperature value and
barometric pressure value, to select the one you want to calibrate.
4.
Use
A
(+) and
C
(–) to set the calibration value in the units shown below.
Temperature 0.1°C (0.2°F)
Barometric Pressure 1 hPa (0.05 inHg)
• To return the currently fl ashing value to its initial factory default setting,
press
A
and
C
at the same time. OFF will appear at the fl ashing
location for about one second, followed by the initial default value.
5. Press
E
to return to the Barometer/Thermometer Mode screen.
Barometer and Thermometer Precautions
• The pressure sensor built into this watch measures changes in air pressure, which you can then apply
to your own weather predictions. It is not intended for use as a precision instrument in offi cial weather
prediction or reporting applications.
• Sudden temperature changes can affect pressure sensor readings.
• Temperature measurements are affected by your body temperature (while you are wearing the watch),
direct sunlight, and moisture. To achieve a more accurate temperature measurement, remove the
watch from your wrist, place it in a well ventilated location out of direct sunlight, and wipe all moisture
from the case. It takes approximately 20 to 30 minutes for the case of the watch to reach the actual
surrounding temperature.
Altimeter
The watch displays altitude values based on air pressure readings taken by a built-in pressure sensor.
How the Altimeter Measures Altitude
The altimeter can measure altitude based on its own preset values (initial default method) or using a
reference altitude specifi ed by you.
When you measure altitude based on preset values
Data produced by the watch’s barometric pressure sensor is converted to approximate altitude based on
ISA (International Standard Atmosphere) conversion values stored in watch memory.
When you measure altitude using a reference altitude specifi ed by you
After you specify a reference altitude, the watch uses that value to convert
barometric pressure readings to altitude.
• When mountain climbing, you can specify a reference altitude value in
accordance with a marker along the way or altitude information from a
map. After that, the altitude readings produced by the watch will be more
accurate than they would without a reference altitude value.
Not visible on
the display.
Not visible on
the display.
Barometric
pressure
differential
pointer
Barometric
pressure
differential
pointer
Barometric pressure
differential pointer
inHg values
hPa values
Current pressure
greater than most
recent measured
pressure
Current pressure
less than most
recent measured
pressure
Barometric pressure
differential pointer
inHg values
hPa values
Current pressure
greater than most
recent measured
pressure
Current pressure
less than most
recent measured
pressure
l
l
l
l
l
l
l
l
l
l
l
l
l
l
l
l
l
l
l
l
l
l
l
l
l
l
l
l
l
l
l
l
l
l
l
l
l
l
l
l
l
l
l
l
l
l
l
l
l
l
l
l
l
l
l
l
l
l
l
l
l
l
l
l
l
l
l
400
A
B
400
A
B
To take an altimeter reading
1. Make sure the watch is in the Timekeeping Mode or any one of the
sensor modes.
• The sensor modes are: Digital Compass Mode, Barometer/
Thermometer Mode, and Altimeter Mode.
2. Press
A
to start Altimeter measurement.
• ALTI will appear on the display, indicating that Altimeter
measurement is in progress. The fi rst reading will appear on the
display after about four or fi ve seconds.
• The current altitude value is displayed in units of 5 meters (20 feet).
• After the fi rst reading is obtained, the watch continues to take
altimeter readings automatically every fi ve seconds for the fi rst
three minutes, and then every two minutes after that (under initial
default settings).
• If you leave the watch in the Altimeter Mode, it will update the
displayed altitude value regularly and indicate reading-to-reading
changes in graph form.
• You can use the procedure under “Selecting an Altitude Auto
Measurement Method” to specify the altitude auto measurement
method you want to use.
3. After you are fi nished using the Altimeter, press
D
to return to the
Timekeeping Mode and stop auto measurement.
• The watch will return to the Timekeeping Mode automatically if you
do not perform any operation for about 24 hours after entering the
Altimeter Mode (under initial default settings).
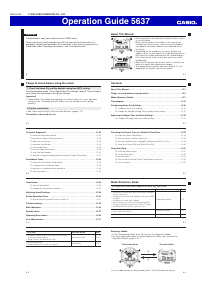
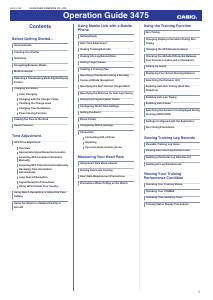
Reading the Altitude Graph
The altitude graph shows Altimeter Mode auto measurement readings over time.
• The vertical axis of the graph represents altitude, and each dot stands
for 10 meters (40 feet).
• The horizontal axis represents time. For the altitude readings taken
during the fi rst three minutes after you start an altimeter measurement
operation, each dot represents fi ve seconds. After that, each dot
represents two minutes (under initial default settings).
• An out of range reading or a measurement error will cause the column
of dots for that reading to be blank (skipped).
Note
• The measurement range for altitude is –700 to 10,000 meters (–2,300 to 32,800 feet).
• The displayed altitude value changes to
- - -
if an altitude reading falls outside the measurement range.
An altitude value will reappear as soon as the altitude reading is within the allowable range.
•
Normally, displayed altitude values are based on the watch’s preset conversion values. You also can
specify a reference altitude value, if you want. See “Specifying a Reference Altitude Value”.
• You can change the unit for displayed altitude values to either meters (m) or feet (ft).
See “To specify temperature, barometric pressure, and altitude units”.
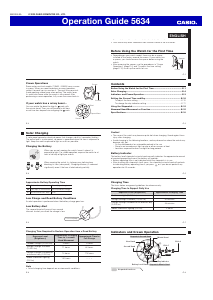
Selecting an Altitude Auto Measurement Method
You can select either of the following two altitude auto measurement methods.
0’05
: Readings at fi ve-second intervals for one hour
2’00
: Readings at fi ve-second intervals for the fi rst three minutes followed by two-minute intervals for
approximately 24 hours
Note
If you do not perform any button operation while in the Altimeter Mode, the watch will return to the
Timekeeping Mode automatically after 24 hours (altitude auto measurement method:
2’00
) or after one
hour (altitude auto measurement method:
0’05
).
To select the altitude auto measurement method
1. In the Altimeter Mode, hold down
E
until the current reference altitude
value starts to fl ash. This is the setting screen.
• Before the reference altitude starts to fl ash, the message SET
Hold will appear on the display. Keep
E
depressed until SET
Hold disappears.
2. Press
D
to display the current altitude auto measurement method
setting.
• This will cause either 0’05 or 2’00 to fl ash on the display.
3. Press
A
to toggle the altitude auto measurement method setting
between
0’05
and
2’00
.
4. Press
E
to exit the setting screen.
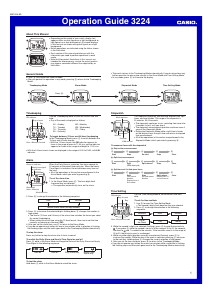
Using the Altitude Differential Value
The Altimeter Mode screen includes an altitude differential value that
shows the change in altitude from a reference point you specify. The
altitude differential value is updated each time the watch takes an altitude
reading.
• The range of the altitude differential value is –3,000 meters (–9,980
feet) to 3,000 meters (9,980 feet).
•
- - -
is displayed in place of the altitude differential value whenever the
measured value is outside the allowable range.
• See “Using the Altitude Differential Value While Mountain Climbing or
Hiking” for some real-life examples of how to use this feature.
To specify the altitude differential start point
In the Altimeter Mode, press
E
.
• The watch will take an altitude reading and register the result as the
altitude differential value start point. The altitude differential value will
be reset to zero at this time.
Altitude
differential
Altitude
graph
Current
altitude
Current time
Altitude
differential
Altitude
graph
Current
altitude
Current time
Altitude
Latest
reading
Time
Altitude
Latest
reading
Time
l
l
l
l
l
l
l
l
l
l
l
l
l
l
l
l
l
l
l
l
l
l
l
l
l
l
l
l
l
l
l
l
l
l
l
l
l
l
l
Altitude
differential
Altitude
differential
Altitude differentialAltitude differential


Delta i konversationen om denna produkt
Här kan du dela vad du tycker om Casio Pro Trek PRG-240T-7ER Armbandsur. Om du har en fråga, läs först noggrant igenom manualen. Att begära en manual kan göras genom att använda vårt kontaktformulär.