封面
反面
英文说明书
S1
2ALP003-6d02A0
杨振华
24.07.10
杨振华 24.07.10
17.0303.0803-00
340mm
200mm
User Manual V1.0
Model:S1
SMART PLUG
1. Use the S1 smart plug within the specified voltage
(100-240V), frequency (50/60Hz), and maximum current
(16A) to prevent overload and reduce the risk of fire.
2. Do not use the smart plug in damp or high humidity
areas to avoid potential electric shock hazards. Keep the
plug away from water sources.
3. When inserting or removing plugs, handle with care and
avoid pulling on the device's cord to avoid damaging the
cable and plug and reduce the risk of electric shock.
4. Regularly inspect the smart plug and connected devices
for signs of damage or abnormal heating. If you notice
anything unusual, stop using the plug immediately and
contact a qualified technician for assistance.
5. Ensure that all devices connected to the smart plug
meet applicable safety standards and regulations. Do not
connect high-power or industrial equipment.
6. Keep the smart plug firmware updated to ensure
optimal performance and safety.
7. Before servicing on devices connected to the smart plug,
always unplug it first. (The plug features a single-pole
disconnect mechanism; to fully disconnect, remove the
device plug entirely.)
• Remote Control: Control your appliances remotely using
the mobile app from anywhere, allowing convenient on/off
operation.
• Automated Timing: Set timers or countdowns within the
app to automate the switching of appliances on/off at
specific times.
• Energy Monitoring: Monitor real-time energy consumption
of your appliances.
• Compatibility: Works seamlessly with BLUETTI's solar
energy storage systems for integrated home energy
management.
• Reliable Safety: Includes multiple safety protections such
as over/under voltage protection, overcurrent protection,
overload protection, and overtemperature protection,
ensuring safe operation.
• Status Indicator: The power button indicator displays
operational status such as normal operation, fault alerts, or
product upgrades.
Safety Instructions
Add the WiFi Details
Control the Plug via the App
Timer or Countdown Mode
Key Features
Add the Plug to the App
Start the Plug
Read and follow all safety instructions and user
guides before use.
This product complies with CE standards for safety
and environmental protection.
Dispose of electronics responsibly at designated
recycling facilities.
For indoor use only.
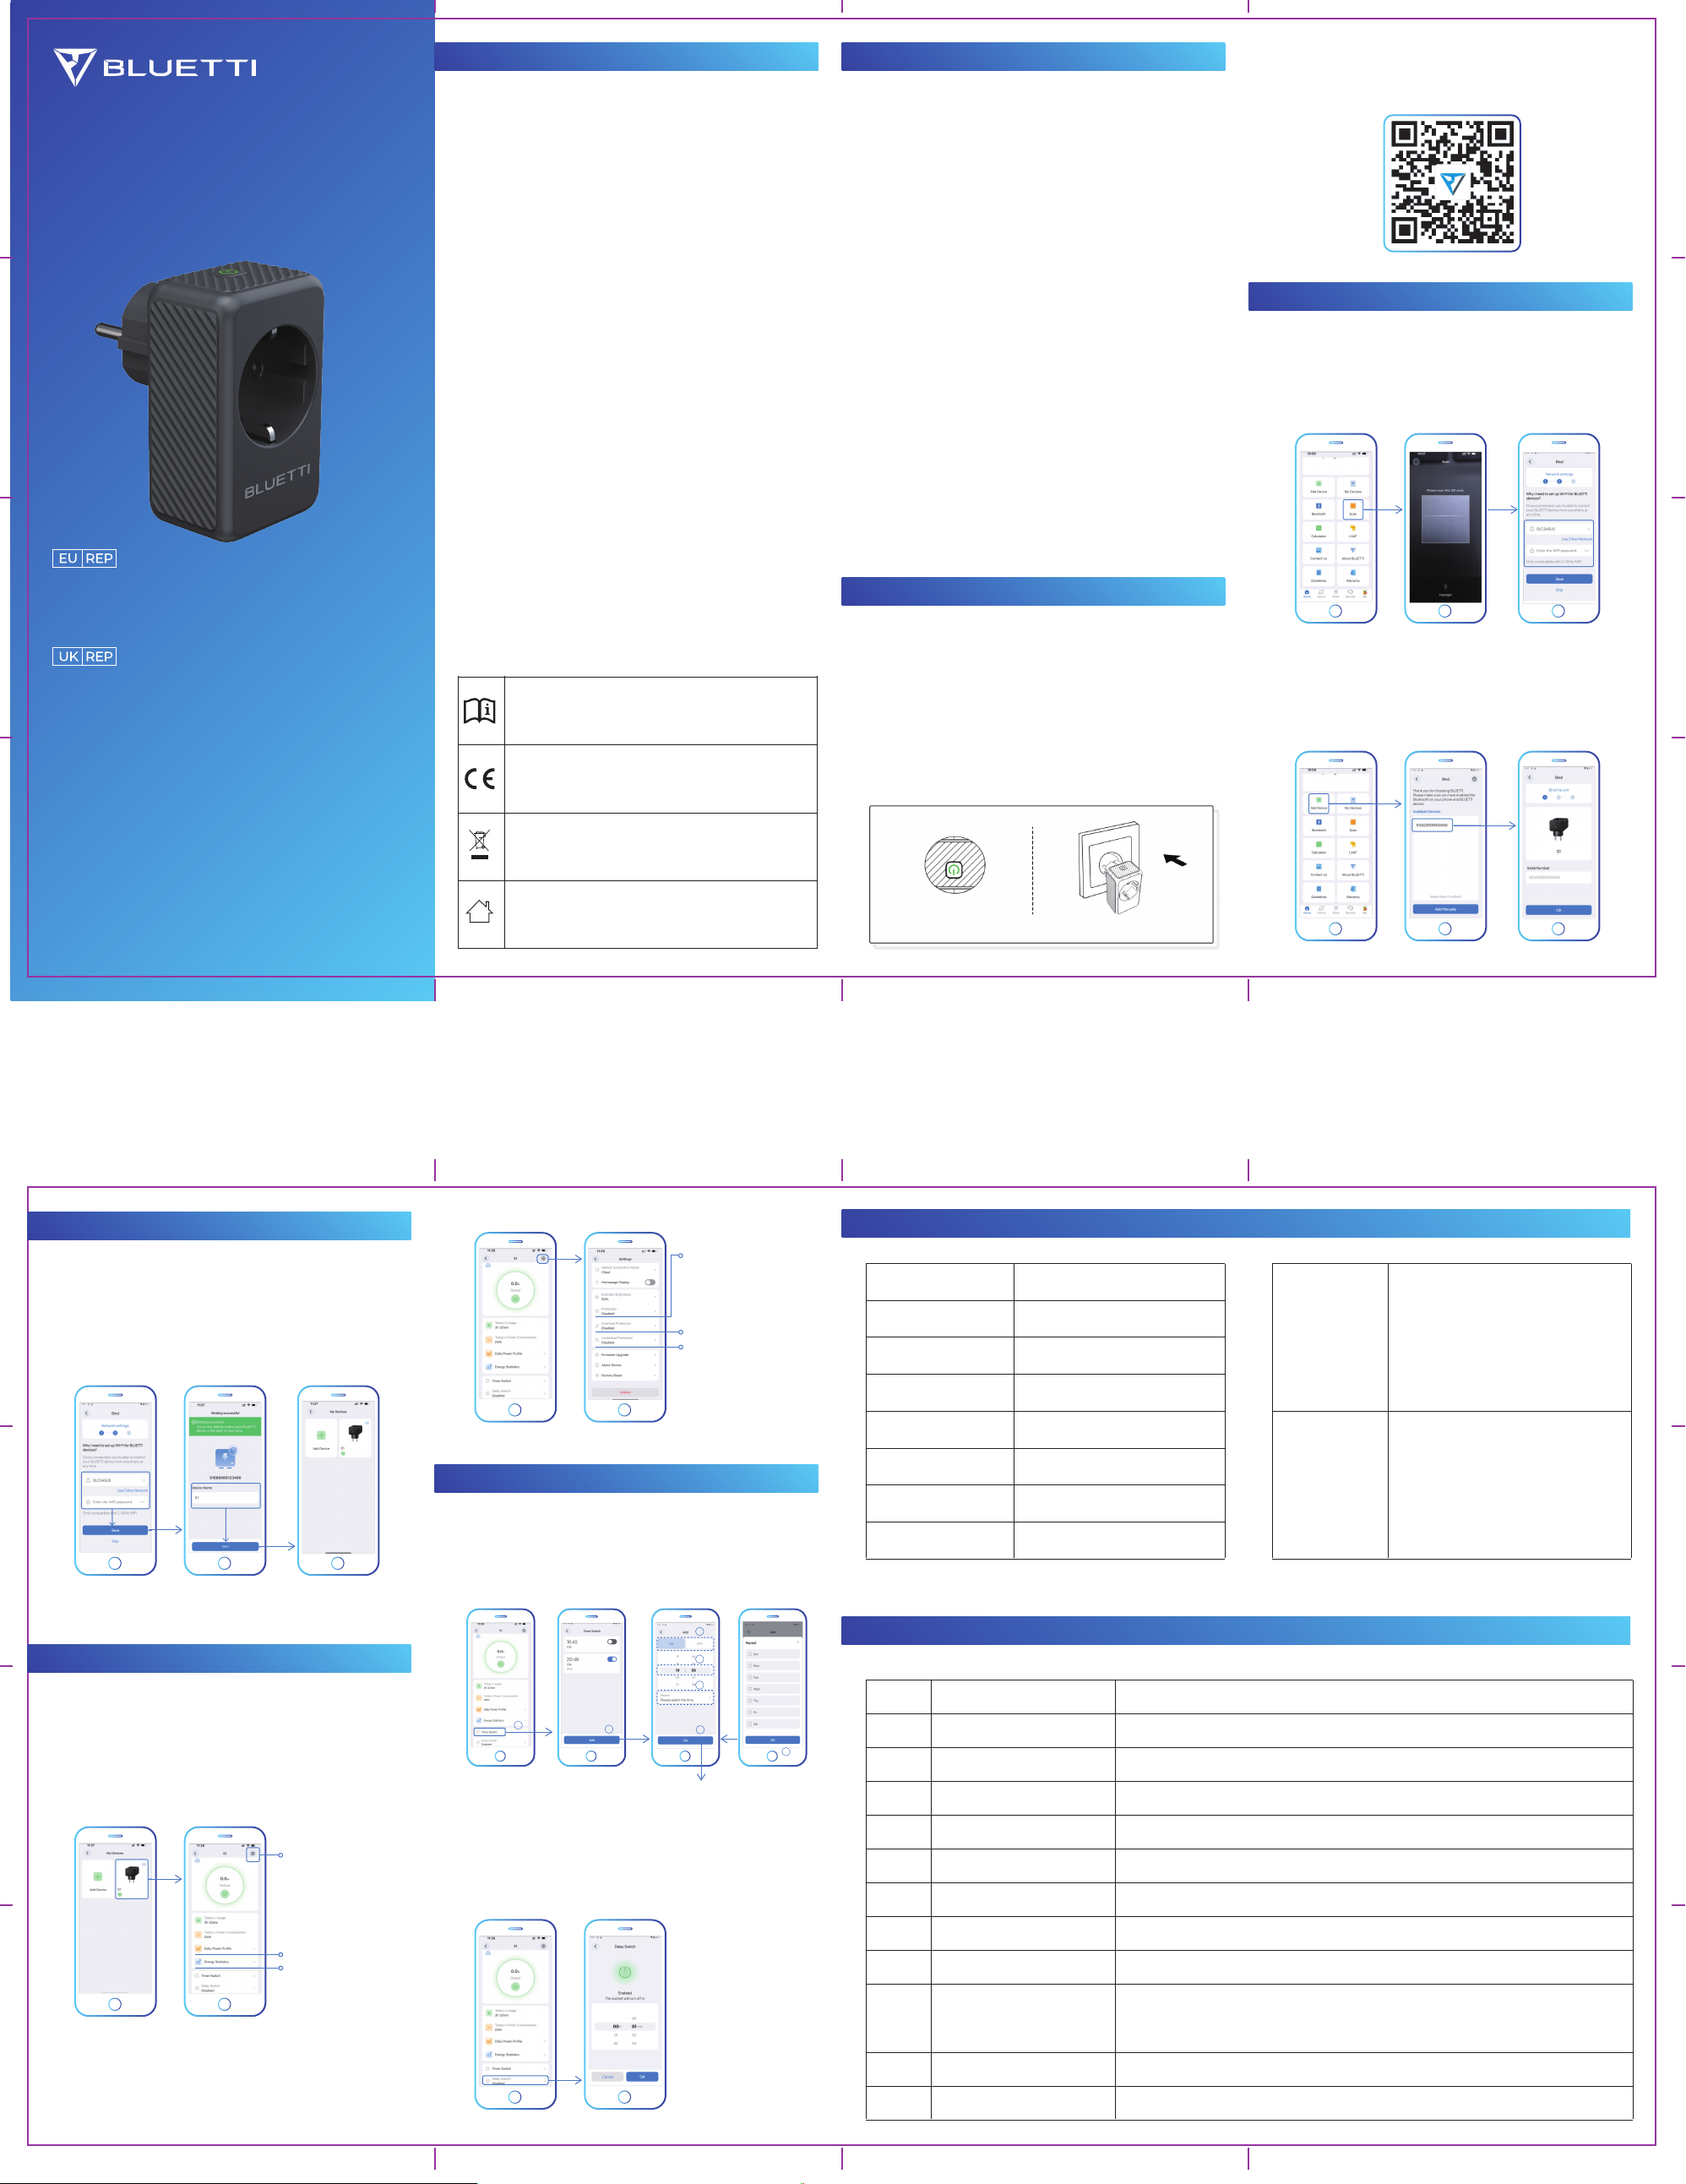
1. Plug into Socket
When you first use S1, plug it into the socket. If the green
indicator light turns on, it means the plug has started
successfully.
Note: If the light doesn't turn on when you plug it in, it
might be because S1 was turned off when you last
unplugged it. To turn it on, simply press the power button.
Specification
Fault Codes and Solutions
2. Download the App
Scan the QR code or search for "BLUETTI" in the App Store
or Google Play to download the app.
Add via QR Code
• Open the app and find the Scan option.
• Scan the QR code located on the plug or its packaging.
• After adding the plug, you will see the network setup page.
On the network settings page, enter your WiFi details and
Save. If you see "Binding successful," edit the name of your
smart plug and tap Start to complete the setup.
Note: You can skip the network setup, but real-time
monitoring will be unavailable.
Add via Bluetooth
• Open the app and find the Add Device option.
• Select your plug from the available device list.
• Tap OK to add the plug.
Smart Plug Interface
After successfully adding your smart plug, find it in My Devices
and tap to control it. The circle on the screen shows the
load power; tap to view voltage, current, power, and
frequency details.
Timer Mode
Tap Timer Switch and set timers to schedule when the
plug should turn on or off.
Countdown Mode
Tap Delay Switch and set the countdown timer. After the
countdown finishes, the plug's on/off status will automatically
change.
Protection Settings
In the settings menu, there are three switches for different
protection settings.
Settings
Today's power profile
Energy statistics
Over/under voltage,
overcurrent, short-circuit,
and overtemperature
protection
Overload protection
Underload protection
1
2
3
4
5
6
7
Operating Temperature
Operating Humidity
Operating Altitude
Dimensions
Net Weight
Operating Voltage
Operating Current
Operating Frequency
-10°C to 40°C (14°F to 104°F)
10% to 90% RH (non-condensing)
<2000m
Approx. 84mm * 52mm * 75mm
Approx. 110g
100V to 240V
16A Max.
50Hz/60Hz
Frequency: 2.4GHz
20M: 2412-2472MHz
40M: 2422-2462MHz
Maximum Transmitter Power: ≤20dBm
Frequency: 2402-2480MHz
Maximum Transmitter Power: ≤20dBm
WiFi
BLE4.2
F001
F002
F003
F004
F005
F006
F007
F008
F013
F014
Check if the power consumption of the appliances exceeds the set power limit.
Check if the temperature of the appliances is too high.
Check if the power consumption of the appliances is too high or if there is a short circuit.
Check if the input voltage is too low.
Check if the input voltage is too high.
Check if the input frequency is too low.
Check if the input frequency is too high.
Restart the smart plug.
Check if the power consumption of the appliances is below the set power limit.
Check if the output current is 17A or higher.
Overload
Overtemperature
Output Short Circuit
Input Undervoltage
Input Overvoltage
Input Underfrequency
Input Overfrequency
Firmware Upgrade Failure
Underload
Overcurrent
Communication Module and
Metering Module
Communication Abnormality
Fault Code Description Recommended Solution
Company: POWEROAK ENERGY UK CO., LTD.
Address: Unit 2 NorthGate, Bolsover Business Park,
Woodhouse Lane Chesterfield England, S44 6BD
Email: sale-uk@bluettipower.com
Company: POWEROAK GmbH
Address: Lise-Meitner-Str. 14 28816 Stuhr Germany
Email: sale-de@bluettipower.com
Customer Service (Germany)
Phone: +49 8006 273016
Hours: Monday to Friday, 9:00 AM - 5:00 PM (local time)
Customer Service (UK)
Phone: +44 8000 472906
Hours: Monday to Friday, 9:00 AM - 5:00 PM (local time)
SHENZHEN POWEROAK NEWENER CO., LTD.
Address: F19, BLD No.1, Kaidaer, Tongsha Rd No.168, Xili Street,
Nanshan, Shenzhen, China
技术要求
折后尺寸(85X50mm),展开尺寸340X200mm
材质:折页,80g铜版纸
颜色:4C印刷,哑膜
F012 Contact BLUETTI support for assistance.

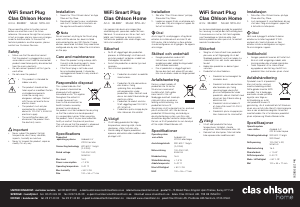
Delta i konversationen om denna produkt
Här kan du dela vad du tycker om Bluetti S1 Smart eluttag. Om du har en fråga, läs först noggrant igenom manualen. Att begära en manual kan göras genom att använda vårt kontaktformulär.